
We have all ‘ink blended’ with stencils but did you know that you can watercolour with Stencils too? In fact, I’m taking it a step further today because we are layering it up!
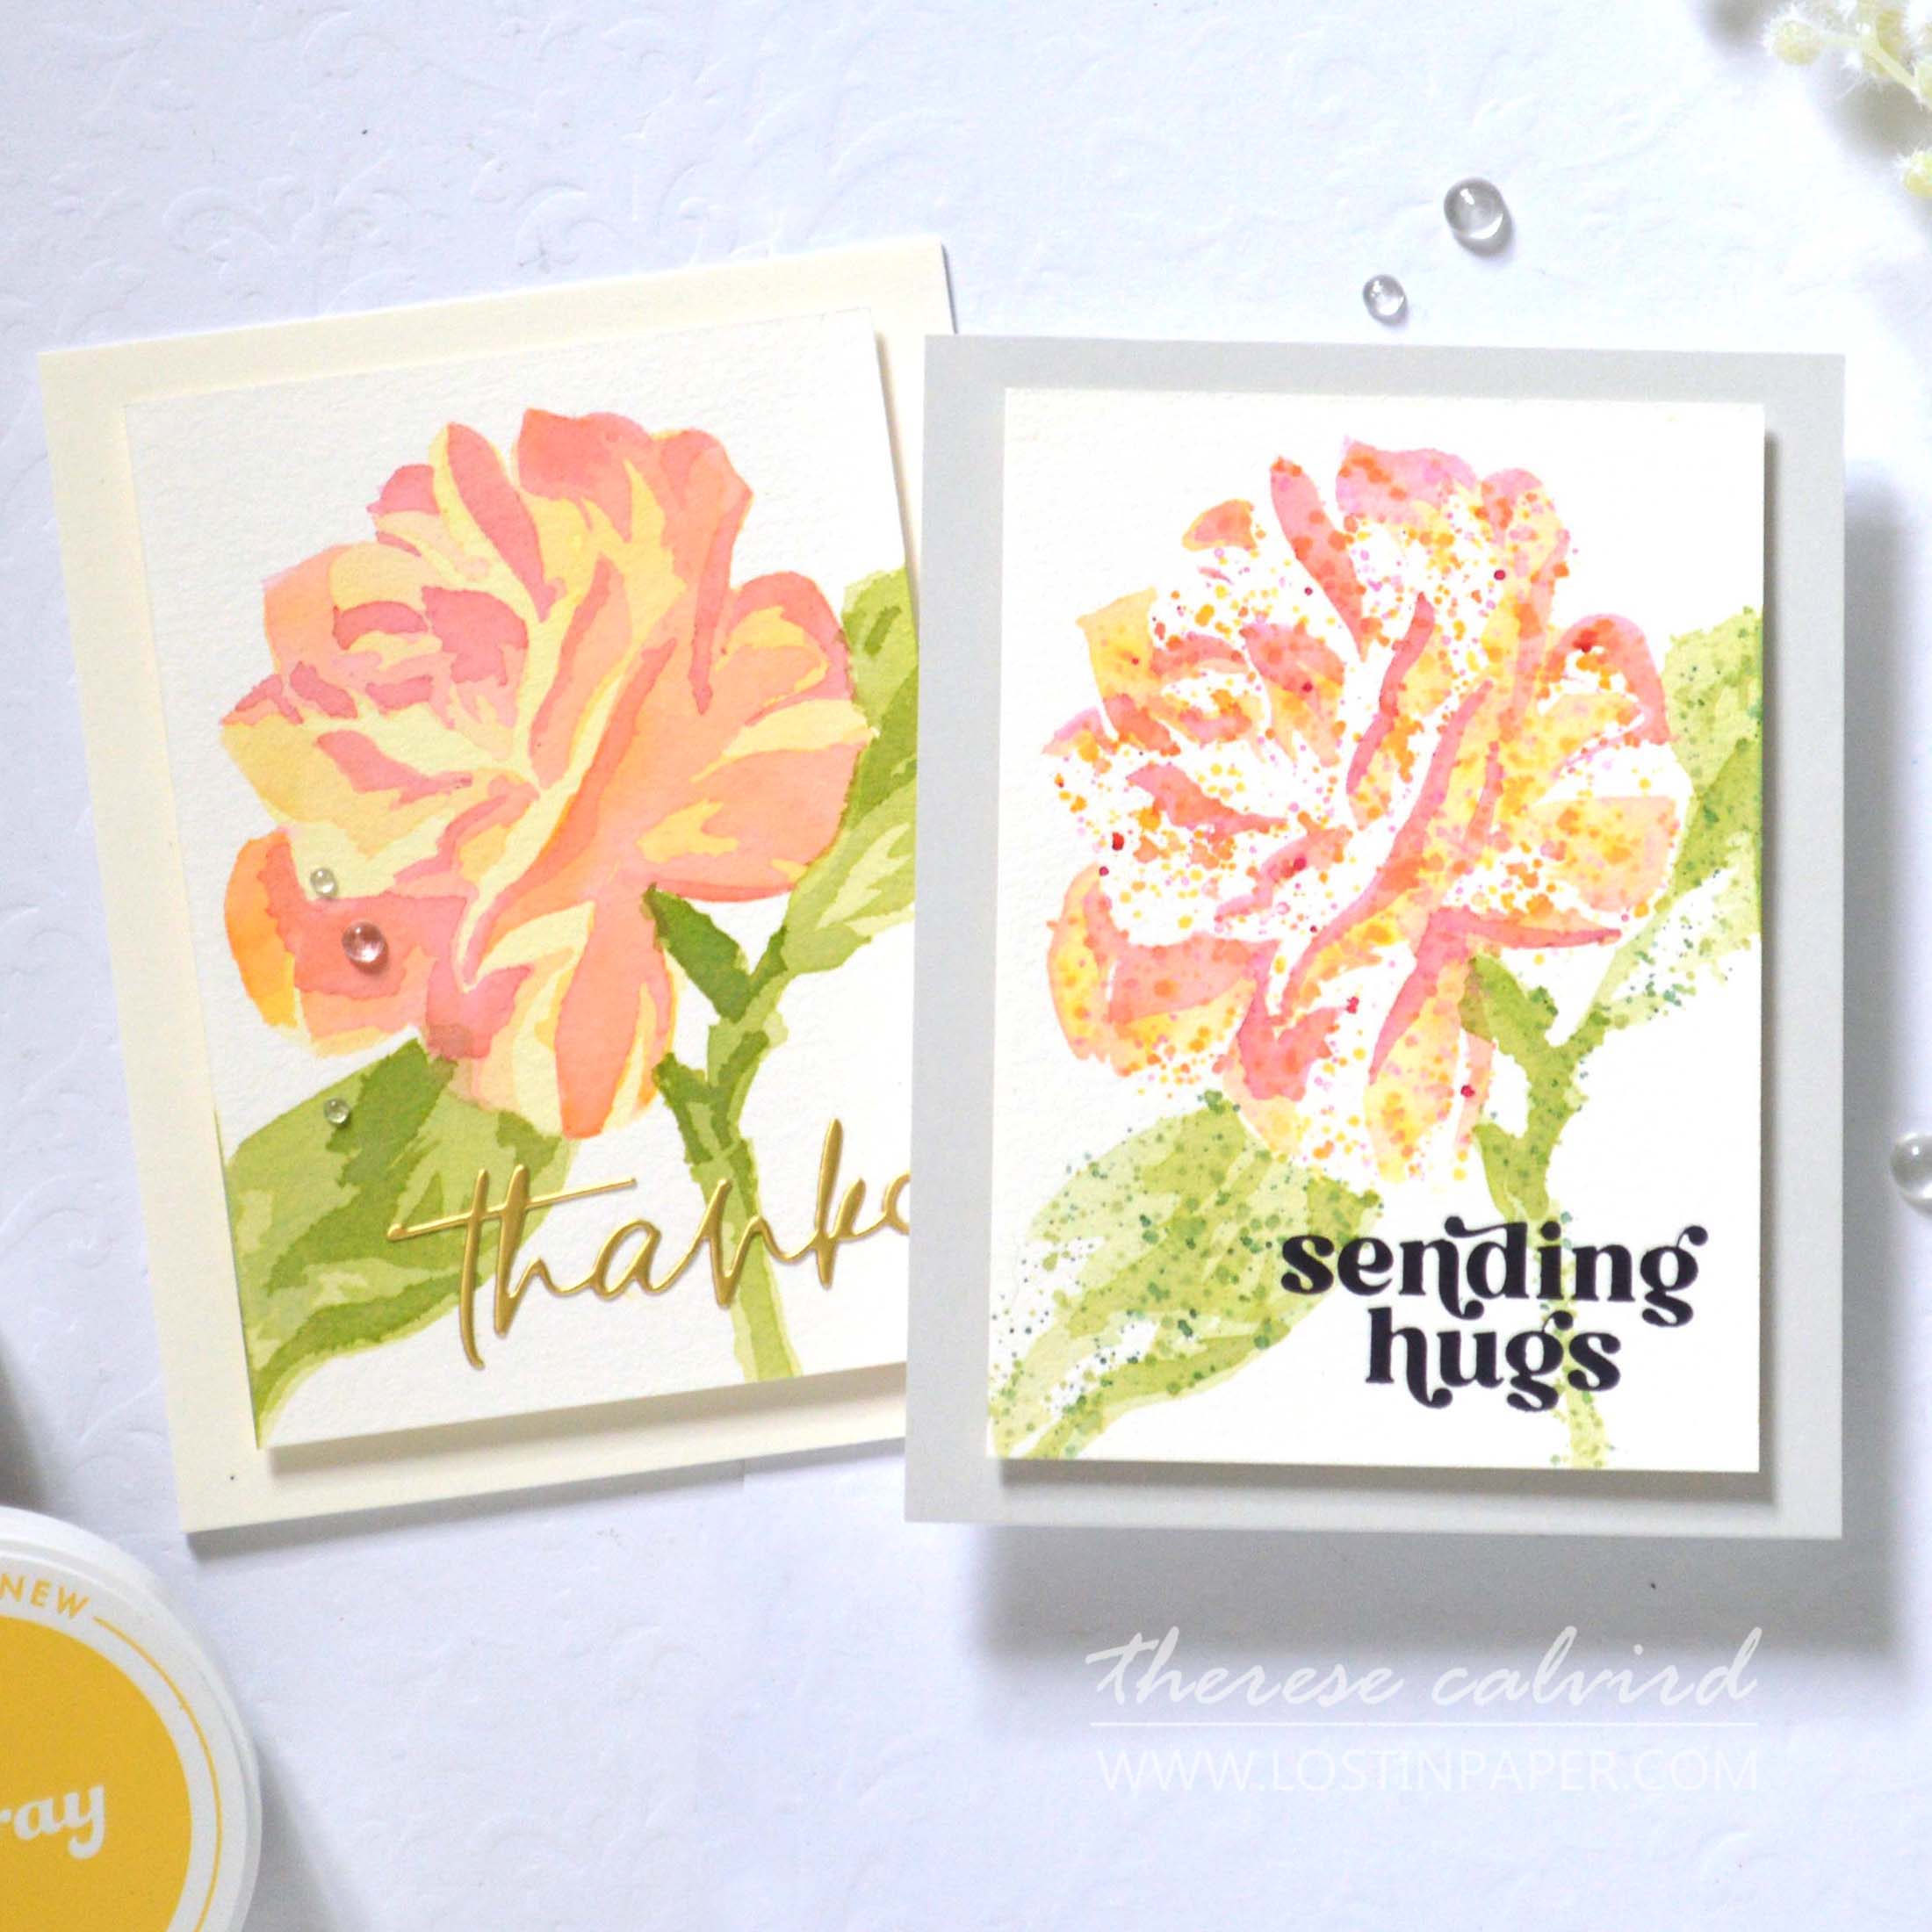
But first, I wanted to let you know that this is part of my Take 2 Series with Altenew and I’m so excited that you are joining me for another video today. Let’s begin with a peek at today’s cards…
You can see my video here or watch it HD at YouTube.
I use affiliate links which means that I will receive a small portion of the sale at no extra cost to you).
I truly appreciate your support!
Layering stencils and ink blending are the perfect combination to create cards quickly, even if you are not a skilled colorist. But, what if you ant a ‘watercolor look’, I know that sounds scary but it’s actually easy to so? And I have 5 Tips & Tricks to help you create as well as a BONUS tip😉!
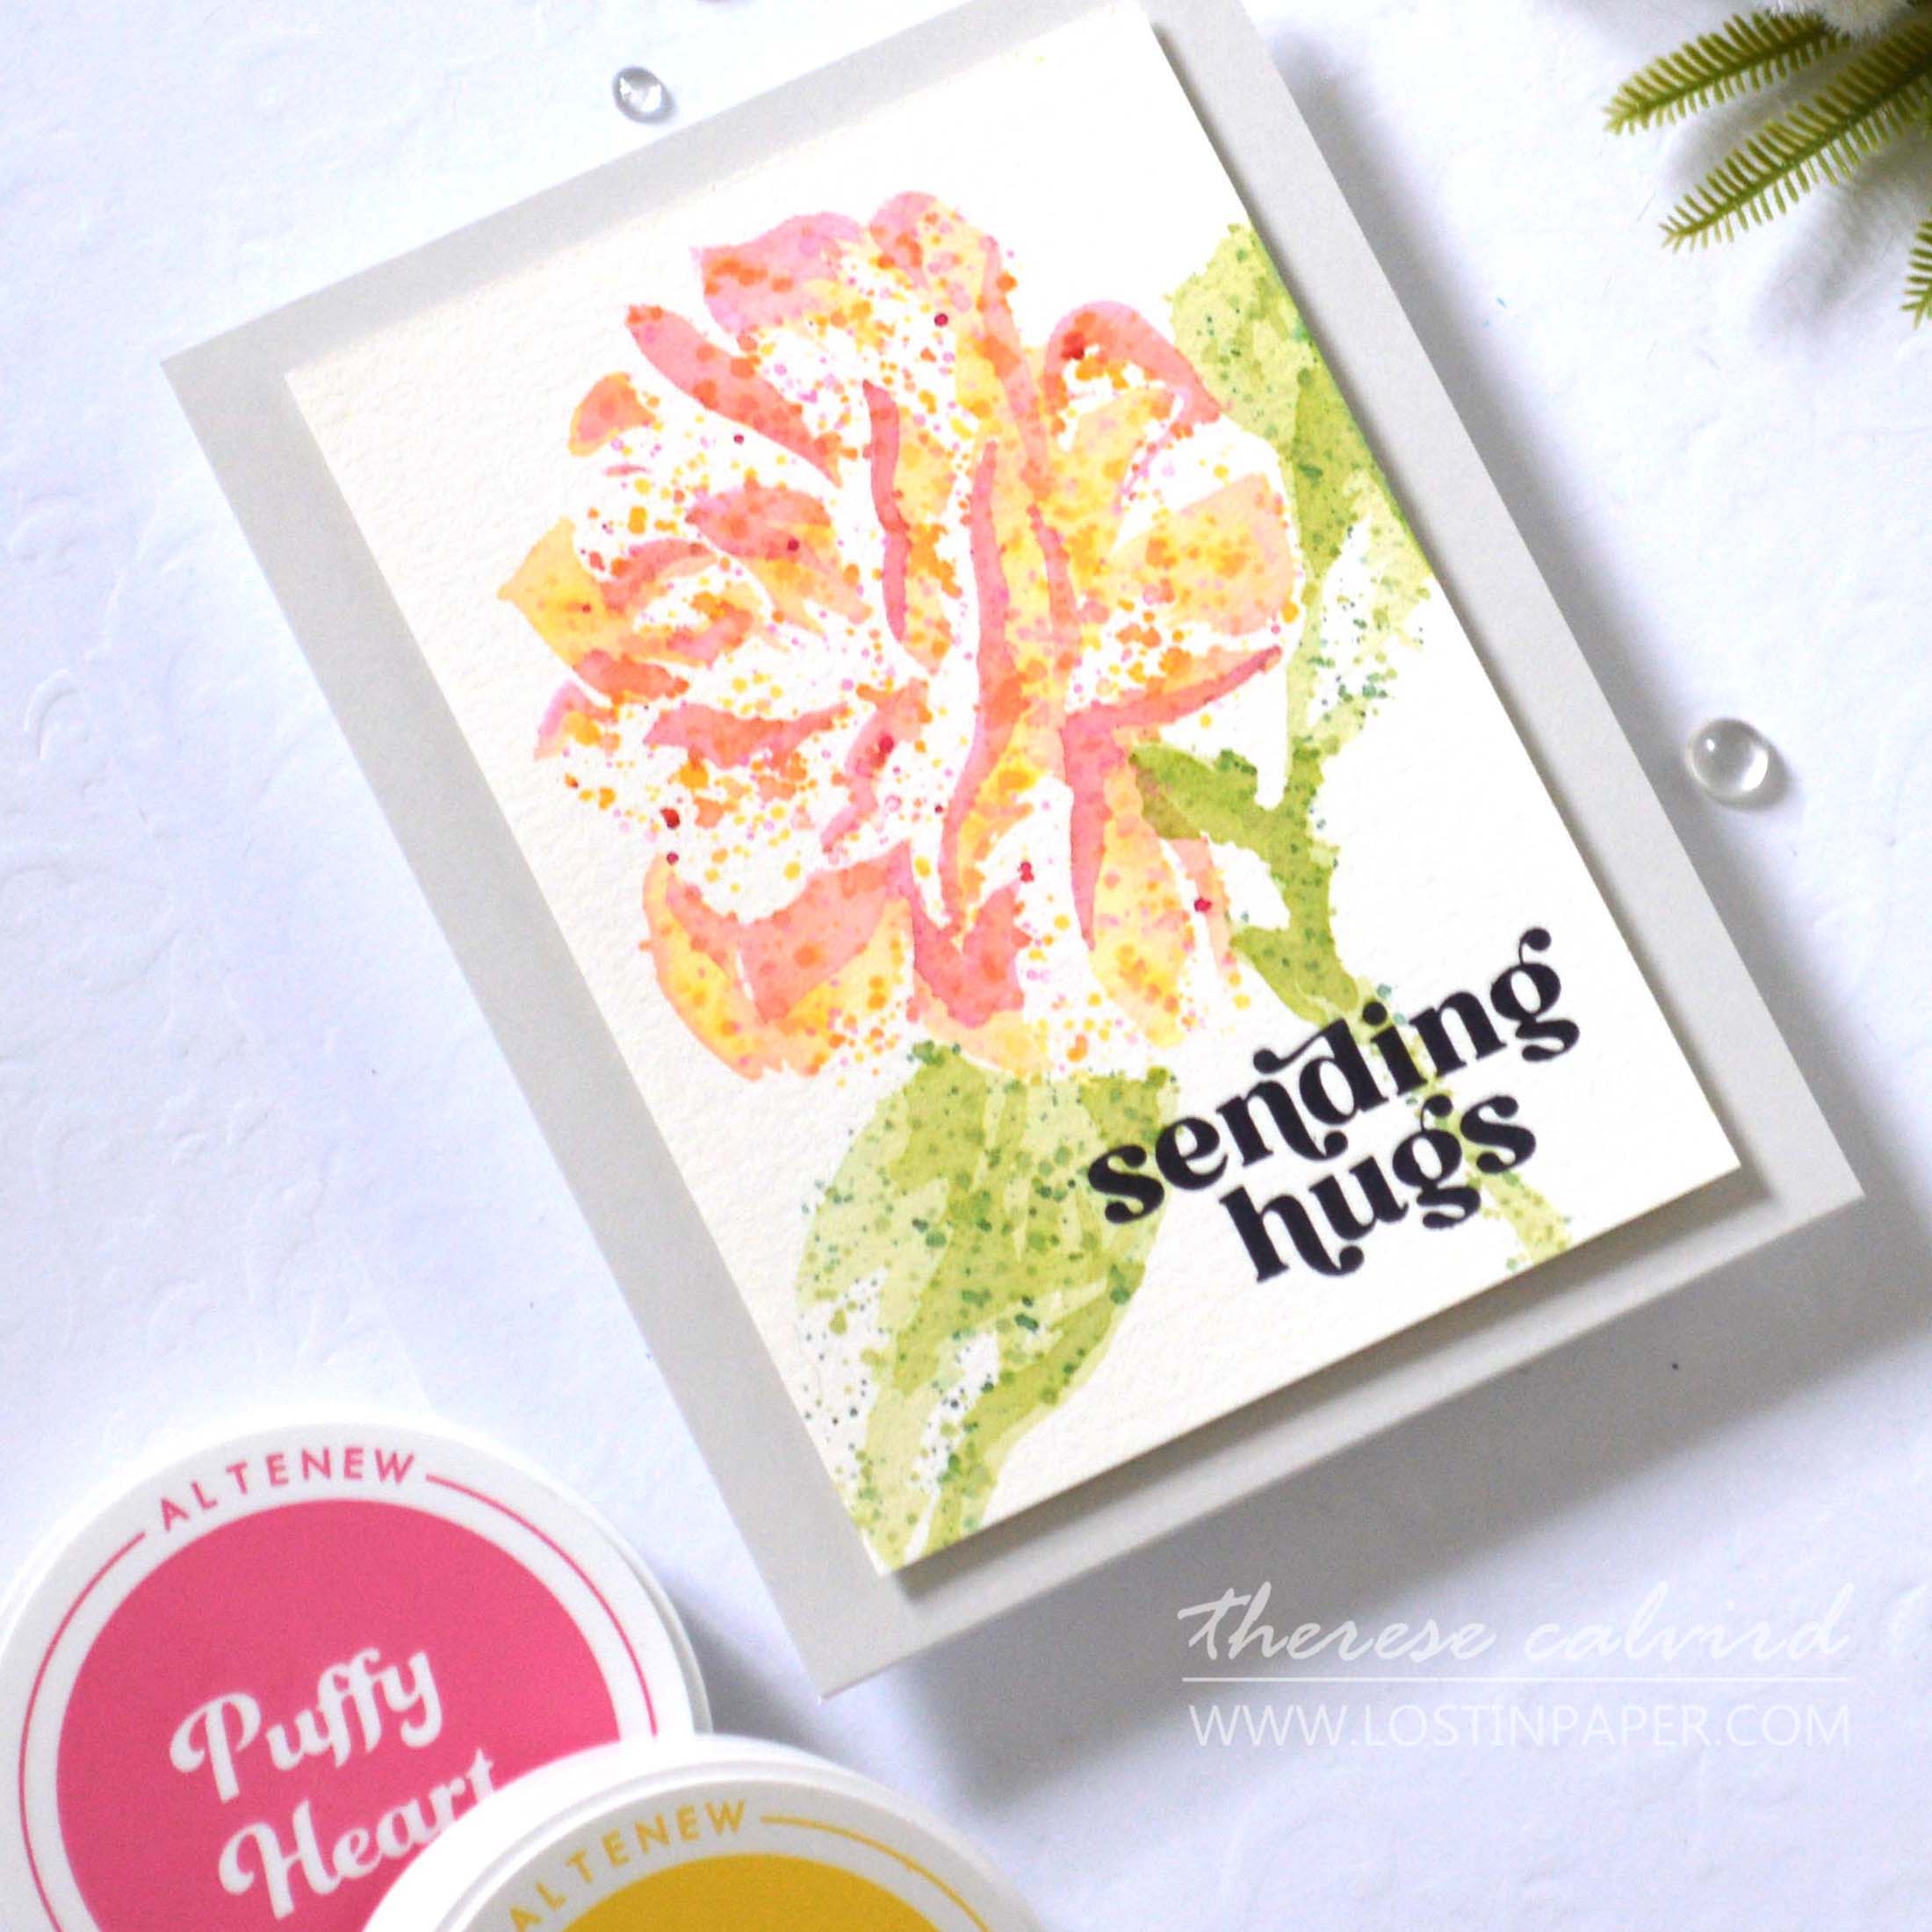
Both of today’s cards were made using the beautiful Mega Blossom Layering Stencil, but this technique could easily be stretched to many other layering stencil sets that are available. Can you imagine this technique in a ‘graphic pattern’ style!
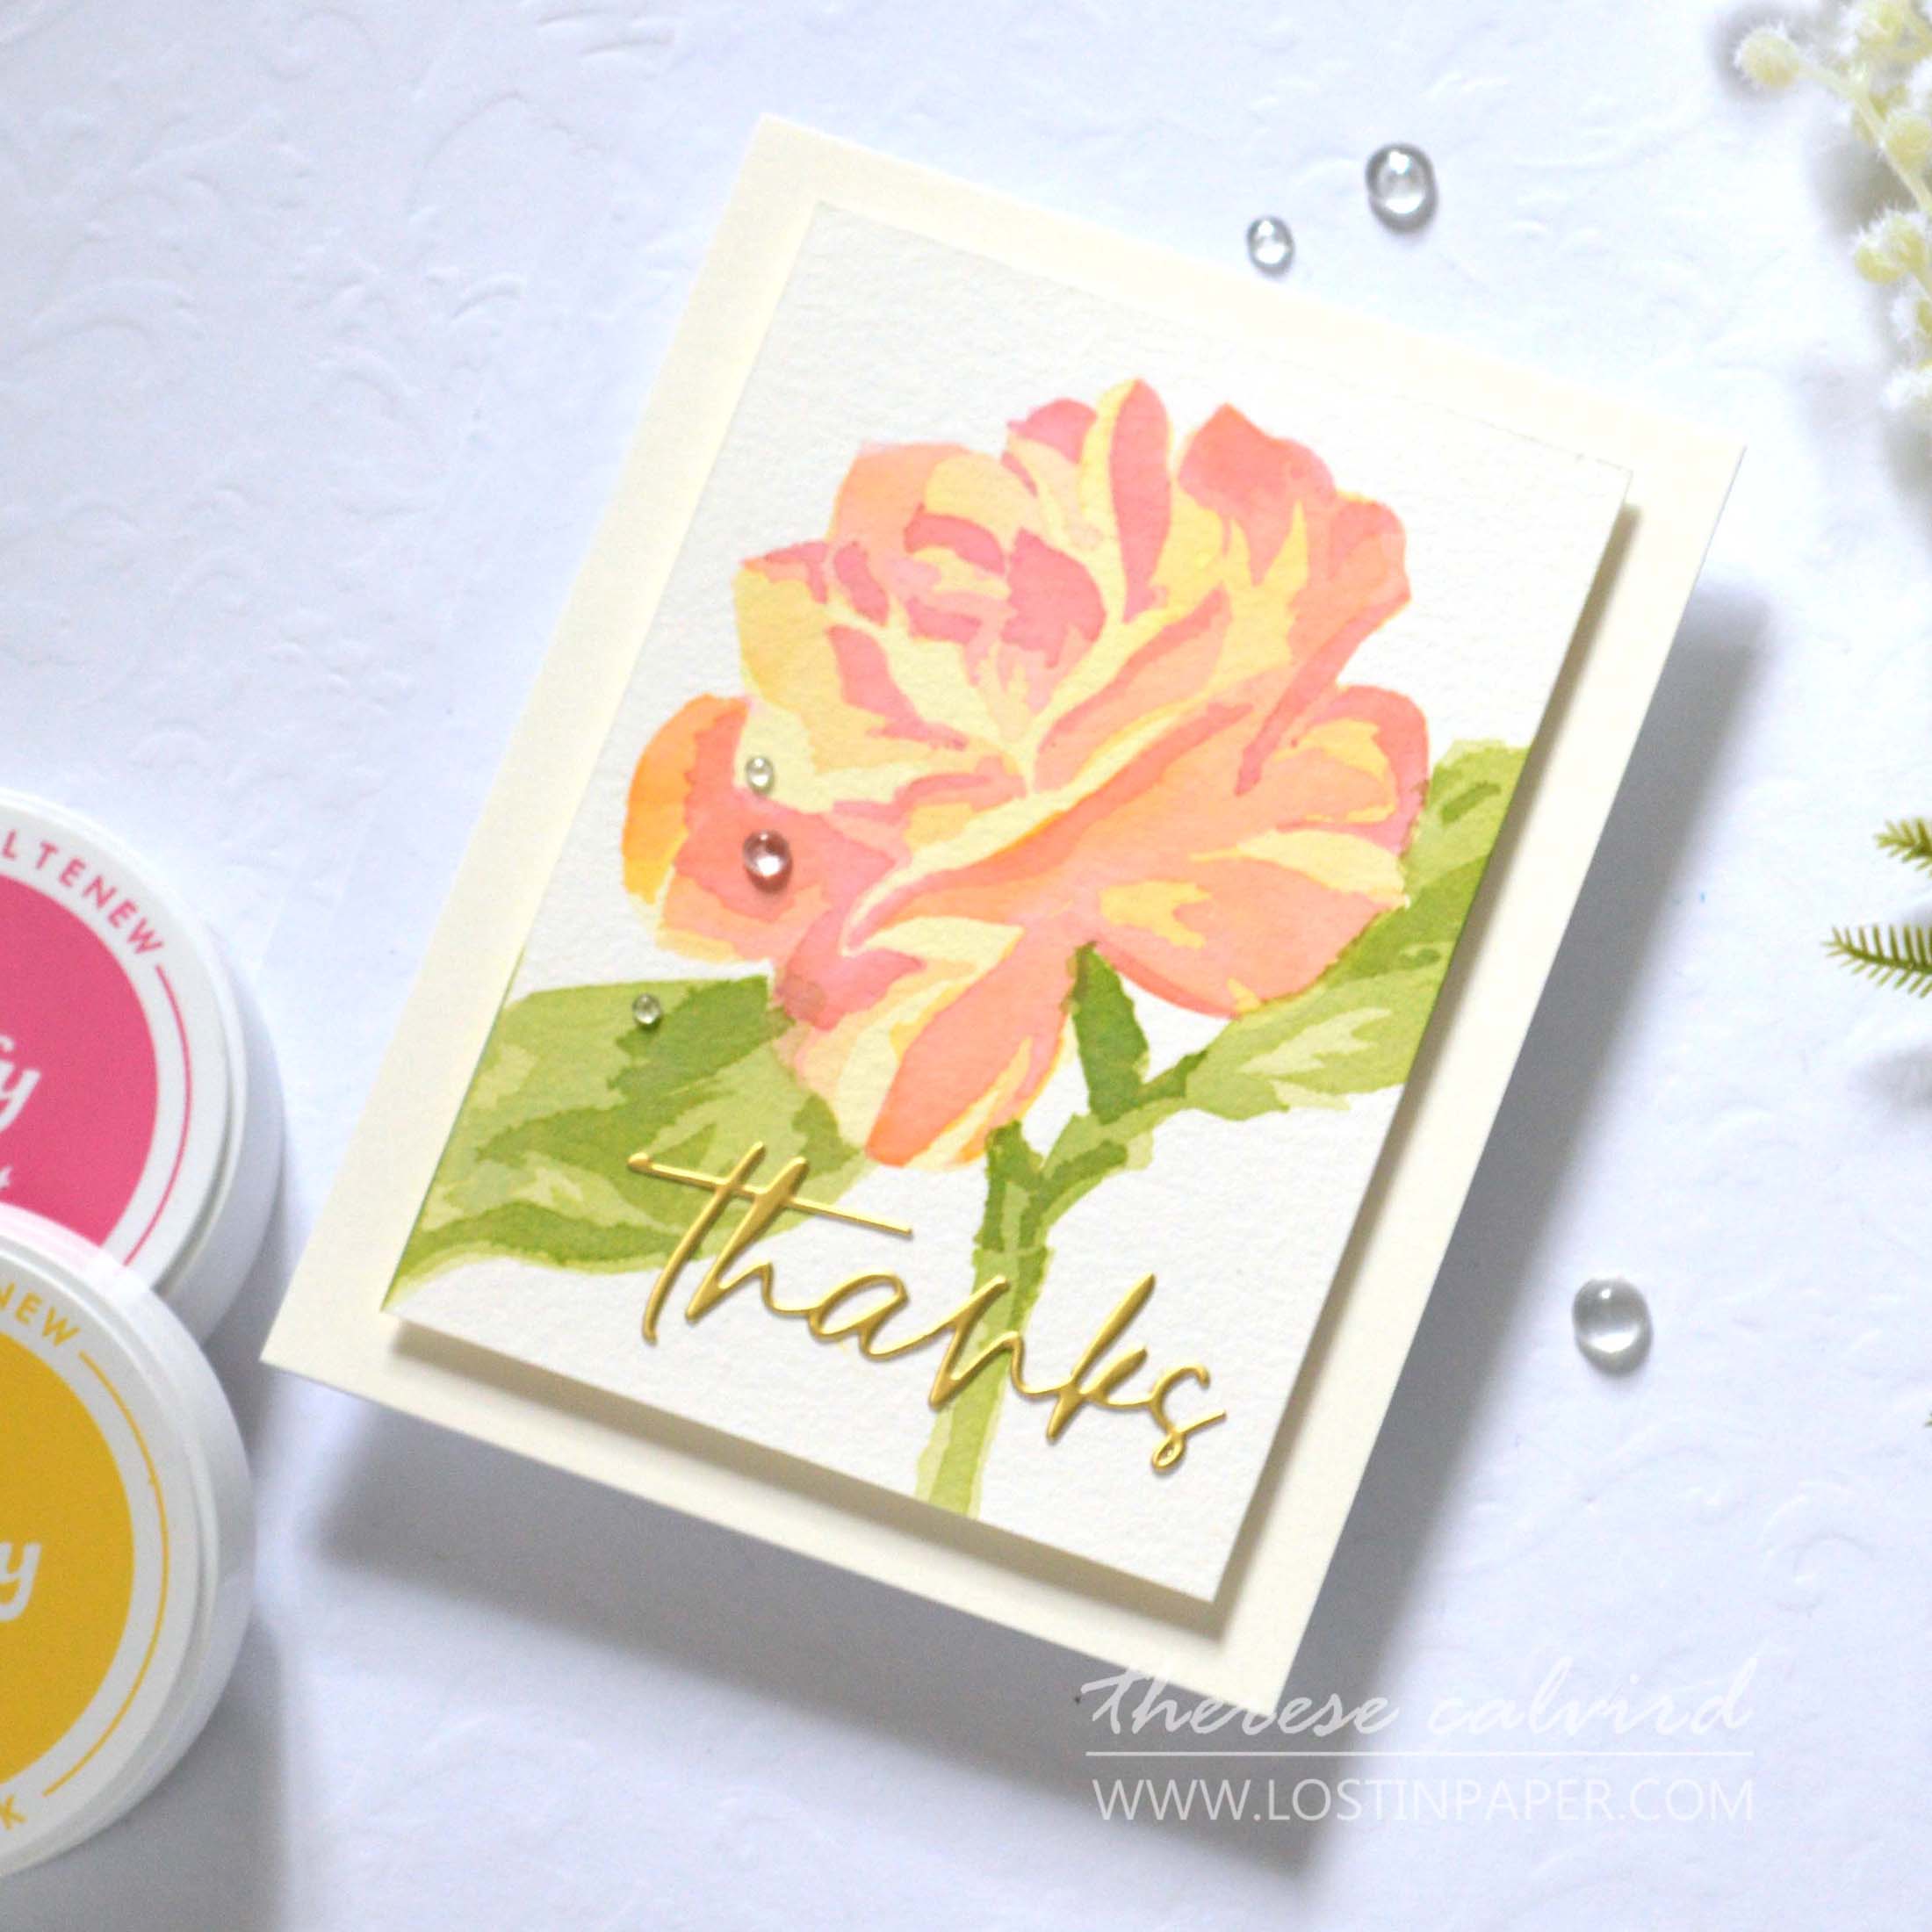
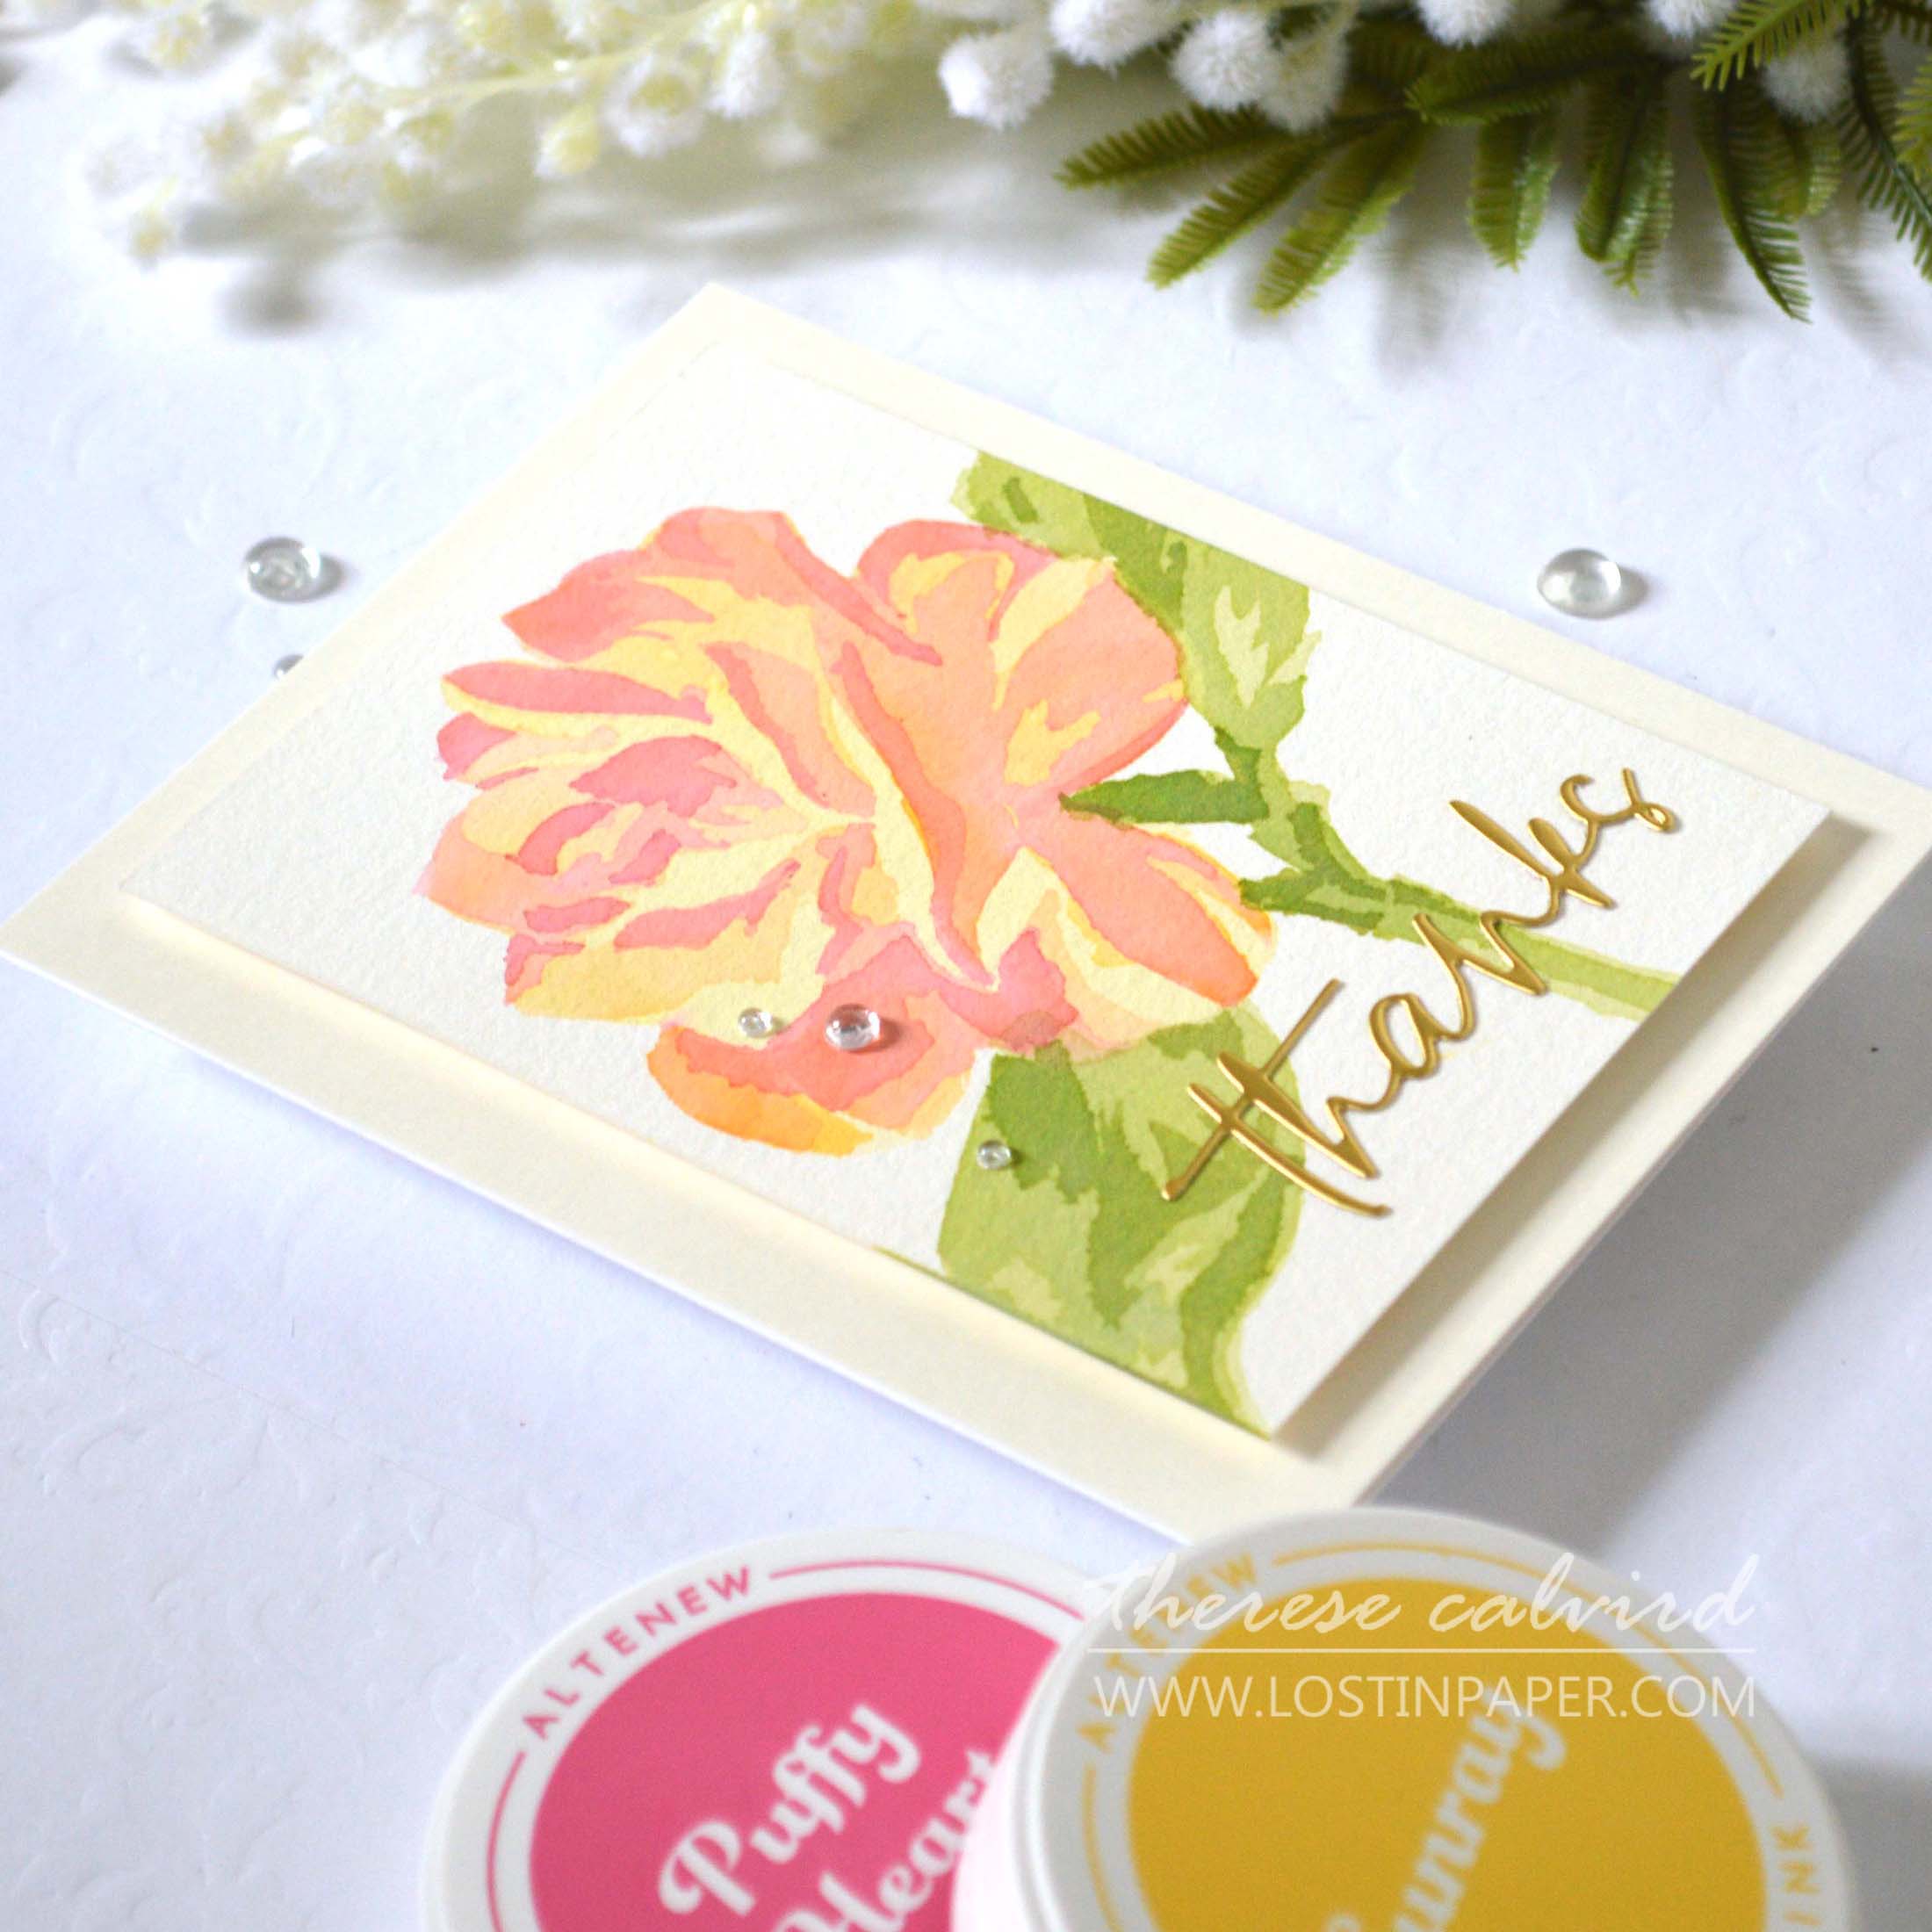
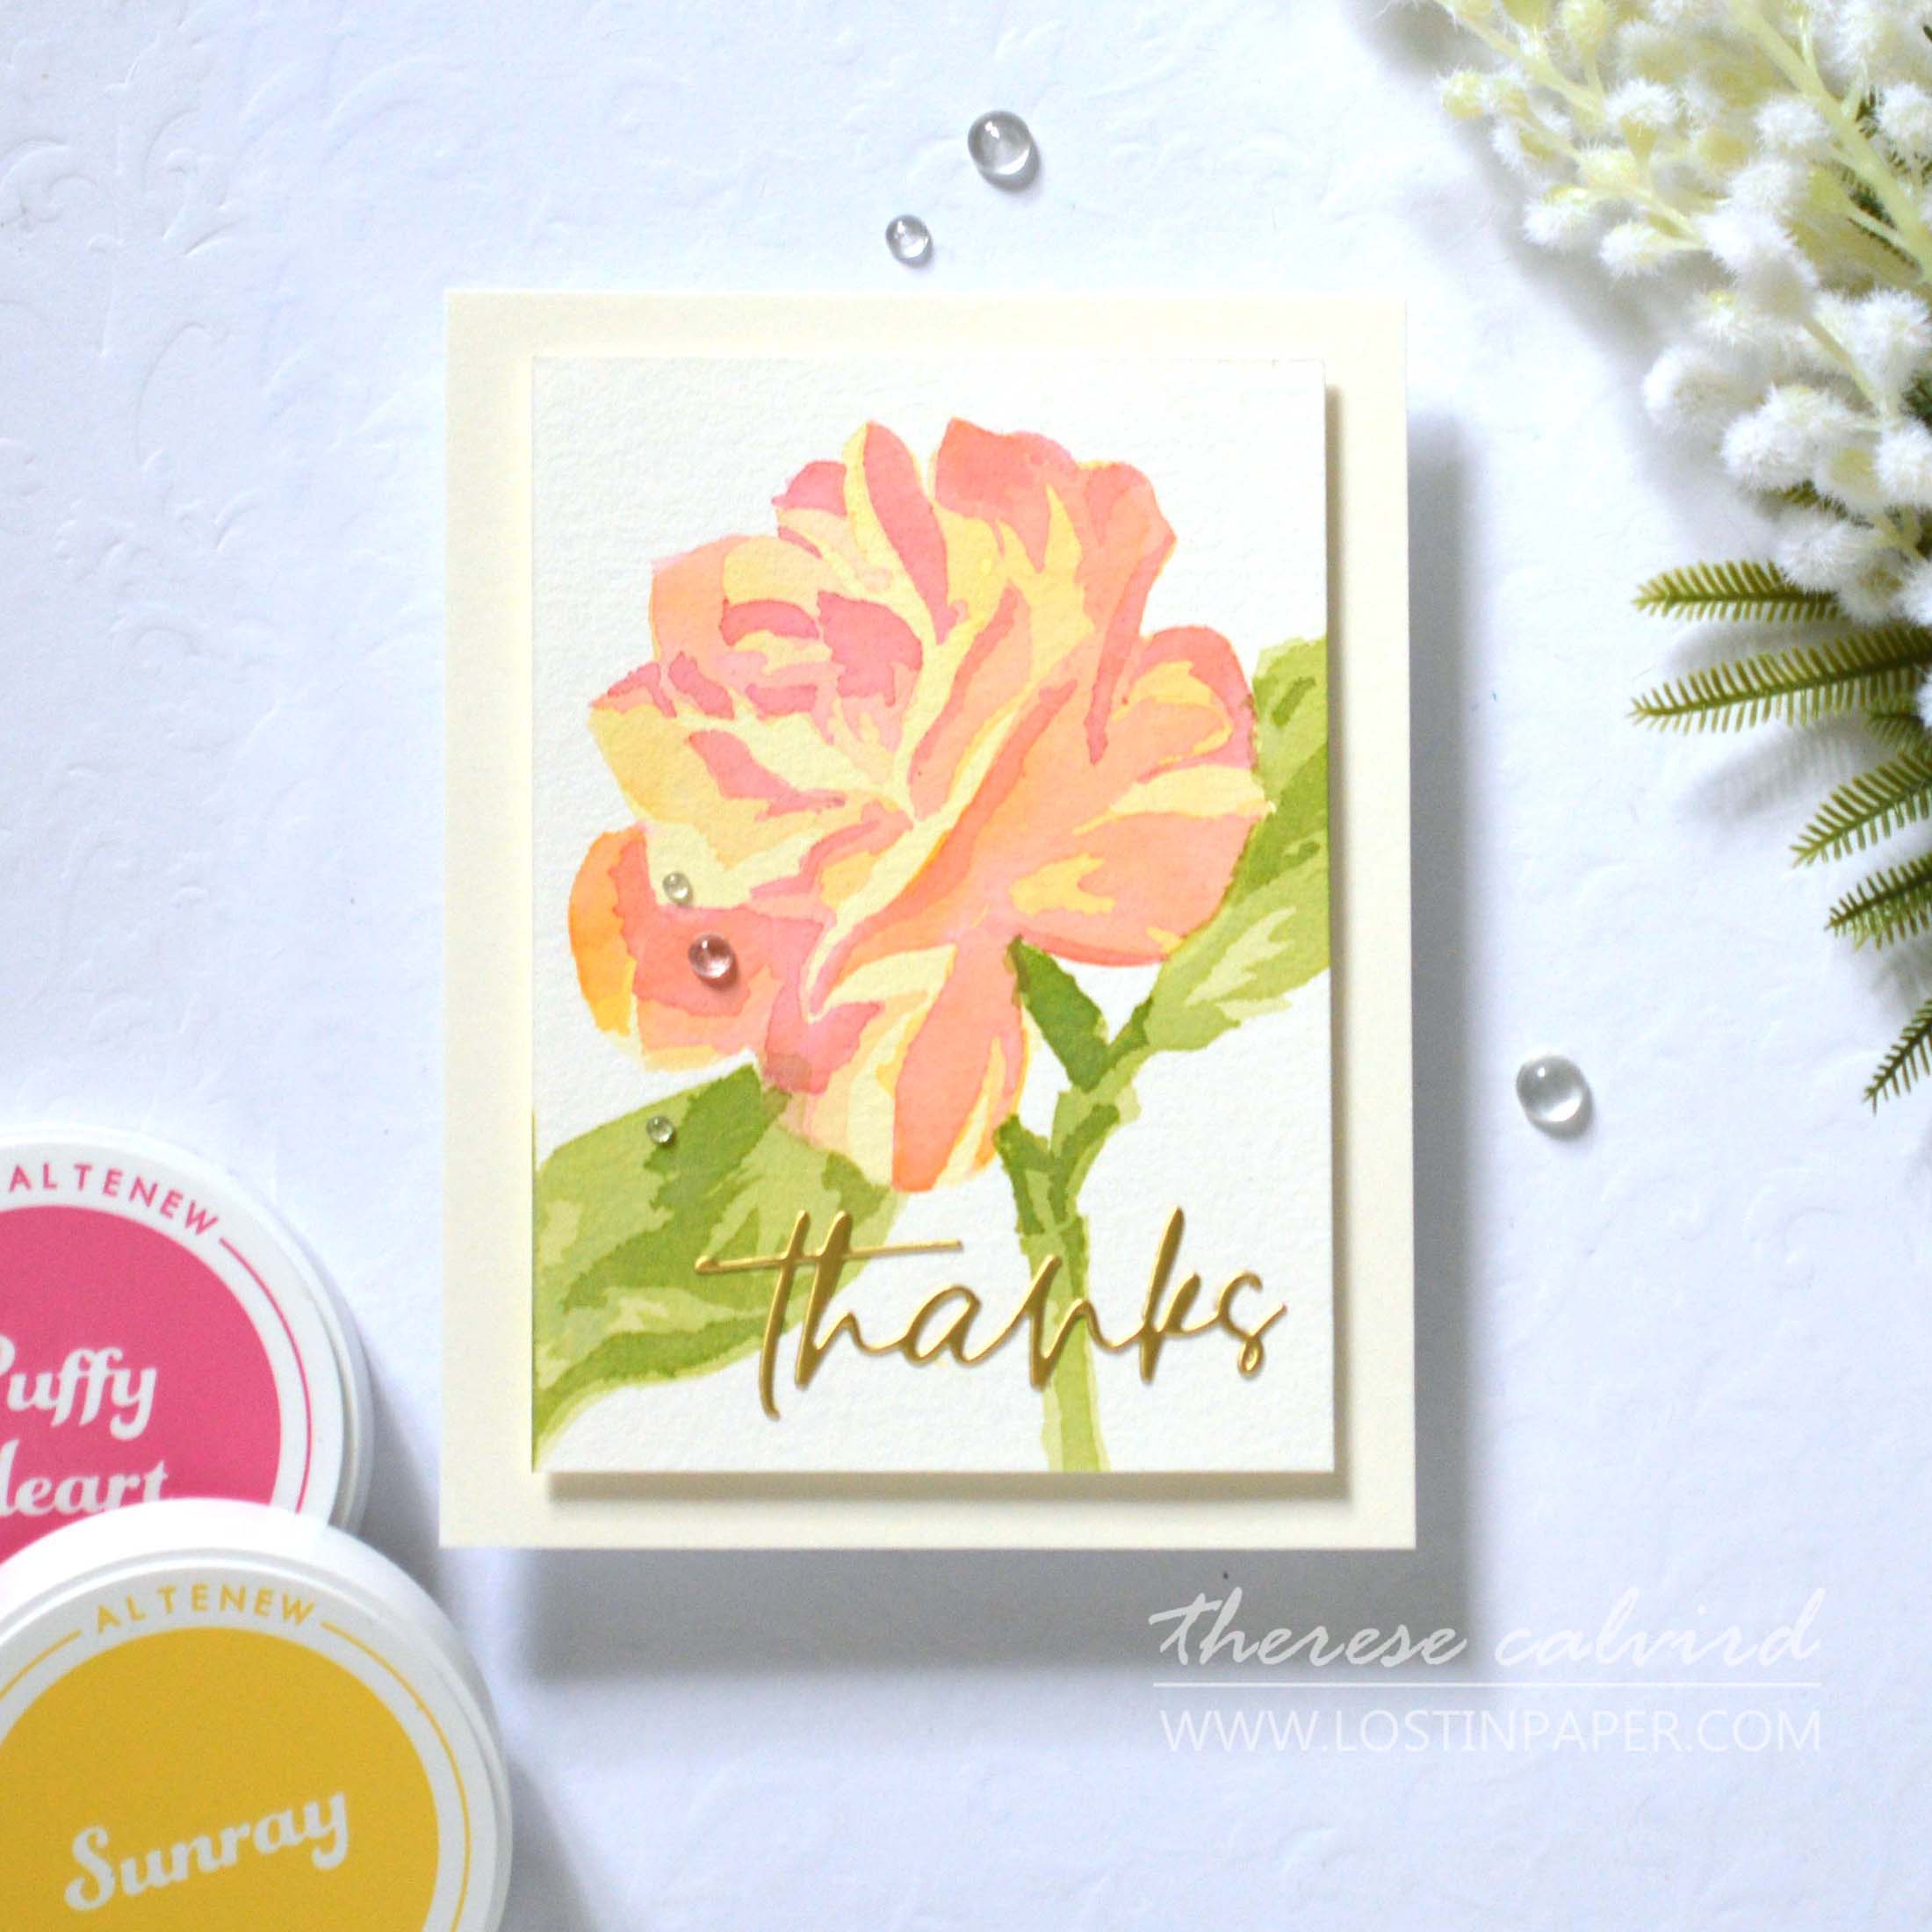
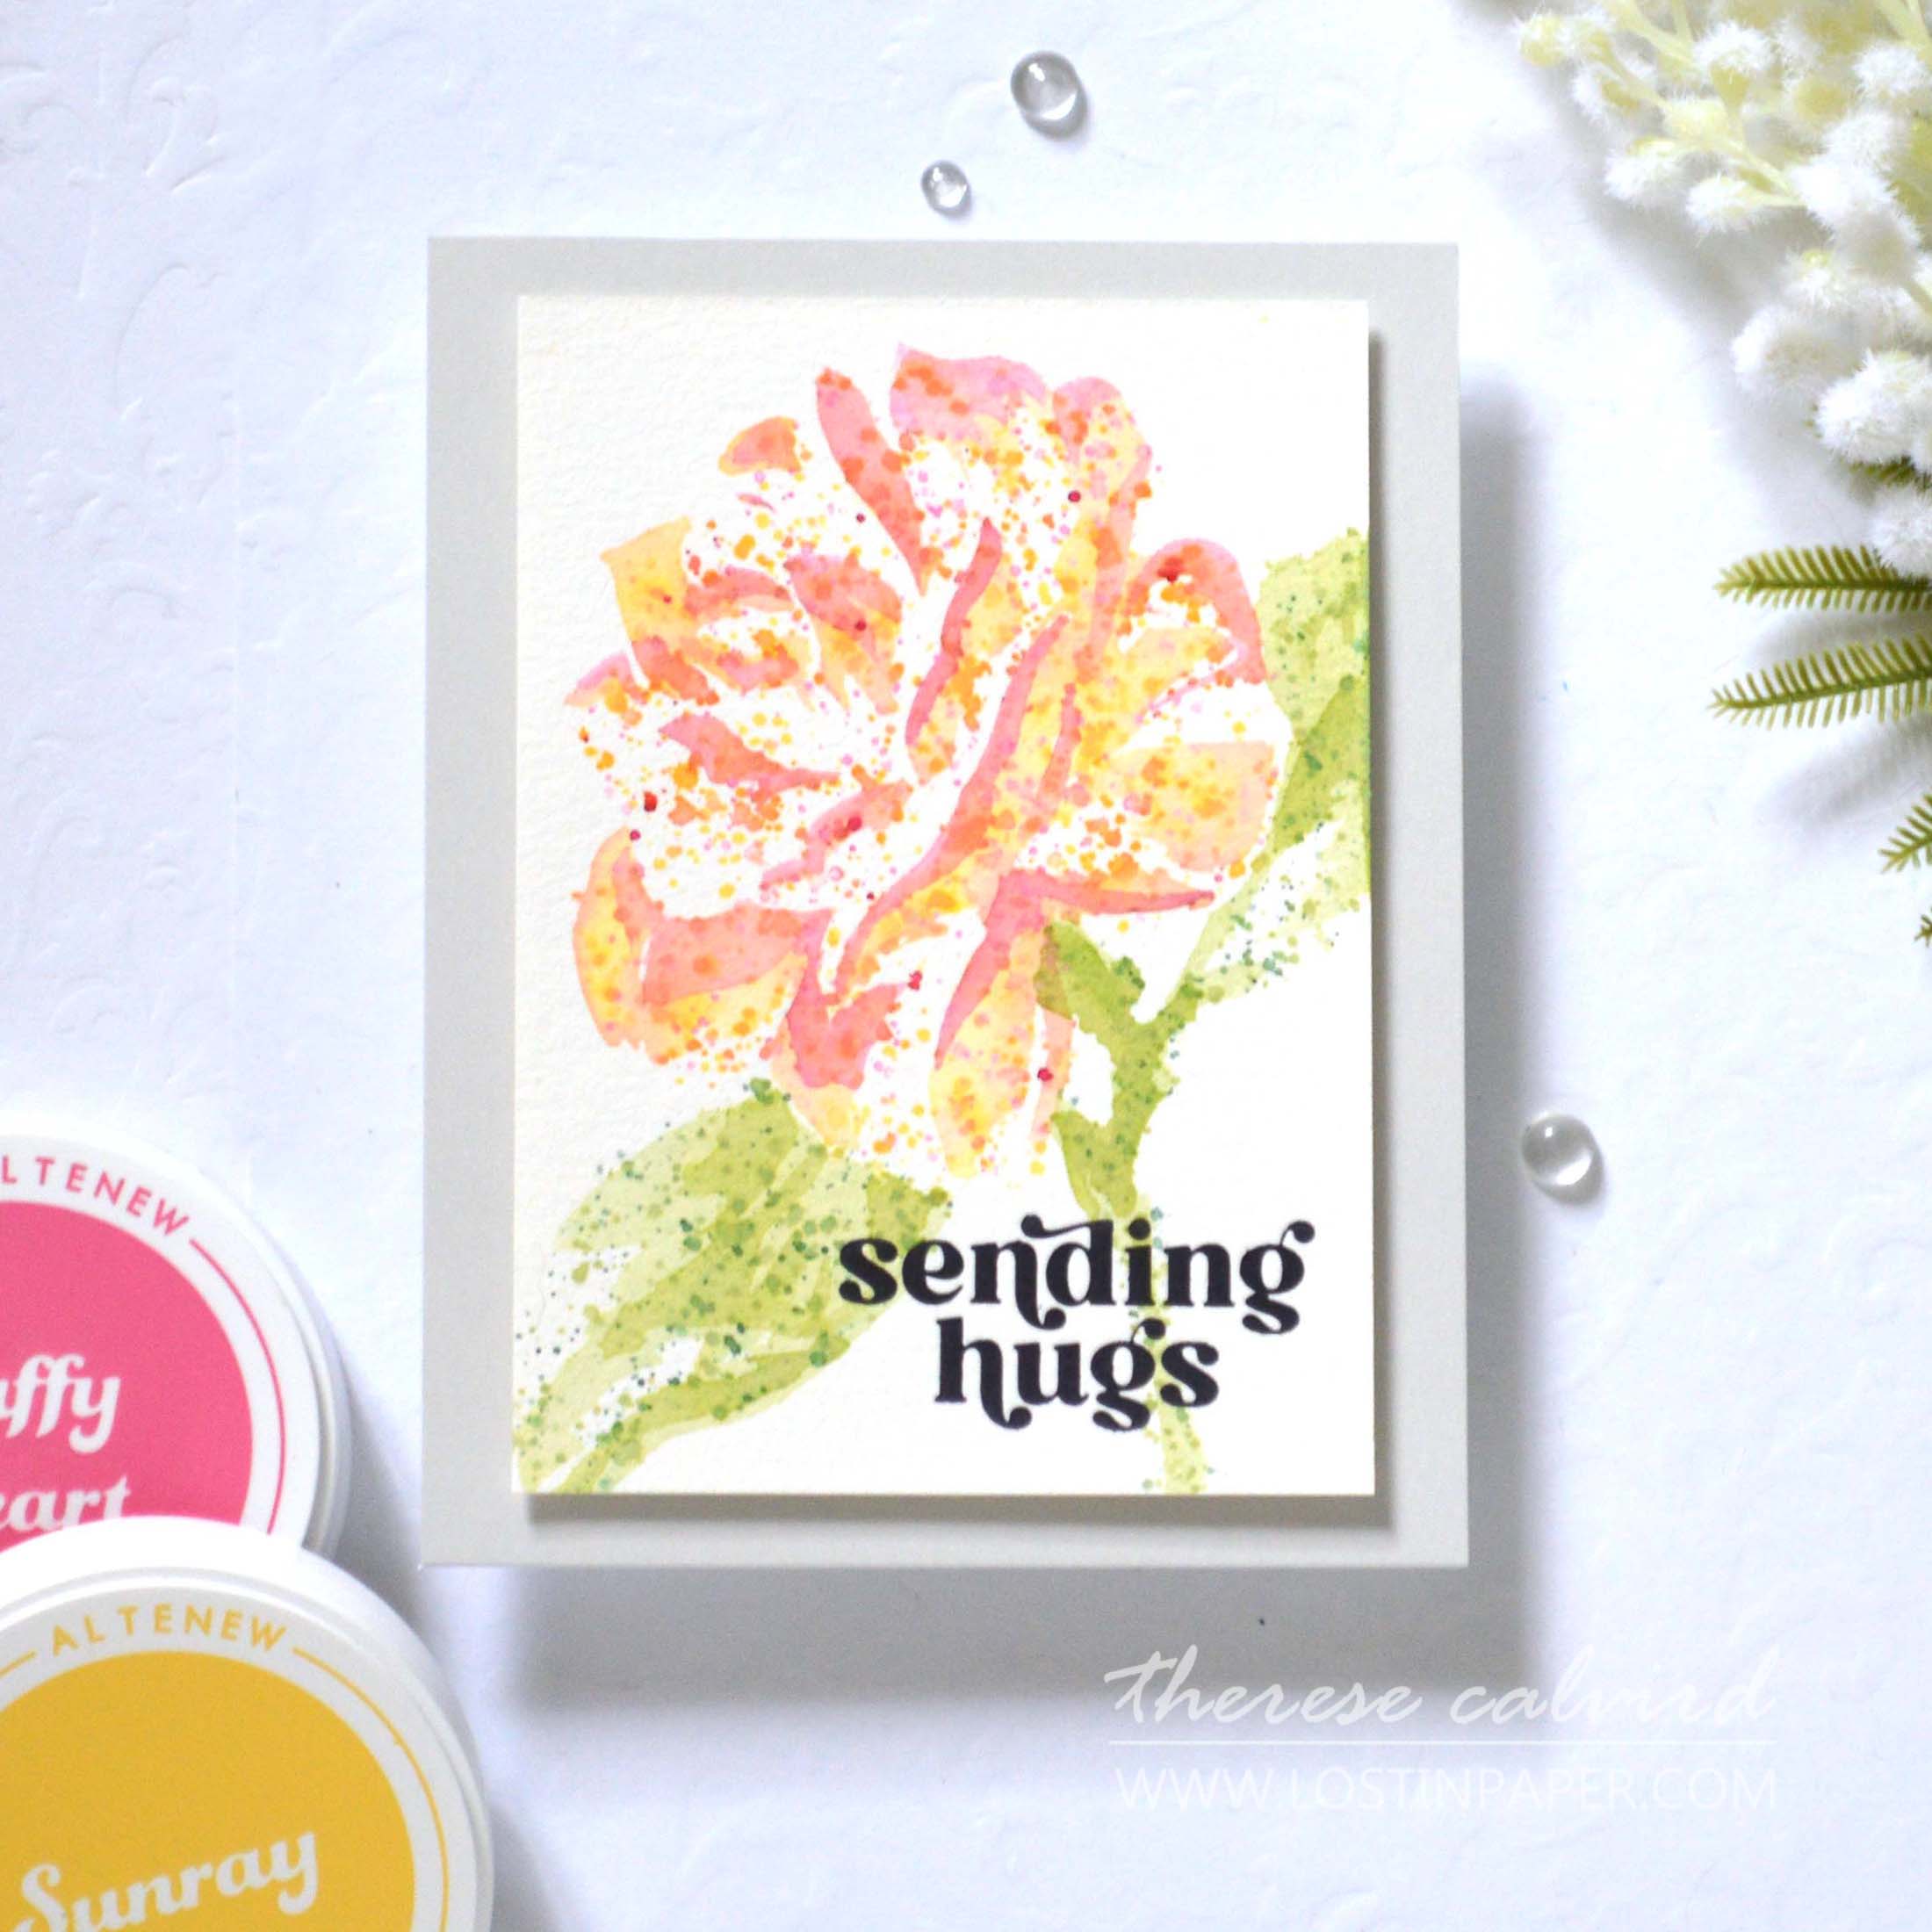
Technique No.1 – Simple Watercolour Image!
TIP #1: Watercolor Cardstock
Watercolor paper is made specifically for watercoloring and it has a coating on one side which makes it more absorbent. Regular cardstock will not tolerate the layers of water required for this technique. The paper may buckle or tear, and the watercolor may spread out, bleeding through the paper which will make it difficult to get nice smooth lines.
PRO TIP:
Using Hot Pressed Watercolor Paper will make it easier if you plan to do any stamping on the finished piece as it has a smoother finish!
TIP #2: No Watercolors?
Not sure if watercoloring is for you? Did you know that you can watercolor with any water based ink pad? This is a great way to try this medium without any extra cost to see if you like the techniques and results. Simply ‘smoosh’ an ink pad onto a non-porous suface such as a palette or plate and pick up the ink with a brush dipped in water.
Like it? Love it? Then a good place to start is watercolor half pans, these are compressed squares of paint that come in premade colors, so if you are not confident to color mix then this is a great option. Or, you could try some Watercolor Tube paints, you need only a few to get started as you can create your own color mixes with these. Many of these are also lightfast tested which means you will know if a certain color will fade or change in the presence of light (particularly important if you are painting a piece that will be on display for extended periods). These paints go a LONG way!
TIP #3: Sticky Grid Mat!
To hold stencils in place while coloring, use a tool such as the Sticky Grid Mat. This is a game changer as it decreases the chance of tearing the cardstock when removing tape.
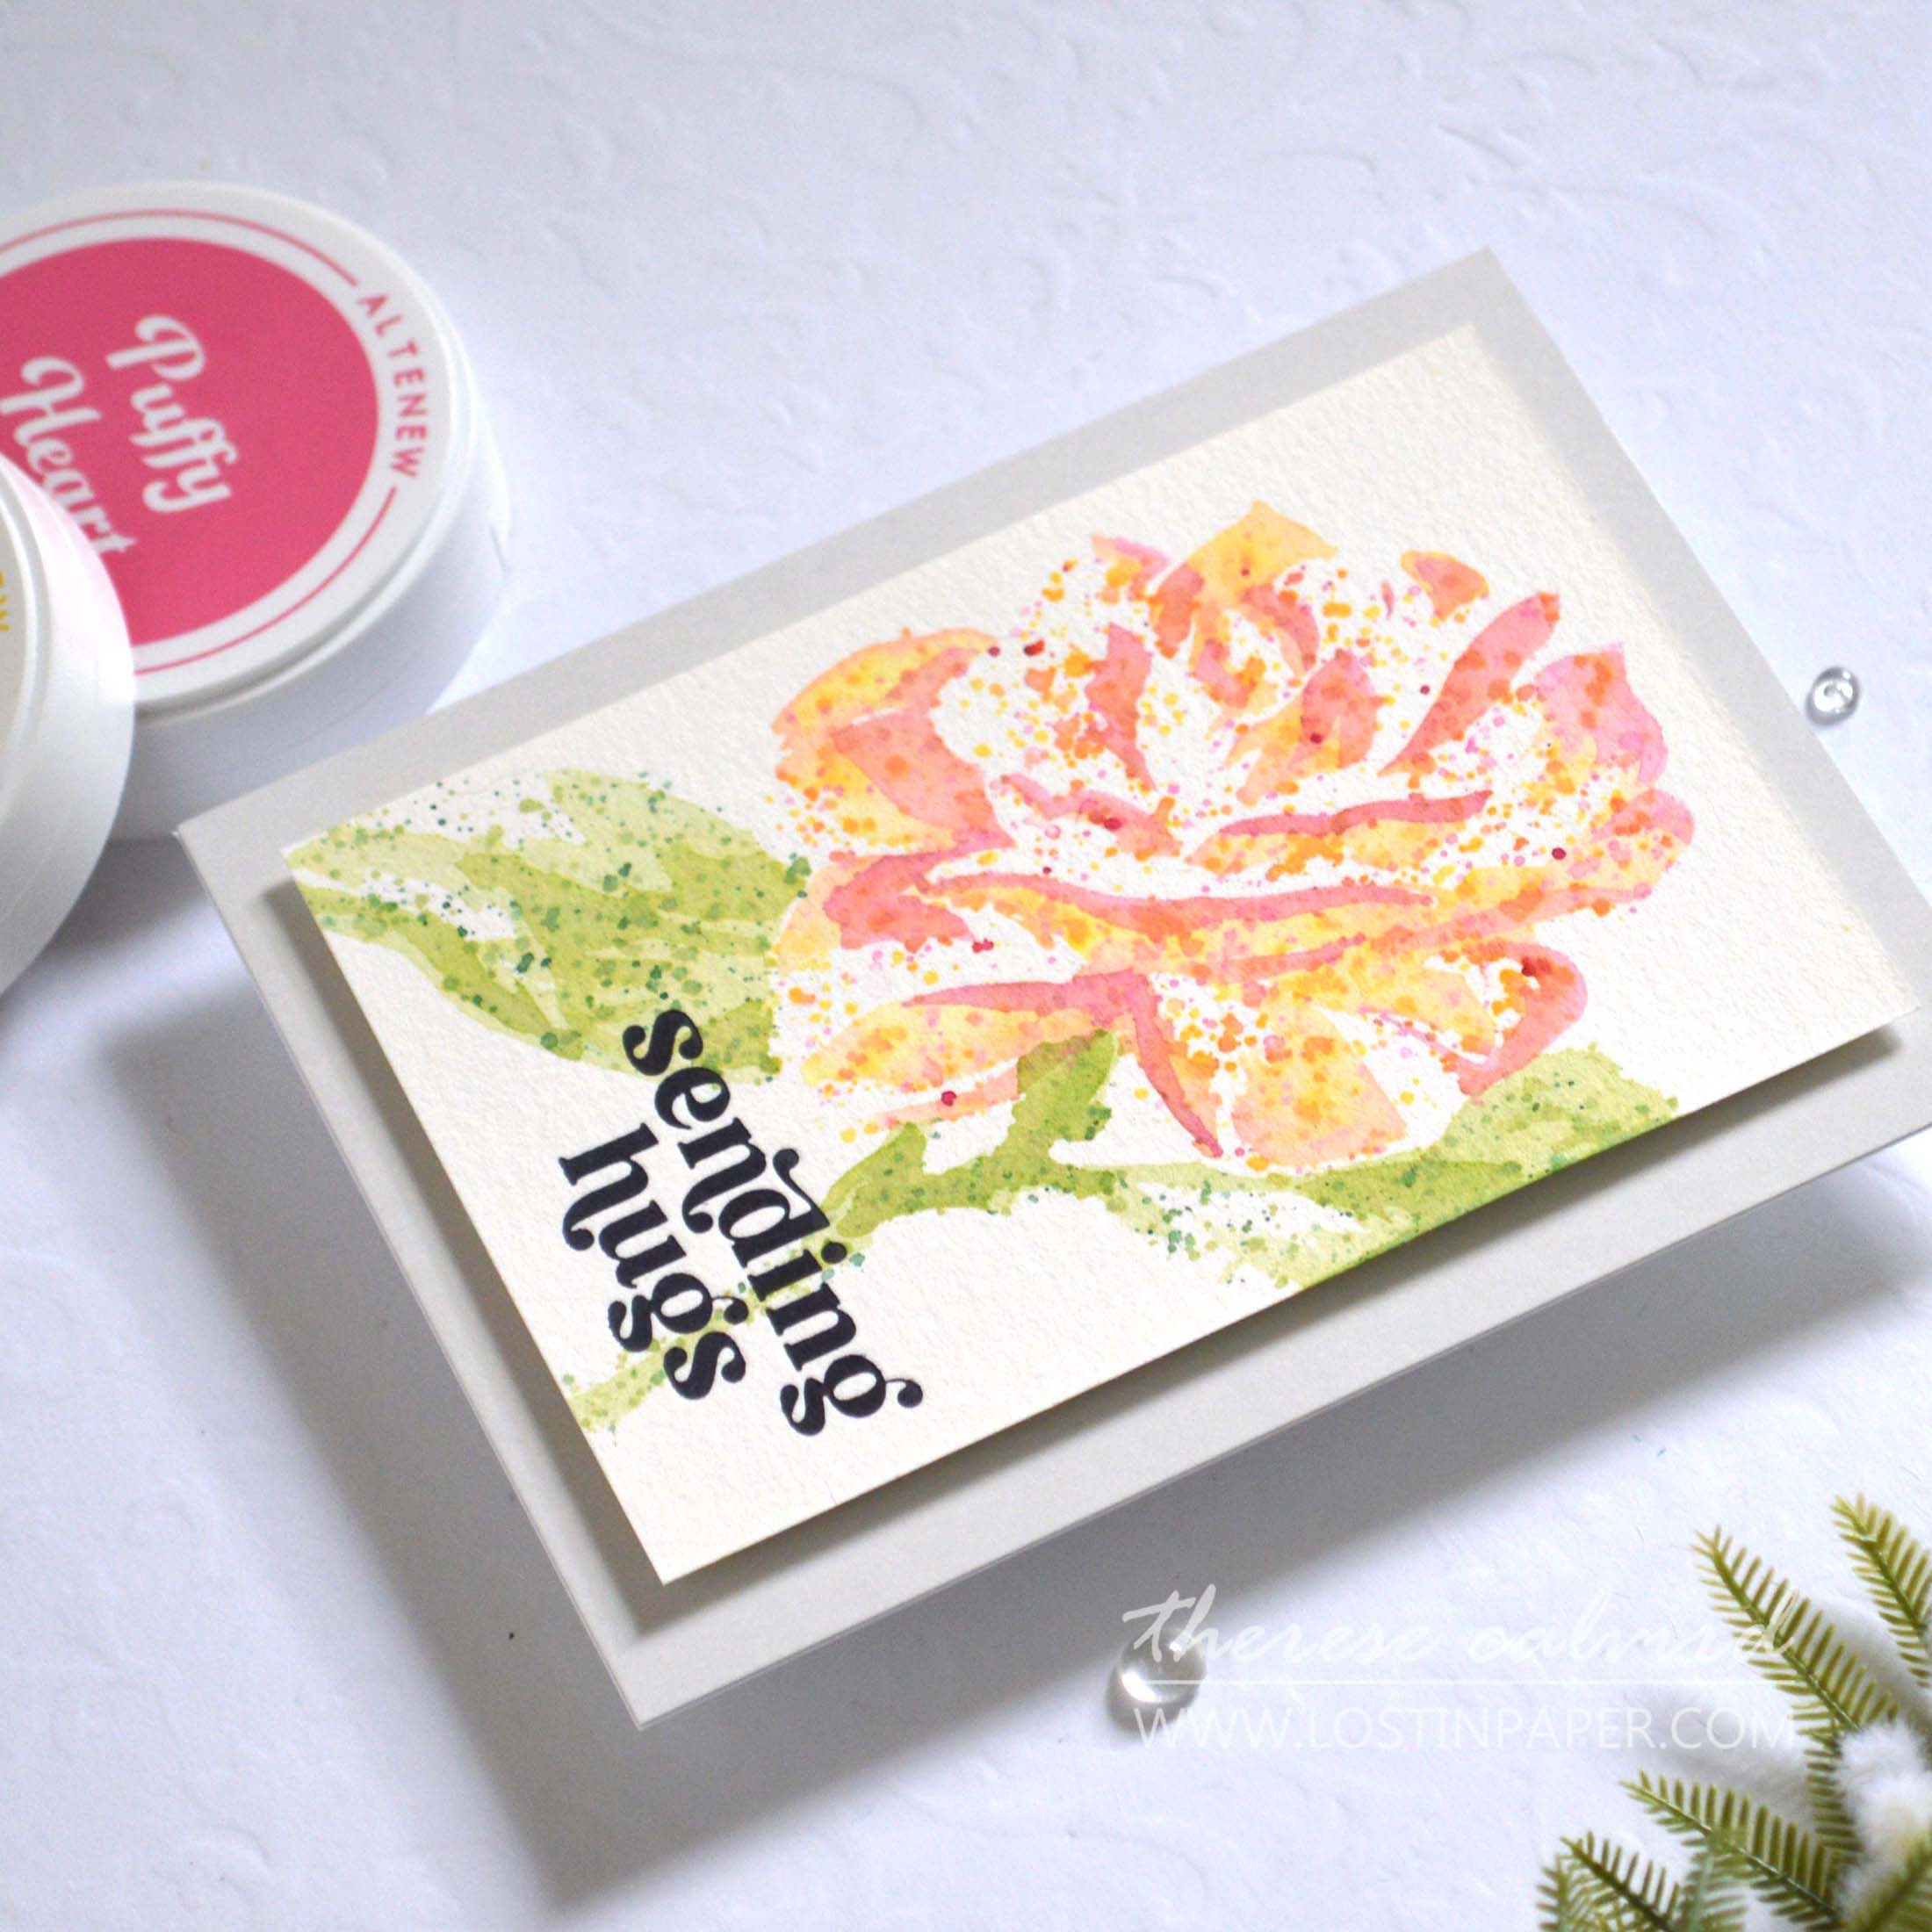
Technique No.2 – Splattered Watercolour Image!
Let’s change it up a little. For the next card design I thought it would be fun to use ‘splatters’ through the stencil to create to base portions of the image. You may notice that it has a very similar look because I kept the same basic design and colours, but it definitely changes it up… and it was fun to do!
AND I didn’t use any extra tools for this technique, you can see how, in the video linked below.
TIP #4: Mask
Be sure to mask or ‘cover’ areas of the stencils that may be exposed when ‘splattering’. Simply use a scrap piece of cardstock, post-it notes or low tack tape (be very careful to remove this gently).
PRO TIP: 
Watercolor paper is typically ‘rough’, if you do intend to stamp a sentiment I would recommend using a stamp positioning tool, and another option would be to add a die cut sentiment. But, this paper is perfect for BetterPress techniques which is how I added the sentiment on this design. 
TIP #5: Drying Time
Allow adequate drying time between each watercolored layer of the stencil. This will help prevent color bleeding and muddying of colors which will also give more defined and crisp color to the layers.
BONUS TIP!
Choose colours that blend well or ‘play nicely together’, so as not to get a muddy look. And, if you are not sure, simply check on a tool such as a colour wheel or just combine the colours together on a scrap piece of cardstock to see what the results are.
I hope you are inspired to create with your watercolors and stencils today! Let me know in the comments below if you are going to try either of these techniques. Have fun crafting!

AFFILIATE LINKS may be used. This means, that if you click on a product I have linked which is an affiliate link then I may receive a small commission at NO EXTRA COST to you. This is a great way to support me and the online businesses that we love🥰 .
Shop with me: (affiliate links used – Supplies are linked below)
Altenew – https://altenew.com/6397491
Simon Says Stamp – https://shrsl.com/3nnrq
Alex Syberia Designs – https://tinyurl.com/mpztt9rt
Spellbinders – https://tinyurl.com/yck6p76s
Kat Scrappiness – https://shrsl.com/4l9h6
Amazon au – https://amzn.to/3QrFt6k
*Certain content that appears on this site comes from Amazon, this content is provided ‘as is’ and is subject to change or removal at any time.
Altenew Fresh Dye Inks – Sunray | Chamomile | Frayed Leaf
24 Watercolor Pan Set – Green Meadows | Cherry Blossom
Cardstock – Pale Gray
• Neenah Solar 110 -AMZ https://amzn.to/3S2nHto |SSS https://shrsl.com/325vx |AUZ https://bit.ly/3Axfn9Q
• Brushed Gold -ALT |SSS https://shrsl.com/3rvx5
• Ivory -SSS https://shrsl.com/3yb38
• Watercolor Paper Se 10 (Cold-Pressed) -ALT |SSS https://shrsl.com/48rnk
• Watercolor Paper Set 30 (Hot-Pressed) -ALT |SSS https://shrsl.com/48rnm
• Mega Blossom Stencil -ALT |SSS https://shrsl.com/4dfuy
• Classical Sentiments Press Plates -|SSS https://shrsl.com/4dfux |AUZ http://tinyurl.com/a5vsy8jp
• Sweet Sentiments Die -ALT |SSS https://shrsl.com/3ocib
• Sunray -ALT |SSS https://shrsl.com/4dfuv |AUZ http://tinyurl.com/mt45k8mr
• Chamomile -ALT |SSS https://shrsl.com/4cfs9 |AUZ http://tinyurl.com/mt45k8mr
• Frayed Leaf -ALT |SSS https://shrsl.com/45180 |AUZ http://tinyurl.com/25yuvakn
• Artists Watercolor 24 Pan Set – |SSS https://shrsl.com/28jzl |AUZ https://bit.ly/3e0LFOi
• Palette Perfection Bundle -ALT |SSS https://shrsl.com/4d0e2
• Watercolor Brushes Round -ALT |SSS https://shrsl.com/2tq2d
• Large Palette -ALT |SSS http://shrsl.com/1mxpj
• Faber Castell – Water Cup -SSS http://shrsl.com/1fdjj | https://bit.ly/3oiPXIQ
• Dew Drops -SSS https://shrsl.com/3vhre |AUZ http://tinyurl.com/43z9mb5u
• Tweezers -ALT |SSS https://shrsl.com/33ycc |AUZ https://bit.ly/2VJiifl
• Scissors -SSS http://shrsl.com/1eezb |AUZ https://bit.ly/3d9M5RW
• Score Board -ALT |SSS https://shrsl.com/3p8q2 |AUZ https://bit.ly/3qBN8mp
• Sticky Grid Mat -ALT |SSS https://shrsl.com/4d0eq |AUZ http://tinyurl.com/27a48khd
• Cutting Mat -ALT |SSS https://shrsl.com/25ttt
• Paper Trimmer -AMZ https://amzn.to/3tywNUv |SSS http://shrsl.com/1ehmd
• Bigshot -SSS http://shrsl.com/1e4r7
• BetterPress SB -SSS https://shrsl.com/44f5g |AUZ http://tinyurl.com/tp3a776f |SB https://shrsl.com/44f4y
• Gemini Junior -SSS http://shrsl.com/1e4rd
• Satin Masking Tape -ALT |SSS https://shrsl.com/3×116 |AUZ https://bit.ly/3I2mBrQ
• Bearly Art Glue -SSS https://shrsl.com/3q8d2 |AUZ https://bit.ly/3y47ZTp
• 1/2″ Ultra Sticky Tape -ALT |SSS https://shrsl.com/3pswr |AUZ https://bit.ly/3PM7N1I
• Foam Tape -ALT |SSS https://shrsl.com/2zacp |AUZ https://bit.ly/3yplMmg
I love them both – but I adore every speck of that splattered rose!
=]
Speckly roses can be pretty too lol.
Great techniques – thanks for sharing. Love learning something new!
Happy you enjoyed these Angy, hope you give it a try!
These are so pretty! Thanks for the great tips, Therese!
So glad you enjoyed these, hope you get a chance to give it a try, and don’t forget to share it with me on Social Media if you do, I’d love to see!
They are such beautiful cards! Such an ingenious idea doing the splatters! I know I never would have thought of it in a million years; but, isn’t that why you are my hero?! Thank you again for an amazing video/tutorial!
Yay! Thank you so very much xx
Love the 2 different looks! Such a great way to use those stencils!
Thank you Lisa, it was a fun experiment!
Two super cards ,thanks for all of the tips I really must give it a go even if you do make it look super easy.
Marie
Hope you give this a try my friend, I’d love to know how it went!
Love both the cards. The speckled one is a welcome piece of inspiration though.
Cheers
Thank you Lisa, they were such fun to make… even though I did have to have to wait for ‘drying’ time lol.
Beautiful watercoloring! This is a game changer for all my stencils and I am excited to try this out. Thanks fot the inspiration! I love both techniques you did but I am going all in with the watercoloring first abd then try the splatter fill in. â¤ï¸
Beautiful cards. Great tips
Thank you Vicki x
Wow and Wow! Very pretty cards and both are great ideas.
Merry Cheers
Merry Cheers to you too my friend!