Do you have any Basic Shapes or Nesting Dies? It’s time to get them out and play as I have a ton of ideas to inspire you! You know you want to… and my theme is RETRO!
I am back with another Same But Different Christmas Series 2024 set of cards and today I am sharing 6 Ideas to Use Basic Shapes to Make FUN Cards and I have a video walking you through these techniques. For MORE Holiday inspiration head to my playlist of videos from 2023, Click HERE (after you have checked out today’s cards 😉).
*** Today I use Nesting Dies, but don’t worry if you don’t have any of these, as many of today’s techniques can be replicated using a paper trimmer, single dies or even a pencil and craft knife (or a Cricut!). ***
Now let’s get to it… would you like to see today’s cards?


You can watch the video here or in HD on YouTube right HERE.
I use affiliate links, this means that if you click on a product that is linked to an affiliate shop then I will receive a small portion of the sale at no extra cost to you).
This is a great way to support my channel as well as the shops that I love!
#BASICSHAPES
Holiday cards are the perfect time to embrace Basic Shapes. Especially if you want to create multiples or get that fun modern or even retro look, which I have gone for today. Basic shapes can be used on their own or incorporated together to create an image, a specific design or pattern to pimp up a card.
But HOW do you use them?
MY TIPS:
- Nesting dies are your friend here. These are an investment so it’s great to be able to make the most of them. Over the years I have collected many ‘basic’ shapes in nesting sets, but if you are starting out, I would recommend buying a set of circle dies (this is one of the hardest shapes to freehand cut).
- Using nesting dies will give you the perfect cut and size every time, it takes the guess work out of it, but…
- If you do not have nesting dies, don’t worry. You can use a paper trimmer, scissors or a craft knife to cut a basic shape!
- Use shapes for a layered look, either build it up with dimension or use the negative space for the WOW factor.
- Basic shapes can also be used to make images or patterns.
- By using shapes, you can make your designs in any colour or size to suit your project, today I decided to go Retro.
- Adding shading with a blending tool, will add extra depth to your element/image.
- Don’t be afraid to sketch it out first (then you know it will fit on your card as planned).
- Build on your design, add in things like stamping, stenciling or even dimension with an embossing folder.
- I like to make the image first and then finish the card design after.
- Don’t forget that you can also use a partial die cut to create a shape/image that you want!
- AND these card ideas are not just for the Holidays, you can change up many of these ideas to use for cards for other occasions.
Enough chat! It’s time to inspire YOU to create!!
Technique #1 – Layered Die Cuts
Layering nesting dies, is probably one of my favourite nesting die techniques and, you can literally use ANY shape that you have in your stash. This looks amazing with a LOT of dimension, but if you prefer, you can still get the WOW factor without dimension, as well as keep postage costs to a minimum.
Idea #1 – Star Dies
Star dies, are not just great for birthday cards, they can also be used for the Holidays such as Christmas or Hanukkah. I chose to layer a large star as a focal point, but used negative space for a dramatic effect.

PRO TIP: Create the layered panel before adding it to the card front. Start the layers from the back and then cut away any excess cardstock that may show around the edges of the front panel.

Idea #2 – Triangle Dies
Triangle dies? Where do I start… trees, mountains, ice cream cones, even party hats, and these shapes are easily made with a paper trimmer. I decided to create a large layered Christmas tree, but this time I added dimension by building up each layer with foam tape.

I took it an extra level and decided to add a ‘split’ colour to each layer to give my layered tree a pattern of colour. But you could just as easily layer a single colour instead.

I don’t usually make a practice card, but for this one I wanted to check my colour palette first… and in fact, I prefer this version without the tinsel, which one do you like the best???

Technique #2 – Create Images
Idea #3 – Circle Dies
If you only buy one set of nesting dies then I would recommend a set of circles. This basic shape is the most difficult cut to do without a die. Though it is possible, if you want that ‘perfect’ round edge, then a die is your friend. Circle dies are great to create a window or a focal point on a card, somewhere to sit an image, but they can also be used in many other ways.
Today I decided to make a large retro bauble. But, circles are also perfect to make other images such as snowmen, doughnuts, wheels, tyres and I’ve even used them to make a lifebuoy (check it out right here).

Did you know that you can step up your basic shape designs with some additional stamping? Here I added a simple pattern on the bauble as well as a stamped string. You could even step it up even more, and add some real string to hang the bauble.

Idea #4 – Square Dies
This basic shape is very easy to recreate with a paper trimmer! So the world is your oyster here, use squares to make a large present such as I did here. But you could also make a scene of multiple presents, or change it up and add some rectangle shapes as well.
Squares (and rectangles) are great to make building scenes, layered cakes, a quilted pattern, or you could even cut them in half to make triangles!

Why not add a stencil pattern with embossing paste, like I did here, to add some fun patterned paper to the present.
PRO TIP: Don’t have time for the embossing paste to dry? Then simply ink blend through the stencil to create the pattern… or use design paper instead.

Idea #5 – Arch Dies
Not a typical basic shape, but a fun one all the same. I would usually use an arch die to create a window or arch shape border for my design or even use it for a shaped card base. But today, I used these arches to make some Retro Christmas Bells for this card.

Don’t forget to add some shading with an ink blending tool, as this adds extra depth to the shapes, as well as some white highlights with a gel pen, to give the illusion of shine!

Idea #6 – Oval Dies
Also a fabulous shape to create a window or a focal point or border for a card! But today I used the oval dies to make a fun Retro Candy Cane. Ovals could also be used to make bells with a little partial die cutting or even an oval shaped bauble. Other ideas to try would be to make an Easter Egg, or even some fun shaped mountains!

I did a little partial die cutting here to create this candy cane, but you could also die cut the top of the cane and then add a rectangle for the lower portion of the cane. Then simply cover where it joins with a red stripe or a bow!

Did you enjoy these ideas and techniques and would you like MORE die cut inspiration? Check out my video here sharing 8 AMAZING Ways to Use Die Cut Alphabet’s on Cards!
I’d LOVE to know if you are inspired to try any of these techniques and if YOU have a favourite card today? Let me know in the comments below and share with me on Social Media, it would be fantastic to see what you create!
Thank you for spending your time with me today, sending crafty hugs your way!

Also, just in case you want to do a little shopping I’ve added the links below (some of them are affiliate links which means that I will receive a small portion of the sale at no extra cost to you). I truly appreciate your support of my card adventures!
Other Supplies:
Dies: Ellen Hutson – Essential Triangles | Essential Arches | Couture Creations – Nesting Dies – Oval | Waffle Flower Crafts – Nesting Stars (these were in stock) – Nesting Circles | Trinity Stamps – Triangle Stack Dies
Stamps: Avery Elle – Dear Santa | Altenew – Brilliant Baubles (retired)
Cardstock: Concord & 9th – Pebble | Sea Glass | Stardust | Rainforest | Black
 Halftone Stars Dies ALT |  Halftone Circles ALT |  Fine Rings: Circle Bundle ALT |  Halftone Squares Dies ALT |
 Everlasting Squares SSS | SB |  Essential Arches SSS | SB |  Nesting Oval Dies SSS |  A2 Layers Die SSS |
 Pretty Bows SSS | OTH |  Joyous Sentiments ALT | SSS |  Modern Poinsettia ALT |  Linear Life: Poinsettias Bundle ALT | OTH |
 Linear Life: Poinsettias ALT | SSS |  Linear Life: Poinsettias Dies ALT | SSS |  Perfect Poinsettias ALT | SSS |  Christmas Sweater Stencil OTH |
 Candy Canes Stencil OTH |  Neenah Solar 110 AMZ | SSS |  Neenah Solar 80 AMZ | SSS |  Concord & 9th – Cardstock SSS |
 Brushed Silver ALT | SSS |  Nocturne SSS |  Lemonade Stand ALT | SSS |  Cherry Sweet ALT | SSS |
 Berry Cool ALT | SSS |  Versamark Ink SSS | OTH |  Mini Blending Brush Set ALT | SSS |  Gelly Roll White Pens SSS |
 Palette Knife Set ALT |  Embossing Paste ALT | SSS |  WOW Heat Tool SSS |  Opaque Bright White SSS |
 Powder Tool SSS | 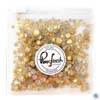 Sparkle & Shine (Glitter Drops) SSS | 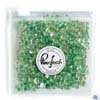 Leaf (Glitter Drops) SSS | 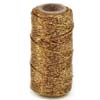 Flashy Gold Metallic Cord (twine) SSS | SB |
 Tweezers ALT | SSS |  Triangle Tray OTH | 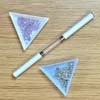 Pick Up Tool OTH |  Scissors SSS |
 Bone Folder Altenew ALT |  Perfect Align Tool OTH |  Score Board ALT | SSS |  Stampwheel ALT | SSS |
 Stampwheel Square Grid Flip Plate ALT | SSS |  Slimgrip Sticky Mat ALT | SSS |  MISTI SSS |  9″ Fiskars Paper Trimmer AMZ | SSS |
 Bigshot SSS |  Gemini Junior SSS |  Thin Foam Squares AMZ | SSS |  Bearly Art Glue AMZ | SSS |
 ATG OTH |  Glue Tape ALT | SSS |

Your ‘same but different’ series is my favorite of the season, Therese!! Your clever use of dies has ‘shaped up’ to be a very cool, very creative and phenomenal cards!
The green, gold, mint color combo* is my favorite today!
=] Michele
* Sans tinsel for me, thank you!
I agree, it’s weird because typically I don’t ‘premake’ a card but this one was a little tricky and I wanted to get the colours how I imagined them… and I gotta say that I like the ‘sans’ version too 😊.
You had me at the stars! Such clever ideas to use up those shapes.
Thank you so very much, these were such fun cards to make!
What a brilliant post!!! Love all these creations using what so many of us already have. And the retro look has my heart! I’m 1950’s gal living in a mid-century house. So very cool. Tanks for sharing!
How wonderful Maureen! It makes my heart happy to hear that you enjoyed these card designs. I do hope you get a chance to give these ideas a try! Crafty hugs Tx
I’ve gone back and forth, oohed and aahed… they’re all wonderful, Therese! Thanks for always sharing your creative tips and ideas!
Thank you Lisa, you are the BEST!
I love all your creative ideas, Therese. The split colors look wonderful on all the shapes.
You are so sweet, thank you Bobby!
Such smart idea and so effective, it’s amazing what you can come up with just using simple shapes. All of your designs are so stunning and gorgeous. Hugs xx
Thank you so very much Angellica, you are the BEST!
Awesome! I need some inspiration. Love the stars.
Thank you hon x
I love the mint and mustard too. I like the tinsel version.
I really enjoyed this colour combo, it felt very retro!