Got stencils? Then grab them out, and try these fun and easy techniques with me, I dare ya!
But first, I wanted to let you know that this is part of my Take 2 Series with Altenew and I’m so excited that you are joining me for another video today.
Would you like to see today’s cards?

And you can see the video below or watch it HD at YouTube.
I use affiliate links, this means that if you click on a product that is linked to an affiliate shop then I will receive a small portion of the sale at no extra cost to you).
This is a great way to support my channel as well as the shops that we love 🥰!
Let’s STEP-UP Those Stencils!
Stencils have become a popular way to ‘colour’. They are very easy to use, it’s a fast way to create and add colour quickly and they are affordable. And, if you are not a confident colourist with mediums such as pencils, paints and alcohol markers, they are a fantastic option for a polished result!
Fast forward to layering stencils, such as these beautiful Romantic Roses, these give us many opportunites to build on the original design. Let me show you how you can Step-It-Up with 2 very easy techniques! Are you ready?
Technique #1 – Miss a Layer
This is one of my favourite ways to quickly change up the final look of a layered stencil, and it’s simply to ‘miss a stencil layer’. Usually it is the very first or background layer that I miss, but depending on the image, you could certainly try changing this up.

BONUS IDEA: This technique can also be used with a layering stencil, which also has a co-ordinating stamped image.

For some reason, I always feel like this gives a image a more ‘modern’ look. So I kept the card very clean and simple and added a scripty sentiment.

Technique #2 – Pencil Shading
Don’t freak out… because, even if you are not a confident colorist, this EASY technique can be done by anyone!
Ink blend the layered image as you normally would. Then, look at where the shadows and base of the petals would be (it’s in those nooks and crannies, where the darker colours of ink were layed down). Choose a pencil that is slightly darker and draw a little colour into these corners. I like to try and make it a bit darker at the base of the petal and then use a lighter touch on the pencil and blend it out a little as I draw higher up the petal.

But, you can start small, and as your confidence grows, you might find that you will grab a couple of colours and even darkers ones… such as the ‘Jet Black’ that I used on the darker rose.

The best thing is that you can use any pencils that you have, I used watercolour pencils, but did not add any water, I like the way that they kind of give a rougher textured finish.

I hope you are inspired to create using a Layered Stencil with one of these techniques on your next project! If you do, don’t forget to share them on social media with me, I’d love to see what you make!
Crafty hugs,

Also, just in case you want to do a little shopping I’ve added the links below (some of them are affiliate links which means that I will receive a small portion of the sale at no extra cost to you). This is a great way to support me and the shops that we love 🥰!
Other Supplies:
Pencils: Altenew Woodless Watercolor Pencils – Coral Bliss | Rubellite | Ruby Red | Desert Night | Moss | Jet Black.
*Certain content that appears on this site comes from Amazon, this content is provided ‘as is’ and is subject to change or removal at any time.
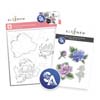 Romantic Roses ALT | SSS | 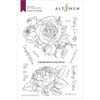 Fresh Cut Roses ALT |  Rainforest Leaves ALT | SSS |  Halftone Circles ALT |
 Watercolor Paper Set ALT |  Altenew Cardstock ALT | SSS |  Neenah Solar 110 AMZ | SSS |  Neenah Solar 80 AMZ | SSS |
 Acetate SSS |  Obsidian ALT | SSS |  Embossing Ink ALT | SSS |  Jade Dreams ALT | SSS |
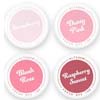 Blushberry Bliss ALT | SSS |  Watercolor Pencils ALT |  Ink Blending Tool ALT | SSS |  Mini Blending Brush Set ALT | SSS |
 Watercolor Brushes Round ALT | SSS |  Large Palette ALT | SSS |  Pure White ALT |  Powder Tool SSS |
 WOW Heat Tool SSS |  Perfect Picker ALT | SSS |  Fine Blade Scissors ALT | SSS |  Bone Folder Altenew ALT |
 Stampwheel 2.0 ALT | SSS |  Score Board ALT | SSS |  9X12 Ultra Sticky Mat: Grid ALT | SSS |  Platinum 6 ALT | SSS |
 9″ Fiskars Paper Trimmer AMZ | SSS |  Bearly Art Glue AMZ | SSS |  Glue Tape ALT | SSS |  Foam Tape ALT | SSS |
 Foam Tape NEW sizes! ALT | SSS |  Satin Masking Tape ALT |

I really must remind myself to skip a layer more often, Therese! I love the bright white highlight you maintain by doing so! Two gorgeous ways to pump up our stenciling!
=]
AND it’s quicker lol.
GORGEOUS!
I really love how you ink smooshed the background with the same colors as your flowers and leaves. Terrific effect!
I cannot grow anything because of my “black thumb” syndrome, but I sure do love stamped and stenciled ones! 🙂 I told my husband I was not going to buy any more products this month, but I cannot resist this beautiful rose bundle…. don’t tell him!
You me both with the ‘black thumb’, lucky we have our cards to ‘save’ us June lol. AND, your secret is safe with me, I won’t tell if you don’t…
Fun tips with spectacular results! Love them both so very much.
Thank you my friend x
I so appreciate these tips. My layers look flat.
So glad you liked them, hope you give this a try Jan!
You do have the niftiest ideas! Skip a layer.. I must remember that. Pretty cards, Therese!
Thank you so very much!
Yes I always forget about the skipping layer tip. I often find that it pops an image. Beautiful florals and the two cards are gorgeous.
I know right, it can really change the whole look of an image!
These are beautiful.
More great tips I must try to remember to put into practice!
Hope you enjoy this technique!
Yay such wonderful and creative tips Therese, I love what you come with so much. You have a real eye for detail. Stunning makes xx
So glad you like these, they are such a realistic style of die cut flower!
I should use pencils more. The added depth really adds to the card.
Yes, mine have been forgotten for a while and they were my FAVE for such a long time!