Do you have any pencils? If you said Yes, then why not try today’s techniques!
I use affiliate links, this means that if you click on a product that is linked to an affiliate shop then I will receive a small portion of the sale at no extra cost to you).
This is a great way to support me as well as the shops that we love 🥰!
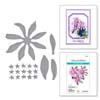
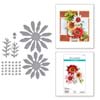
Today I am using some beautiful dimensional flowers from Spellbinders. And boy, do they have the WOW factor!
Would you like to see today’s cards?

To Post or Not To Post: The dimension in these cards makes them perfect for being ‘hand gifted’. But, if I wanted to send them I use a rigid mailer, (like these ones – I have a few sizes) it is like a thin cardboard box. I keep these on hand for those special cards that I don’t want to be crushed in the mail.
Idea #1 – Leafy Background
Many die cut flower sets include co-ordinating leaves… but, you don’t have to use them. Have you ever thought about adding your own leafy details to the background? These leaves were very easy to draw. I used a sketchy style and a light hand with the pencil, so I didn’t even use any blending solution.

BONUS IDEA: If drawing your own leaves scares the life out of you… don’t worry, you can get a similar look using stamped foliage in the background, check out your stamp sets instead, and then do some simple pencil colouring.

I nearly didn’t share this card, you see, I prefered it before blending the blue green over the background. Now, it’s kind of grown on me. I wish I had a photo of the ‘before’ to share so you could see, but I’d love to know if you like it with the blended background, or if you think it’s too much?

Idea #2 – Add Image Details
This gorgeous bloom totally takes centre stage. I added the colours on the petals using 2 tones of pink pencil and blended them using a little Gamsol and a blending stump.

You may notice that I cheated a little… can you see that the base flower layer does not have any pencil colouring on it? It would have barely been seen and I had to spend time shaping that funny little ladybug (she does need some work, I think that is why she is hiding behind the petal 😉).

I stepped it up with a tone on tone background and added multiple die cut leaves this time. And Yes, it will definitely need to be posted in a rigid mailer!

I hope you are inspired to use pencils to add details to your projects! If you do, don’t forget to share them on social media with me, I’d love to see what you make! Also let me know if you have a favourite card today in the comments below.
Sending crafty hugs your way today,

Also, just in case you want to do a little shopping I’ve added the links below (some of them are affiliate links which means that I get a small commission at no extra cost to you). This is a great way to support me and the shops that we love 🥰!
Other Supplies:
Cardstock: Ballet Slipper | Sweet Pea | Coral Berry | Honeycomb | Sprout | Olive | Espresso | Dark Chocolate.
Artist Marker: C013
Prismacolor Pencils: Marine Green | Sap Green Light | Aritchoke | Carmine Red | Blush Pink.
Altenew Ink: Puffy Heart | Purple Wine | Silver Sage | Dew Drops.
*Certain content that appears on this site comes from Amazon, this content is provided ‘as is’ and is subject to change or removal at any time.
OR Shop at Spellbinders UK HERE
 Lavender Mountain Daisy SSS | SB |  Painted Daisy and Ladybugs SSS | SB |  Sweeping Celebration Sentiments SSS | SB |  Stylish Oval Hello You Floral SSS | SB |
 All the Sentiments SSS | SB |  Floral Celebration Plate SSS | SB |  Foam Sheets AMZ | SB |  Concord & 9th – Cardstock SSS |
 Nocturne SSS |  Ink Blending Tool ALT | SSS |  Prismacolor Pencils AMZ | SSS |  Antique Gold Spray ALT | SSS |
 Gel Pen ALT | SSS |  Scissors AMZ | SSS |  Tweezers ALT | SSS |  Score Board ALT | SSS |
 Platinum 6 ALT | SSS |  BetterPress SB ALT | SSS | SB |  Best Ever Craft Tape SSS | SB |  Glue Tape ALT | SSS |
 Thin Foam Dots OTH |  Bearly Art Glue AMZ | SSS |

Oh my, these are stunning!
Yes I’ve already added these to an order from spellbinders.
Seriously can’t thank you enough for the push lol.
Honestly I do love the blended first card but it would have been nice to see what it looked like without. Great idea to hand draw the foliage.
It really changed the look dramatically, maybe I will recreate this to show you what I mean? And I am happy you like these flowers, they are a little more realistic which is so nice for us flower girls!
The green background is a nice contrast to the flowers on a lovely card. I have the background and sentiment press plates so keep the inspiration coming!
Yay, will do! Thank you Christine!
Therese, both cards, your hand-drawn leaves, and every petal of your ‘shaped’ flowers are gorgeous! I quite like the blended blue over your green background – very pretty and it adds a certain dreaminess to your background.
=]
Thank you Michele, the leaves were fun to draw (and easy) and a great way to stretch the look of any florals that we may or may not have 😉
I like the blended background- it makes the florals POP and definitely make them the center of attention.
I have a few sets of Susan’s Garden flowers, but have been too intimidated to try them. It would be interesting to know how long it took you to create your cards. Pencils take more time than I would like to invest, so I was going to use my new OLO markers.
You have given me some inspiration to break out my sets, mix and match and give them a test run. Thank you!
How wonderful June, I do hope you get to use your garden flowers, they really are beautiful. To be honest they were fairly easy to make, the pencil drawn leaves were very quick and the smaller pink daisies I ink blended the centres which only took seconds. It was the layers of colours on the larger flower that took a little longer… alcohol markers or ink blending would be much quicker, but I wanted the look of pencils and it was fun to play with them again (as it’s been a hot minute). Have fun creating my friend x
Well, how dreamy are these! While they’re both simply fabulous, as are your hand drawn leaves, I’m especially love the pretty flowers on your first one!
Thanks so much!
Gorgeous, love how the details really pop with those pencils.
Thanks so much Lisa!