
Are you bored with Heat Embossing? Well, get your ‘Guns’ out and let’s heat things up!
Heat embossing is a fantastic way to add shine, texture, and dimension to your handmade cards. While the basic technique involves stamping with embossing ink, adding embossing powder, and heating it to create a raised effect, there are plenty of advanced techniques that take your embossing to the next level!
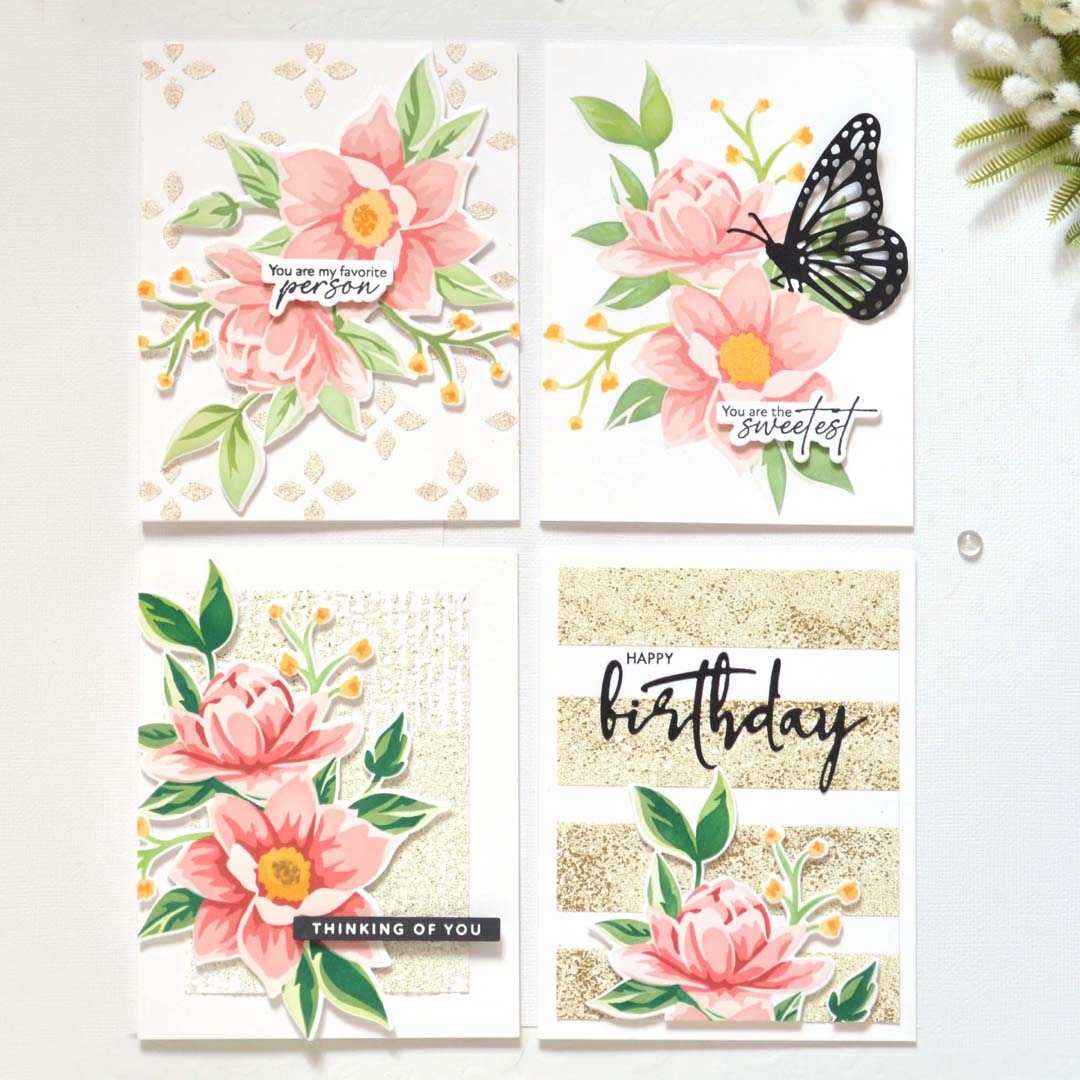
Today I share 4 ways creative ways to elevate your heat embossing… as well as a fun BONUS technique!
But first, would you like to see the cards?
You can jump straight into the video here or watch it in HD on YouTube HERE. Scroll for more pics and details.
I use affiliate links, this means that if you click on a product that is linked to an affiliate shop then I will receive a small portion of the sale at no extra cost to you).
This is a great way to support me as well as the shops that we love 🥰!
#HEATEMBOSSING
If you are new to heat embossing? I would recommend that you read this and watch this video for more beginner friendly tips and techniques.
And Full disclosure: Auzz Trinklets N Crafts kindly sent me this heat tool to try, with no expectations, I do not receive any affiliate payments from them, and as always, all opinions are my own.
Heat Emboss Like A HERO!
- Use a piece of cardstock larger than you need. This will make heat embossing easier, as you will be able to hold onto the cardstock as it is being embossed (no burned fingers).
- Or, you can use a clothes peg, or a pair of tweezers to hold your design as you heat.
- Always prep cardstock with a powder tool if possible this will make it easier to ‘clean up’ the stray flecks of embossing powder and keep the design neater. And powder residue can be wiped away with a dry cloth after the heat embossed image has cooled.
- Use a good embossing ink, and there are many to choose from. These inks are clear and remain ‘tacky’ for longer, this gives you plenty of time to add the embossing powders to the ink before heating.
It is also possible to emboss with Pigment Inks but typically most Dye Inks will dry too fast to be suitable. - Once the powder is added there is no rush to heat emboss, in fact, this is the best time to clean up any stray powder from your project. You can do this with a clean, soft small paint brush or a craft knife works well too. Be careful not to touch the image that is to be embossed.
- Preheat the tool prior to pointing it at the image. If you have used regular or fine embossing powder, it is typically okay to be heated directly from the front. Hold the heat tool, approximately 2″ or 5cm from the image and move it slowly as soon as you see them embossing powder melting.
- PRO TIP: Embossing powder can be ‘overmelted’ so be careful not to hold the tool in one place for too long.
- If you have a dual speed tool, the high setting is the one that you will typically use for most projects. The low heat is fabulous for heat setting inks, drying watercoloured images and even some embossing powders.
- If you are using a textured or glittery embossing powder it is best to start melting the powders by holding the tool ‘behind’ the project. And once the powder has started to melt the heat can be brought to the front of the project to finish it off (this helps to prevent larger grains and glitter from being blown away by the tool).
- Practice! Getting a feel for your heat tool by using different images, backgrounds, embossing powders and you will soon work out what is best for you.
Technique #1 – 3D Embossing Folder
Dry embossing and heat embossing is a match made in heaven. I started here because this is the easiest of today’s ideas.
Begin by dry embossing a piece of cardstock, with a 3D embossing folder. Then, swipe embossing ink over the raised portions of the cardstock, pour over the embossing powder, tap away the excess and heat until melted.

Step-it-Up?
- Add as little or as much embossing ink as you like, or you could even try using a pigment ink instead (A light touch will mean less heat embossed colour).
- Why not ‘swipe’ the debossed side instead of the embossed for a completely new look.
- You can also dry emboss a piece of coloured cardstock instead of basic white.
- Did you know that you can add multiple colours of embossing powder? Simply cover small sections with each colour and tap it off until the whole image is covered (Be aware that the tapped off powders may mix so are not always suitable to go back into the original jars).
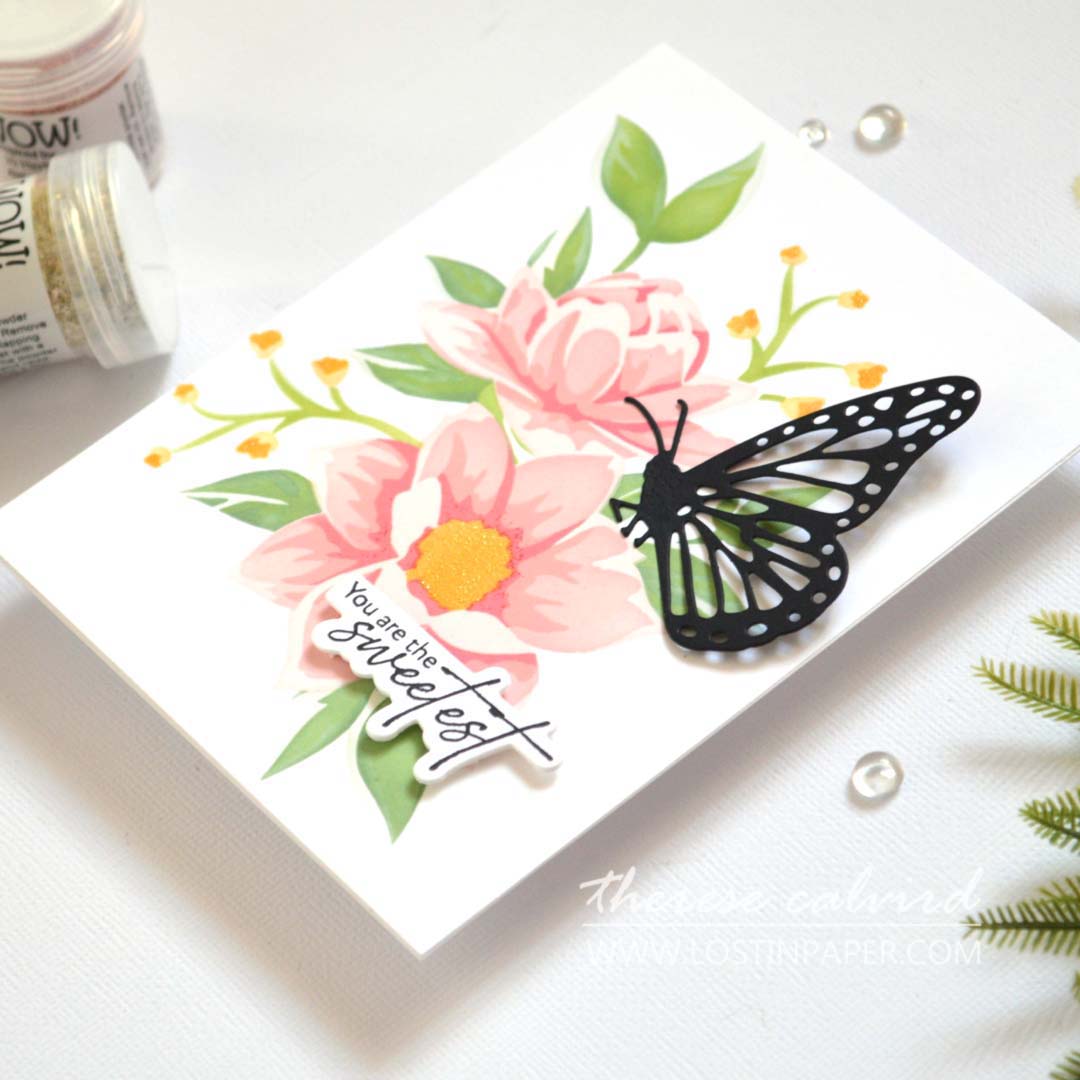
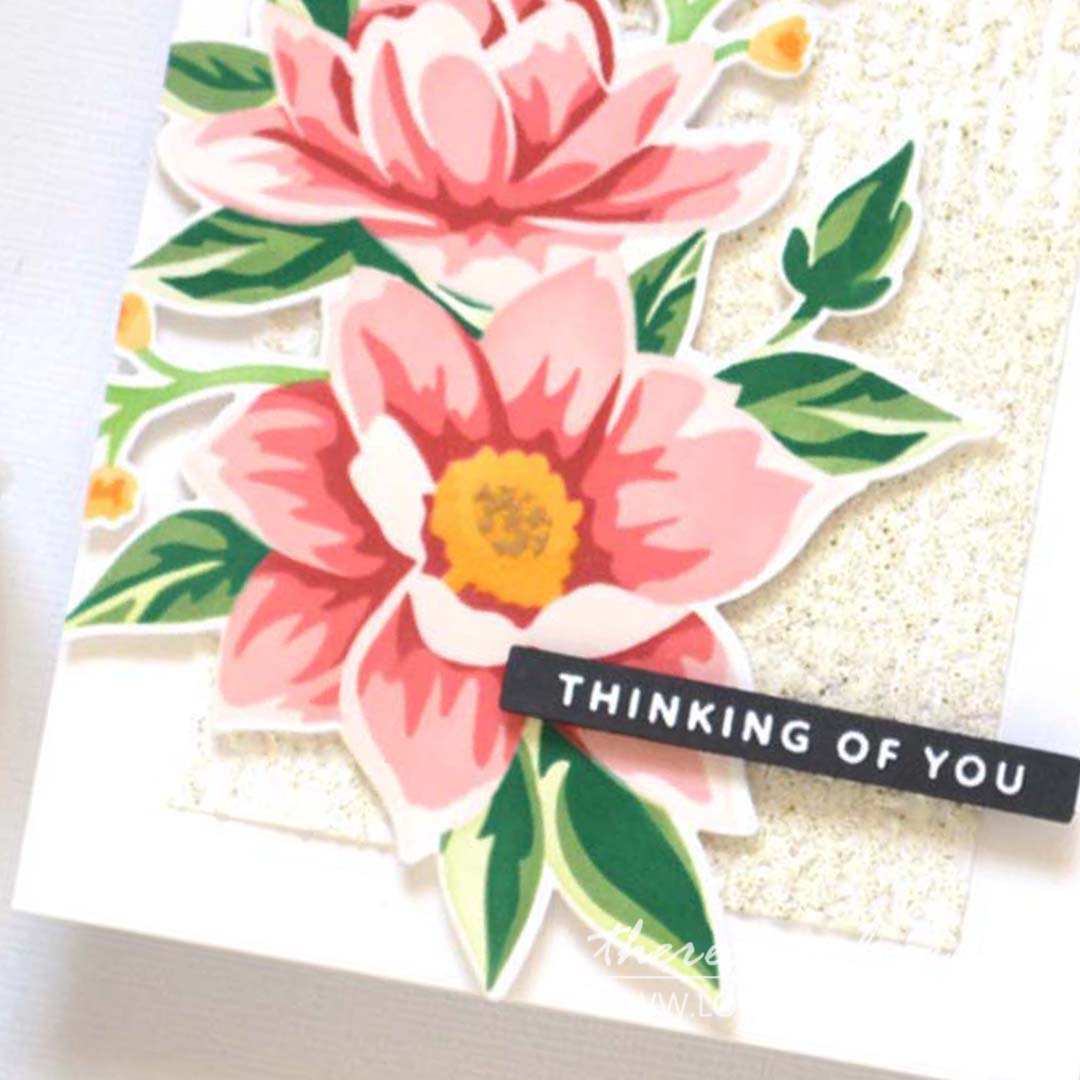
Technique #2 – Stencil and Textures
Have you ever tried embossing through a stencil?
Simply add embossing ink directly through a stencil onto cardstock, this can be done with a dauber tool. Lift the stencil away and add the embossing powder, and tap away any excess. Hit it with a heat tool and watch the magic… except this image has an extra step.
This embossing powder was combined with a ‘Texture’ powder to give a little extra, mmm… texture, I suppose. You can also add other fun stuff like, Glisten or Sheen!
PRO TIP: Prep cardstock with a powder tool to make it easier to clean up any stray flecks of embossing powder.
Step-it-Up?
- You can apply the ink through a stencil by tapping the ink pad directly onto the stencil and through to the cardstock. But, for a different look, use a sponge dauber tool instead, this will give more accurate and even results.
- This technique can look amazing over a whole background or as a highlight for a layered image such as in today’s example.
- Why not step-it-up with some textured embossing powders, there are many to choose from or you could make you own using these fun powders and mix them with what you have in your stash.

There is some secret sauce in these next 2 techniques, because, they do not need any Embossing Ink….
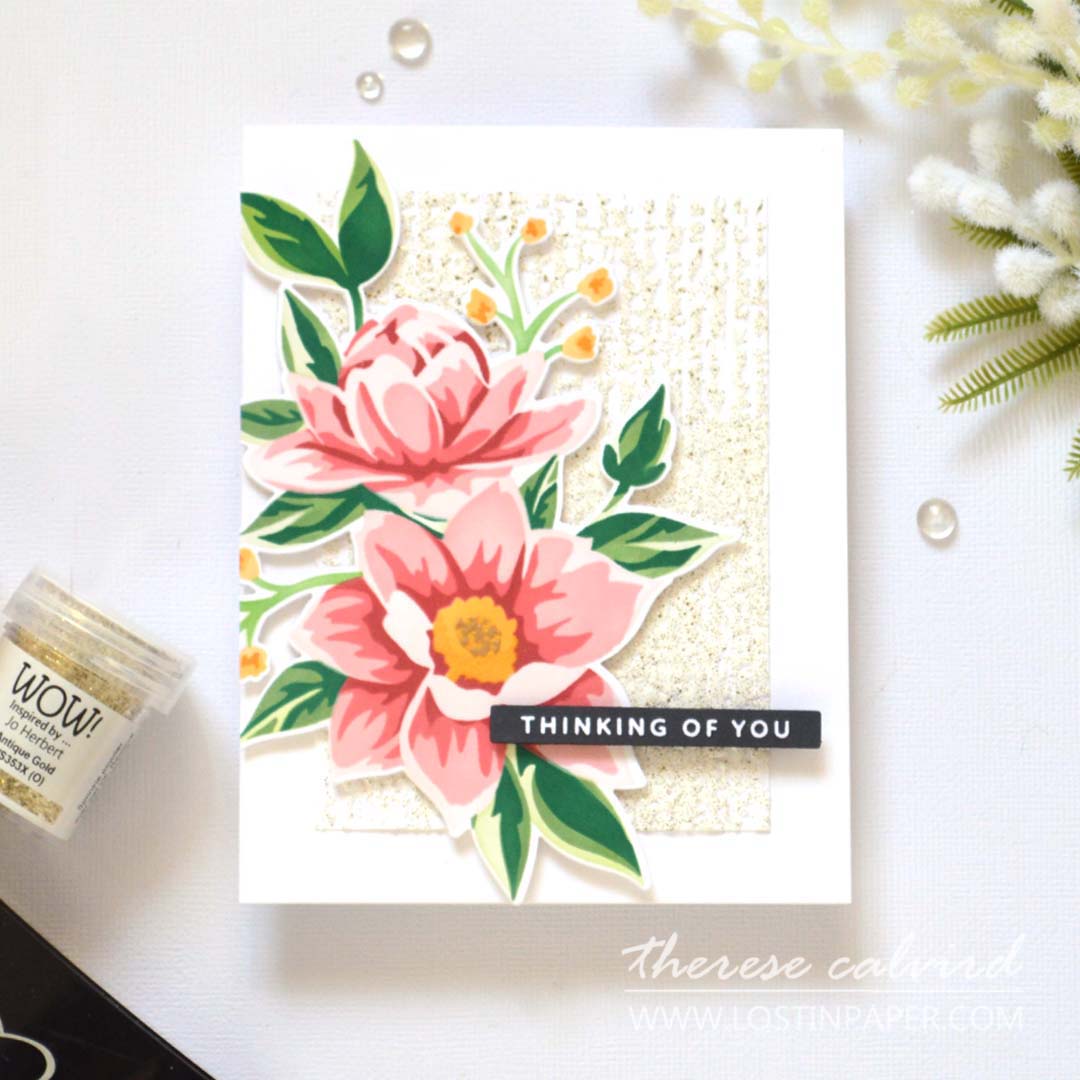
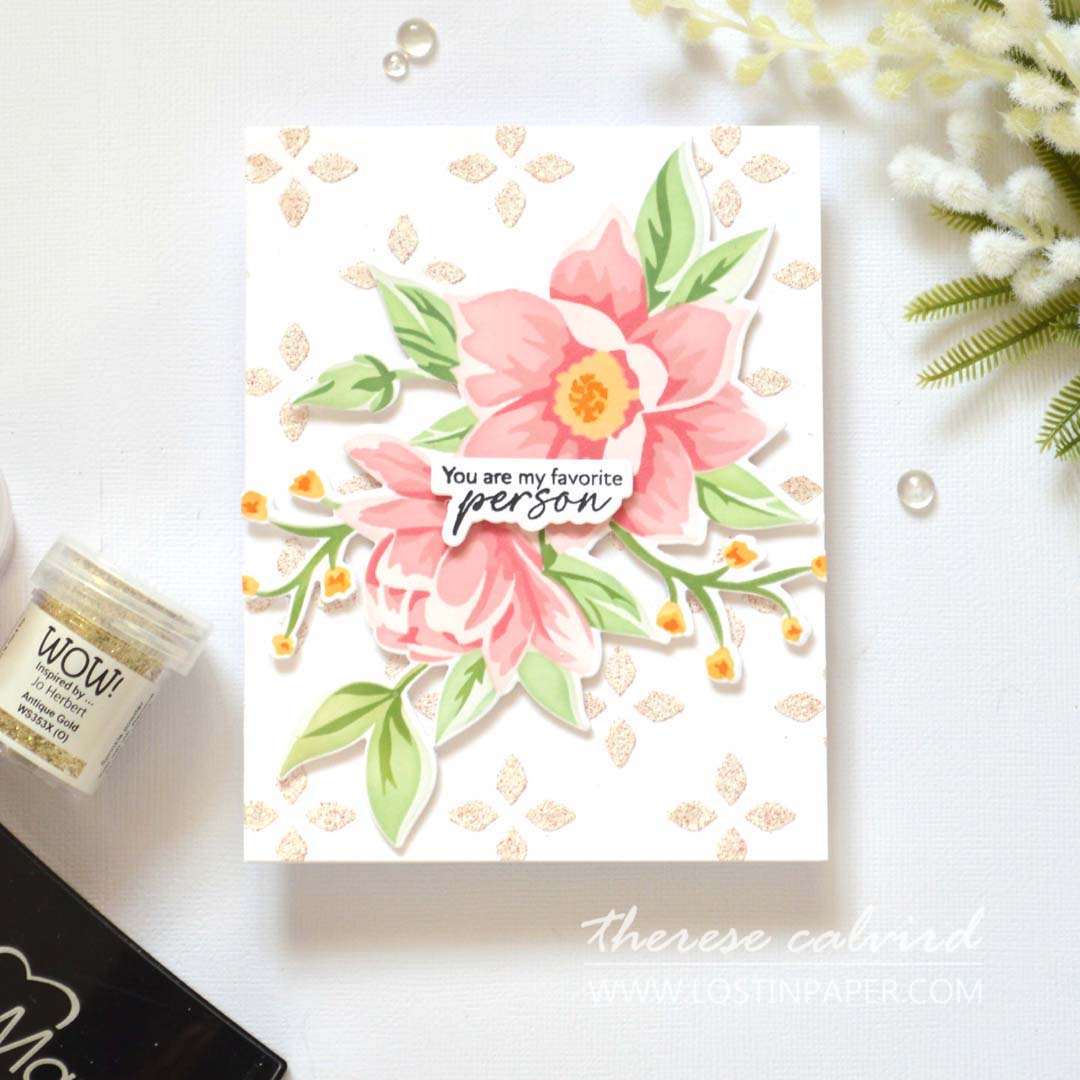
Technique #3 – Embossing Paste
Not just heat embossing, but some serious dimension as well! Simply use a palette knife to swipe embossing paste through a stencil, remove the stencil and add a sprinkle of embossing powder, then set it with a heat tool.
The embossing powder will stick to the wet paste and the heat tool with activate the powder and heat set the paste at the same time. I heat set this on the ‘low’ setting as I didn’t want the wet paste to ‘bubble’, but if you love a little extra drama, this can look amazing too.
Step-it-Up?
- Embossing paste comes in a ton of different colours and types, as do, embossing powders, so imagine the endless possiblities that you can have fun with here!
- And this is not just for background stencils, you could also use a layering stencil for this technique. How about adding some extra glittery dimension to the centre of this flower.
- In fact, you don’t even need to use a stencil, a few swipes of a palette knife on some cardstock, with a sprinkle of embossing powder heat set over top would create a fantastic abstract background and a great place to start a card design.
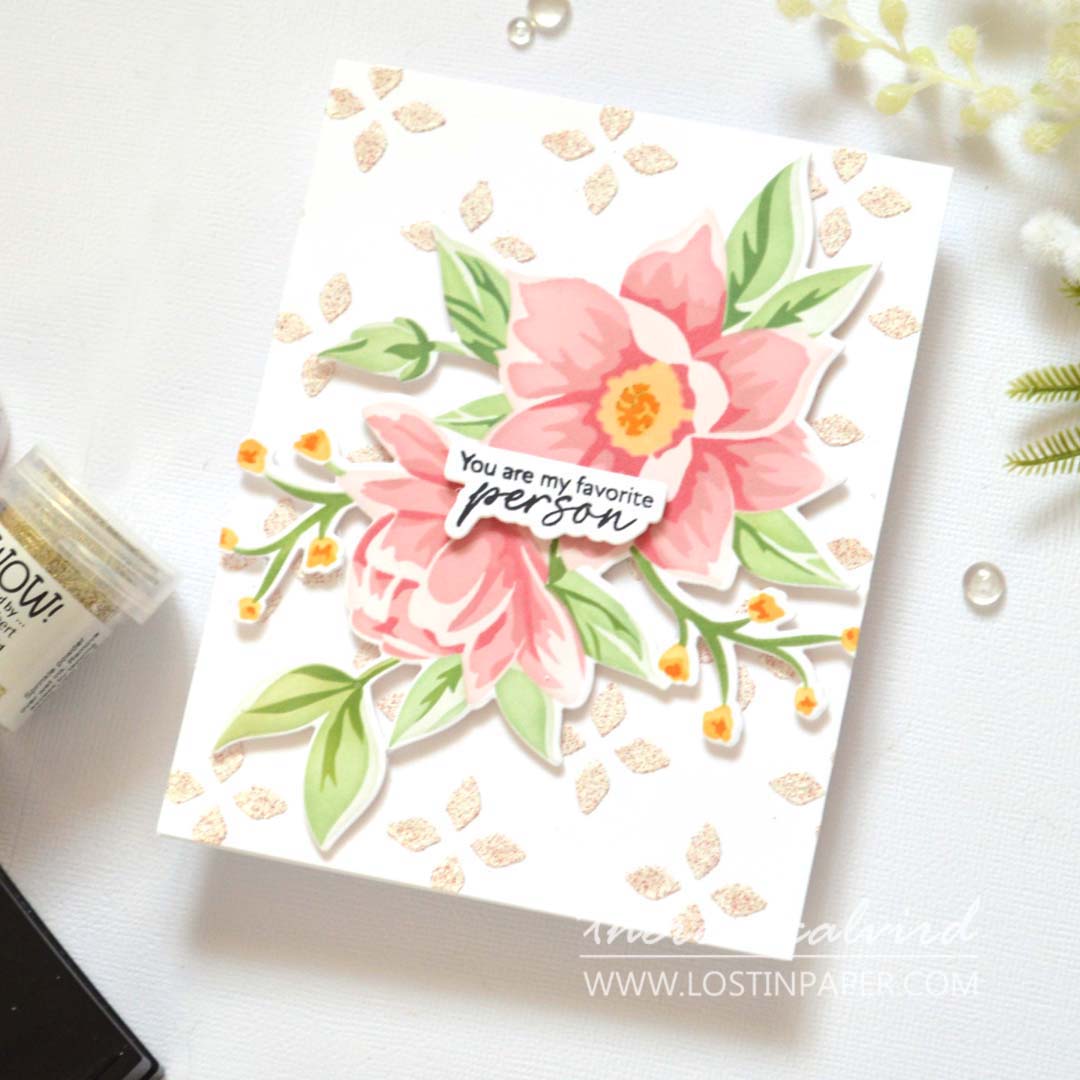
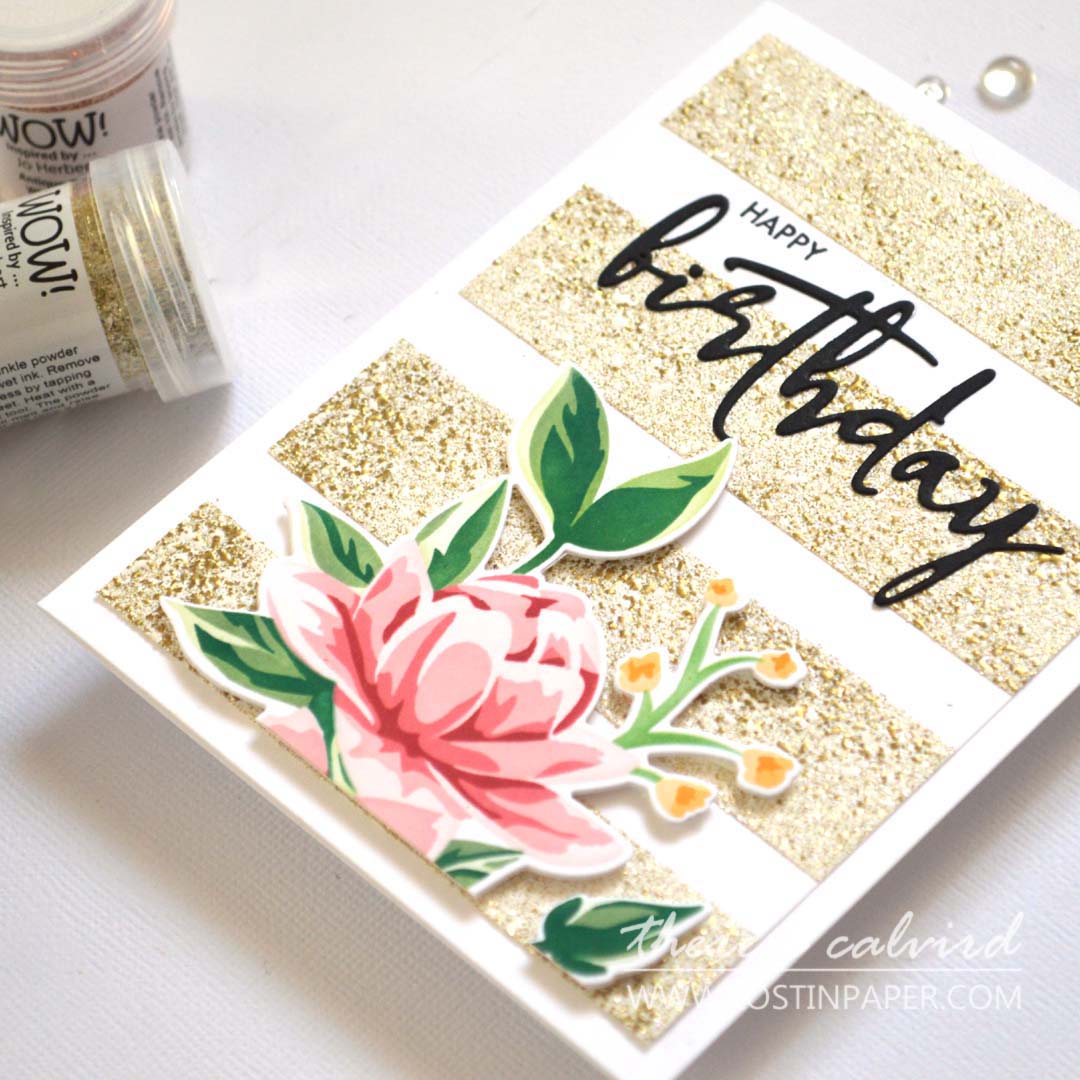
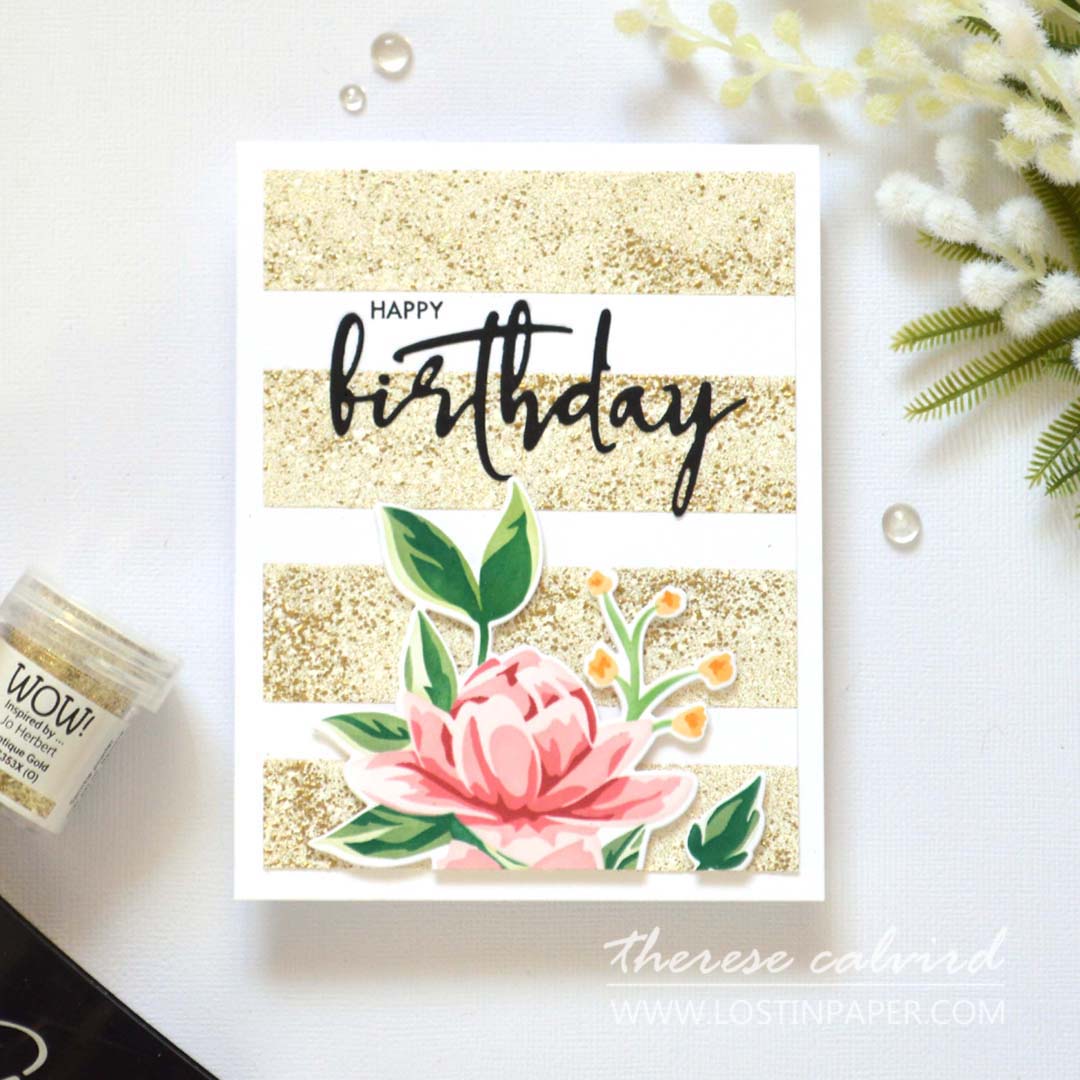
Technique #4 – Double-Sided Tape
No embossing ink in sight again! This time, add double-sided tape to cardstock in a pattern that will suit your project. Remove the release paper, sprinkle the embossing powder over top and tap away the excess. Then heat set it being careful not to ‘overheat’, as the tape may lift from the cardstock.
Step-it-Up?
- Create a multiple coloured stripe background using different colours of embossing powder on each.
- Use different widths of tape to give a fun eclectic look. You could even angle tapes and criss-cross them.
- But, why stop at straight lines… an A4 sheet of double-sided tape can be die-cut into shapes and images, why not try adding embossing powder to an image instead?
- This is an easy way to use chunky, textured and glitter embossing powders, so why not create a full sheet of embossed texture and die cut a sentiment or background from this instead?
BONUS TECHNIQUE!
Did you know that it is possible to ‘double’ heat emboss? Why not take a second peek at the first card and in particular the centre of the flower. It has 2 layers of gold heat embossing!
Because this is a layering stencil, I was able to add the embossing ink to the centre of the flower using a sponge dauber. I heat embossed a light gold colour of embossing powder and let it fully cool. Then I held the next stencil over top of the flower centre and daubed some more embossing ink (being careful not to slip with the stencil and smudge the ink). I added a darker gold embossing powder and heat set this. Using a darker colour makes it easier to see the 2 layers of embossing, but be carerful not to overheat it as the colours will completely mix together instead.
I share my thoughts and demonstrate products so that you can see an item/tool in action. In the hope, that this could help you make a more informed decision about whether it is something that may be of use to you in your crafty stash, because, we all have different styles and needs. I am happy to answer any questions you may have.
Let me know if the comments below if you have a favourite card today and if you are going to try any of these techniques. If you do, don’t forget to tag me on Social Media so I can see your amazing creations!
Sending crafty hugs your way!

PS. For the record, I am never ever actually bored with heat embossing, it’s always a joy to watch it melt 😉!
SUPPLIES:
Cardstock: Altenew – Jet Black Frost.
Embossing Powder: Wow – Gold Pearl Super Fine
Ink: Altenew – Strawberry | Dusty Pink | Blush Rose | Raspberry Sunset | Silver Sage | Jade | Eucalyptus | Forest Fern | Reachy Glow | Golden Honeycomb | Amber Blaze |.
*Certain content that appears on this site comes from Amazon, this content is provided ‘as is’ and is subject to change or removal at any time.
 Organic Linen 3D ALT | SSS |  Charming Delights Bundle ALT | SSS |  Wings & Petals ALT | SSS |  Garden Whispers ALT | SSS |
 Patterned Petals ALT | SSS |  Birthday Bouquet SSS | OTH |  Birthday & Wish Die OTH |  Wow Changers Lightening Effects SSS | AUZZ |
") Heat Tool (Aust) AUZZ | Frosted Jewels AUZZ |  Shimmer Relief Paste – Pearl ALT | SSS | Neenah Solar 110 AMZ | SSS |
Neenah Solar 80 AMZ | SSS |  Versamark Ink SSS |  Nocturne SSS |  Frosted Foliage ALT | SSS |
 Sun-Kissed Delights ALT | SSS |  Blushberry Bliss ALT | SSS |  Ink Blending Tool ALT | SSS |  Mini Blending Brush Set ALT | SSS |
 Palette Knife Set ALT |  Powder Tool SSS |  Antique Gold ALT |  Fine Blade Scissors ALT | SSS |
 Tweezers ALT | SSS |  Blending Tool SSS |  Perfect Picker ALT | SSS |  Score Board ALT | SSS |
 Stampwheel ALT | SSS |  Platinum 6 ALT | SSS |  Scor Tape 1″ SSS |  Glue Tape ALT | SSS |
 Foam Tape NEW sizes! ALT | SSS | Bearly Art Glue AMZ | SSS |  Satin Masking Tape ALT |
Beautiful cards and great ideas.
Thank you Christine
Hi Therese
Firstly I’m glad an additional 24 hours to prepare for the cyclone. Hoping yourself, husband, dog, cats and other animals are safe inside.
Love the four cards today and it’s very hard to pick a favourite but if push came to shove, one and four. Great techniques too.
As I said over on YouTube I’ve taken to making a grab holder to the background panels to make both embossing easier to handle and less messy on the hands. Cheers
I agree, I’m hopeful that means that it’s changed its mind and has decided to do another U turn lol. We can live in hope right? Thanks for your sweet visit Lisa x
Such lovely ideas! Love them all.
Thank you Lisa, so glad you enjoyed these ideas!
YOU are the BOSS of embossing, my friend!! Such incredible tricks and beautiful results!
Now, I’m off to check that you are safe! x
M
Thank you my sweet!
I’ll check the video later. I just wanted to tell you I sent a prayer that you are safe and any damage is minimal.
Thank you Bobby, all good here, but it was a long journey. Hugs Tx
I loved all 4 cards and your video! I really learned a lot , as usual!! I can’t wait to try all of these techniques!! Thank you so very much for all the time and effort you put into your projects and the video!!
So glad you enjoyed this and found it helpful, you have made my day!
Beautiful cards, Therese! Thanks so much for all of you clever ideas. I hope and pray the storm passes you by!
Yay! Glad to say Alfred has moved on, but it was slower than expected lol. Thank you x
Love these Therese! Those embossing powders are brilliant! Geat to be able to mix!! Good luck with Alfred!! Hope he’s kind my friend. x
Hope you are safe and everything is okay for you too my friend x
Great ideas, Therese, and I love how the embossing looks on every single card.
You are the sweetest, thank you Bobby!
Another Fabulous post Therese, you have such clever ideas, tips and wealth of knowledge. Stunning makes too xx hugs xx
So glad you liked these, they were such fun to make!