
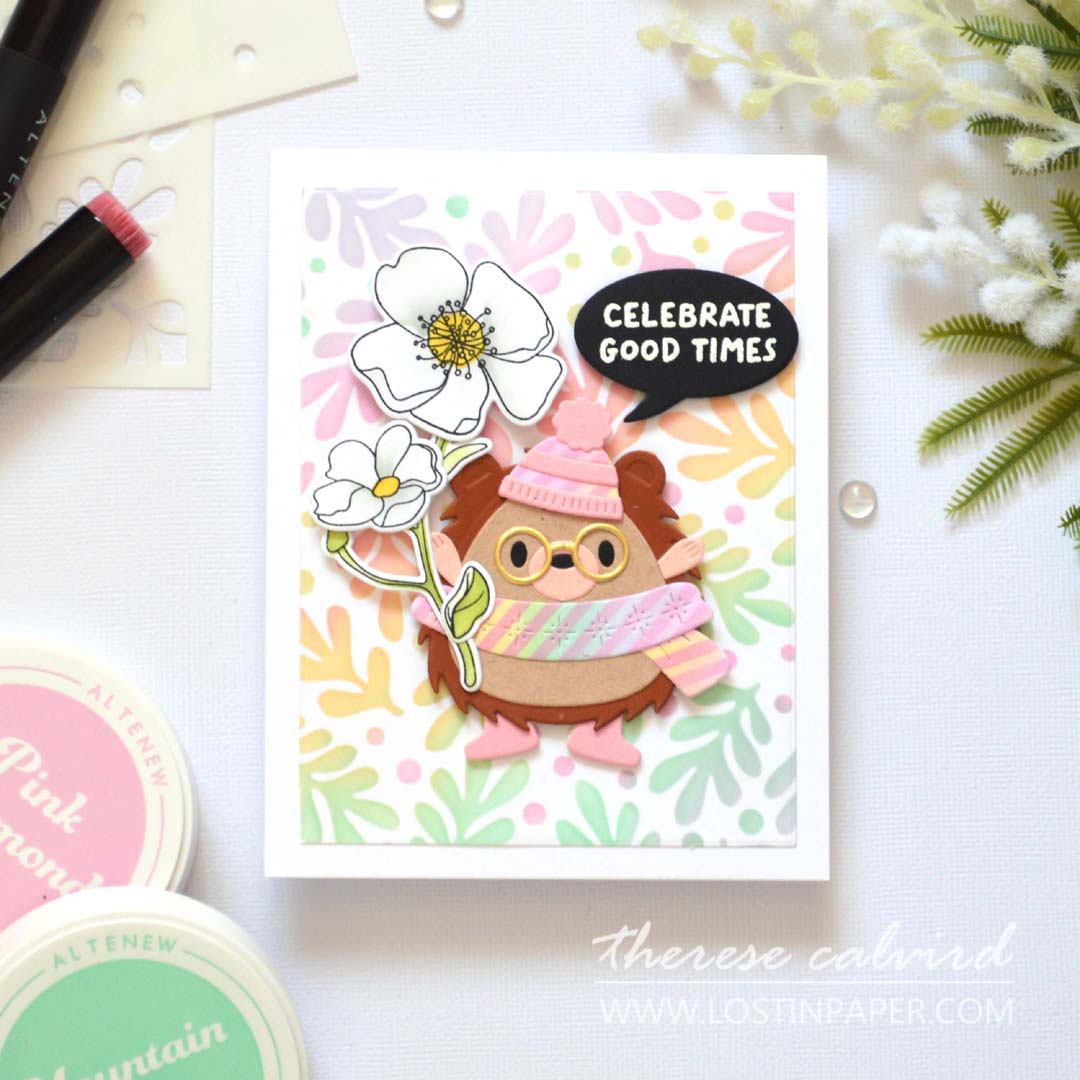
Ever seen a hedgehog get a rainbow makeover? 🌈 Let’s make one together!
Are you ready to add some stencil techniques to your repitoire? This one card has 3 different stencil techniques… can you see them here?
Watch me make this card live, step by step! In the video replay or on YouTube HERE (Scroll down for more pics and details).
I use affiliate links, which means that if you click on a product link, I may receive a small commission at no extra cost to you. It’s a great way to support me and the shops we love 🥰!
#STENCILS
Why Stencils?
Stencils are one of the most versatile tools in your cardmaking stash. They let you:
- Add color, patterns, and texture in a snap
- Layer shapes for depth and dimension
- Quickly step up a basic card without complicated tools
- Stretch supplies – like using Christmas stencils for a non-holiday card!
Are You Ready to Rainbow a Hedgehog?
Technique #1: Ombre / Rainbow Background
A Background Worth Blending
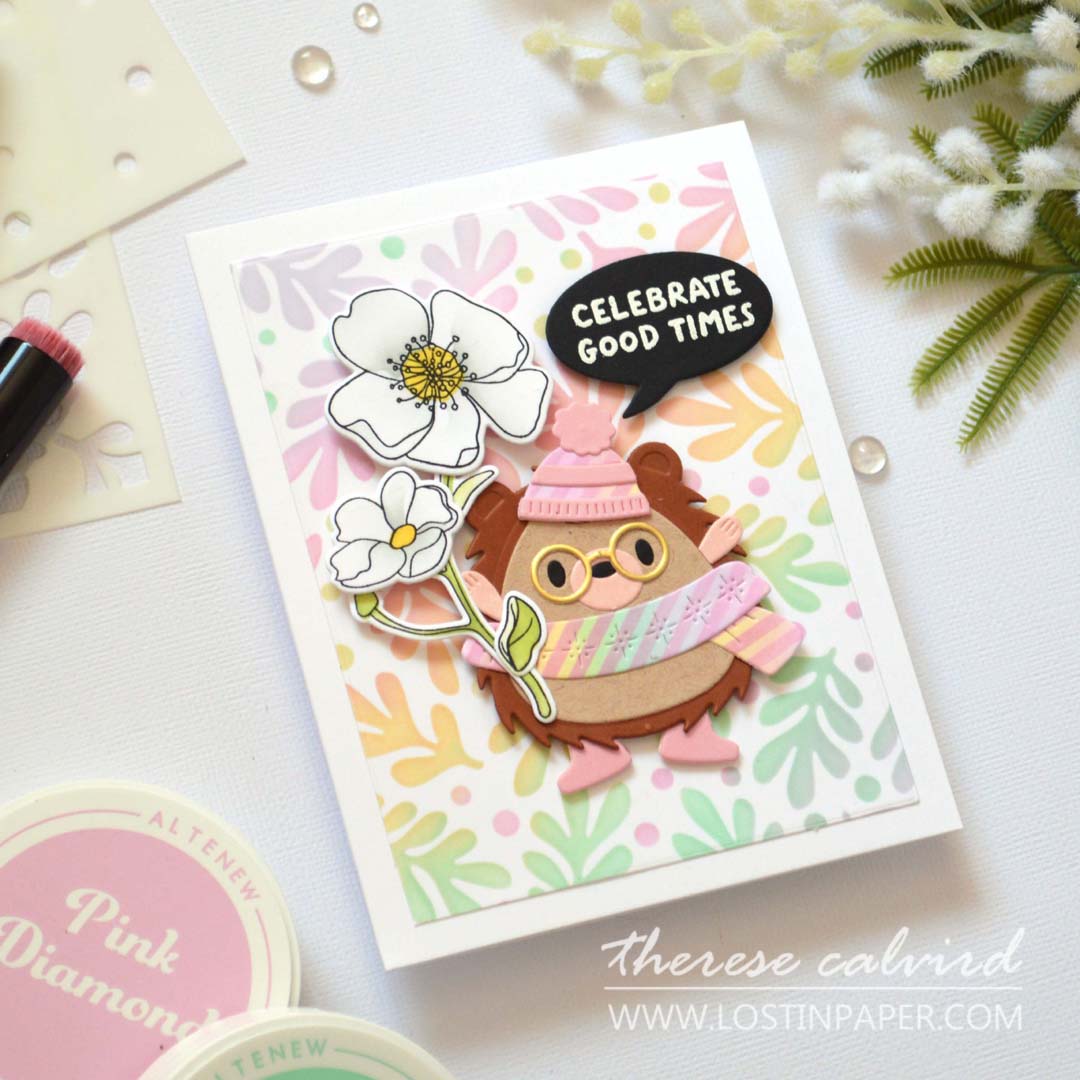
Using a stencil for the background gives your card instant character. For this hedgehog card, I went for a soft ombre rainbow effect – perfect for a whimsical vibe.
Tips:
- Blend colors that mix nicely and experiment with overlapping shades to create new tones.
- Don’t worry if it’s not perfectly uniform – the charm is in the hand-crafted look, and as the inks dry they usually smooth out.
- Covering a large area like a background is faster and easier with a large blending tool.

Technique #2: Stamped Flowers with Coordinating Stencils
Blooming with Color
Next, we added stamped flowers and brought them to life with coordinating stencils for our rainbow hedgehog card, creating perfect shading and dimension without fussing over coloring every petal.
Tips:
- To make white flowers, use a light touch with grey ink. Be mindful of how much ink you apply—it often looks lighter than it really is until you lift the stencil for the big reveal!
- Remember, inks will dry lighter than they appear on the cardstock.
- If you’re not a confident colorist, coordinating stencils are an easy way to achieve a polished, professional-looking finish.
- Layer stenciled leaves or filler shapes behind the flowers to tie the composition together.
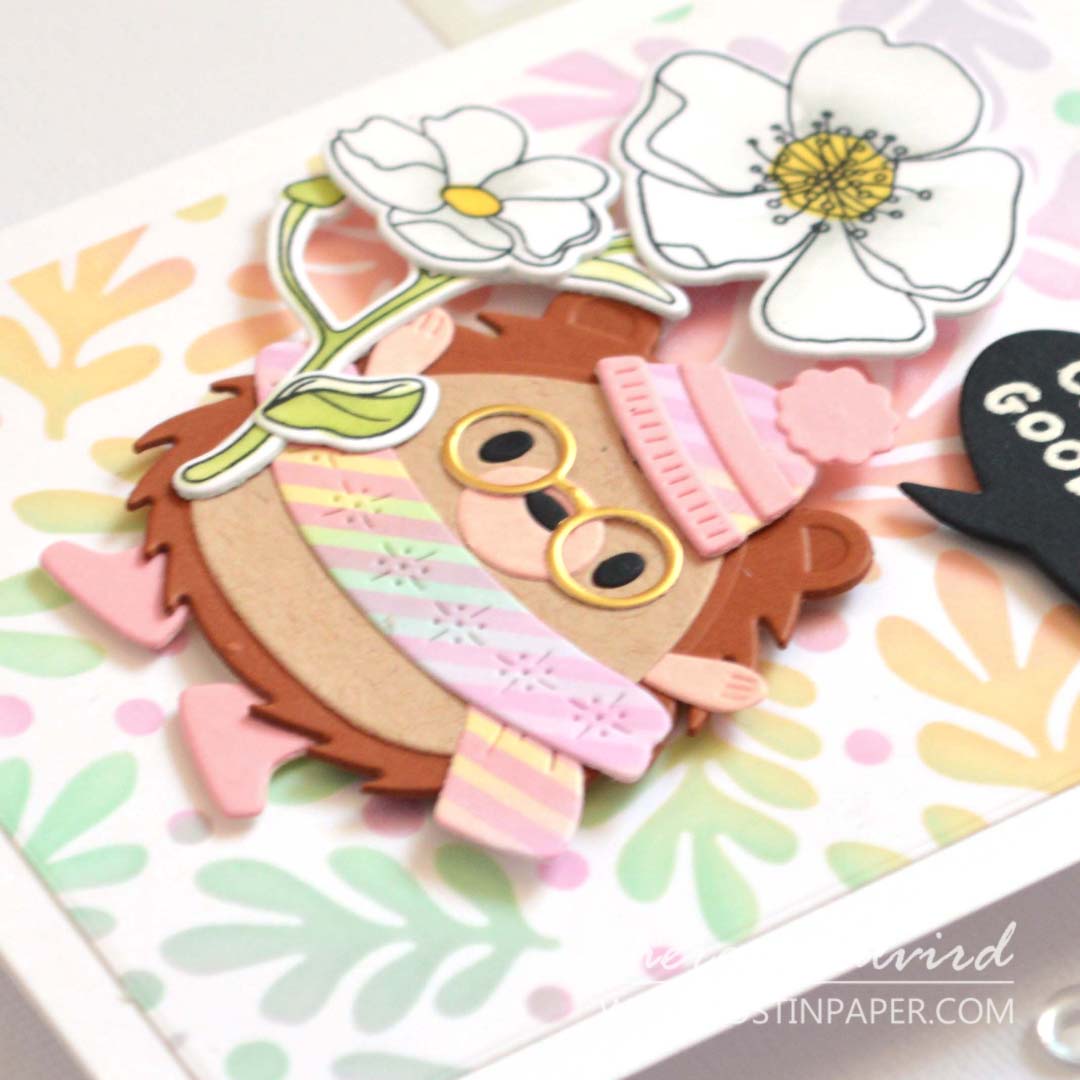
Technique #3: Hedgehog’s Patterned Scarf
Dressed for the Occasion
Finally, we added a patterned scarf to our hedgehog with a small stencil. This little detail gives personality and fun without taking forever.
Tips:
- Small stencils are perfect for tiny details like scarves, hats, or background patterns.
- Mix and match patterns and colors to coordinate with the card’s palette.
- Even Christmas-themed patterns can be used for non-holiday designs – stretch your supplies creatively!
- Try different blending tools or inks for subtle texture variation.
How I’d Step Up This Card
Even though this rainbow hedgehog card is whimsical and fun, there are a few small tweaks I might make to take it to the next level:
- Ground the image: Both of the above adjustments give the hedgehog a sense of space and balance on the card, making it feel more polished while still keeping the whimsical vibe.
- Tone down the rainbow: A lot of color is fun, but adding a circle background behind the hedgehog – maybe even a piece of vellum – would help isolate the focal point and give the hedgehog somewhere to “stand” visually.
- Add contrast to the scarf: The stripes on the hedgehog’s scarf could be embossed in white or ink blended in black. This would tie in nicely with the black from the speech bubble sentiment and add a bit of punch to the design.
Now it’s Time for YOU to Get Crafty!
And there it is – a whimsical rainbow hedgehog stencil card brought to life with three fun techniques! I hope these tips inspire you to try layering stencils, experimenting with color, and stretching your supplies in creative ways – even repurposing those holiday stamps and stencils for non-holiday designs.
Share your creations and link me if you do – I’d love to see what you make! And remember, there’s more stencil inspiration on its way.
Don’t forget to watch the live video tutorial for a step-by-step guide – you can find it embedded above or over on YouTube.
Happy stenciling, and as always, crafty hugs!
Happy Papercrafting,

Special thanks to my crafty assistant, Chad (aka ChatGPT), for helping me stay on track with my Gemini brain, grammar, and spelling… well, all the things! 😄
SUPPLIES:
Stencils: Altenew – Buffalo Plaid (retired)
Inks: Altenew – Pink Diamond | Buttercream | Mountain Mist | Soft Lilac | Warm Sunshine | Limestone | Aloe Vera | Matcha Tea.
Cardstock: Concord & 9th – Pink Lemonade | Wheat | Nectar – Altenew – Jet Black | Milk Chocolate | Brushed Gold.
*Certain content that appears on this site comes from Amazon, this content is provided ‘as is’ and is subject to change or removal at any time. As an Amazon Associate I earn from qualifying purchases.
 Merry Mix Stencils SSS | OTH |  Hedge-Hugs SSS | SB UK | SB US |  Avian Allure SSS | OTH |  Avian Allure Die SSS | OTH |
 Avian Allure Stencil SSS | OTH |  Christmas Crackers Bundle SSS | OTH |  A2 Layers Die SSS |  Altenew Cardstock ALT | SSS |
 Concord & 9th – Cardstock SSS | OTH |  Neenah Solar 110 AMZ | SSS | Neenah Solar 80 AMZ | SSS |  Nocturne SSS |
 Shades of Purple ALT | SSS |  Cherry Blossom ALT | SSS |  Sea Shore ALT | SSS |  Summer Afternoon ALT | SSS |
 Large Blending Brush ALT | SSS |  Mini Blending Brush Set ALT | SSS |  Perfect Picker ALT | SSS |  Tweezers ALT | SSS |
 Perfect Align Tool OTH |  Bone Folder ALT |  Score Board ALT | SSS |  Sticky Grid Mat Ultra ALT | SSS | SB US |
 Mini MISTI SSS |  Platinum 6 ALT | SSS | SB UK | SB US | 9″ Fiskars Paper Trimmer AMZ |  Precision Glue Press AMZ | SSS |
Bearly Art Glue AMZ | SSS |  Glue Tape ALT | SSS |  Foam Tape NEW sizes! ALT | SSS |  Satin Masking Tape ALT |
3 Creative Focal Point Card Ideas with Embossed & Stenciled Backgrounds!
Such a cute hedgehog! Thanks for all the tips – here and on your other posts.
You might’ve guessed I’ve had a little catchup. Sorry I’ve been MIA. I haven’t commented on every post – I think I’ve seen them all though!! You know all your creations are amazing.
I’ve been taking a little blogging/social media break – not sure when I will post again, but you know I’ve been creating.
I know you never stop my friend, life is busy and creating definitely takes priority over blogging lol. Thanks for the love you left today!
Absolutely adorable!!!
Thank you Lisa x
A rainbow delight, Therese! SO cute with her gold rimmed glasses!
=]
Yay! It’s like rainbow has overtaken the card lol.
I too love the gold-rimmed glasses; they are so cute, and I love how your little hedgehog is wearing her woolly hat at such a jaunty angle. This would make a great illustration for a children’s book.
Marie
She is a cutie, and perfect for a children’s book I agree!
I just love her little glasses to bits! The soft colors you used behind her are perfect. Darling card, Therese!
thank you Lisa, there is definitely a LOT of rainbow happening here lol.