
What if your holiday cards could be made with just one simple supply?
Welcome back to this year’s Same But Different Christmas Series (SBDC)! Today I’m highlighting one of the most affordable and versatile tools in our crafty stash – stencils. I’ll be sharing 10 easy stencil techniques to create stunning Christmas cards, plus a bonus sparkly idea at the end. My goal is for you to peek into your stash, grab those stencils (I know you’ve got a few! 😉), and be inspired to try some fresh holiday designs.
If you’re new to the series or want to catch up, check out this year’s playlist here. Last time, we explored How to Make DIY Interactive Cards, and now it’s all about making the most of stencils!
Want more festive inspiration? Check out my 2024 playlist right HERE!
Ready to take a peek at today’s cards?
I use affiliate links, which means that if you click on a product link, I’ll receive a small portion of the sale at no extra cost to you. It’s a great way to support me and the shops we love 🥰!
You can jump straight into the video here or watch it in HD on YouTube HERE. Scroll for more pics and details.
#STENCILS
Stencils are one of those supplies that often get overlooked, but they are honestly one of the most versatile tools you can own. They’re affordable, take up hardly any space, and can be used in so many ways – from soft backgrounds to full-on focal images. And the best part? You don’t need fancy equipment to make them work, just some ink, paste, or a little imagination.
With your die cuts, the possibilities are endless! Here are some fun ideas you can try:
10 Easy Stencil Techniques You’ll See Today
- Simple Ink Blended Background
- Tone on Tone Ink Blended Background
- Shaped Background (House Card)
- Multicoloured Patterned Background
- Emboss with a Stencil
- Shimmer Relief Paste Background
- DIY Patterned Paper for Design Elements (Presents)
- Negative Masking to Create a Focal Point
- Double Stenciling (Pattern over the Masked Section)
- Multi-Layered Image Stenciling (Purpose-Designed Stencils)
Bonus: Layered stencil with heat-embossed highlights for extra sparkle.
Now that you’ve seen the stencil techniques on the menu, let’s take a closer look at how I used each one to create today’s Christmas cards.
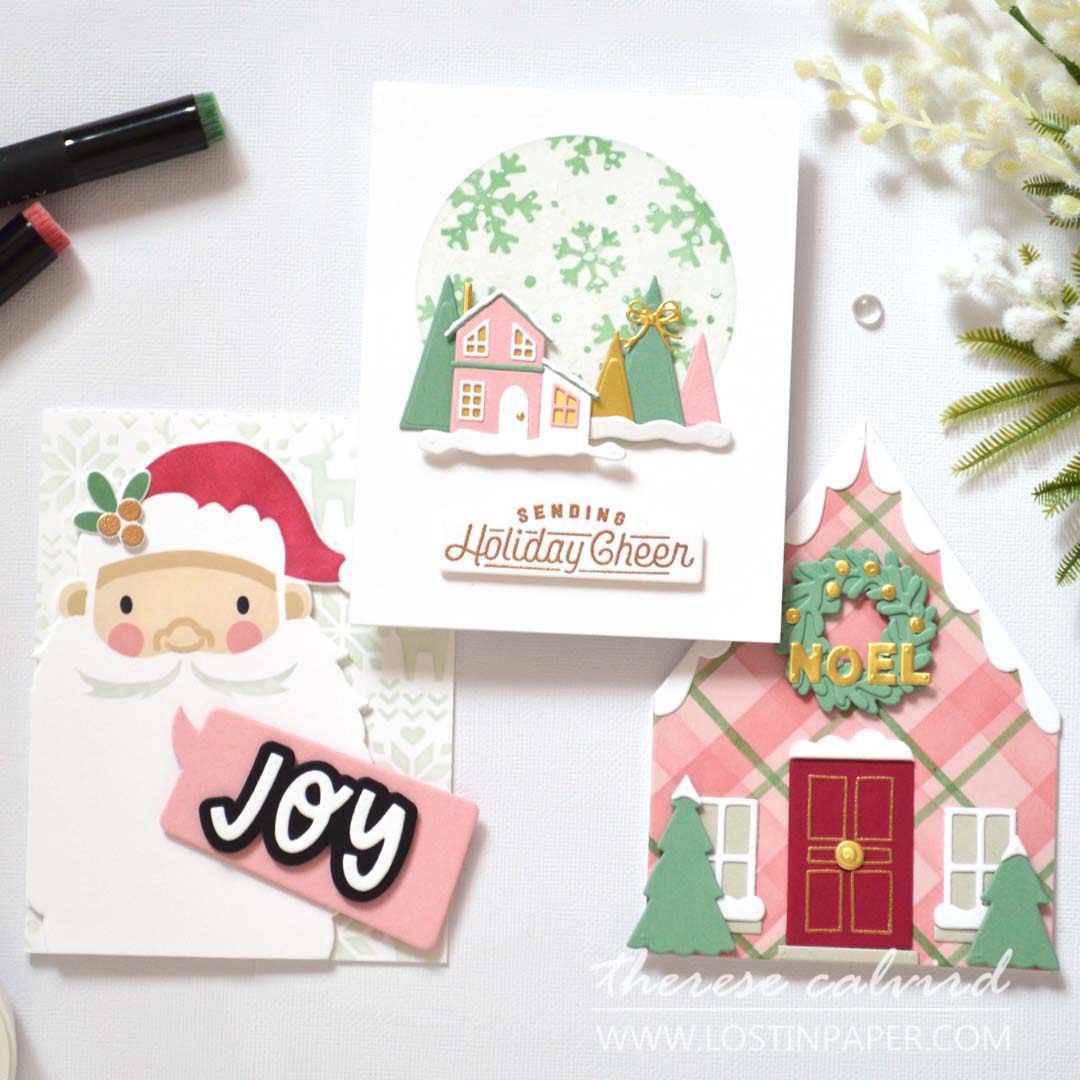
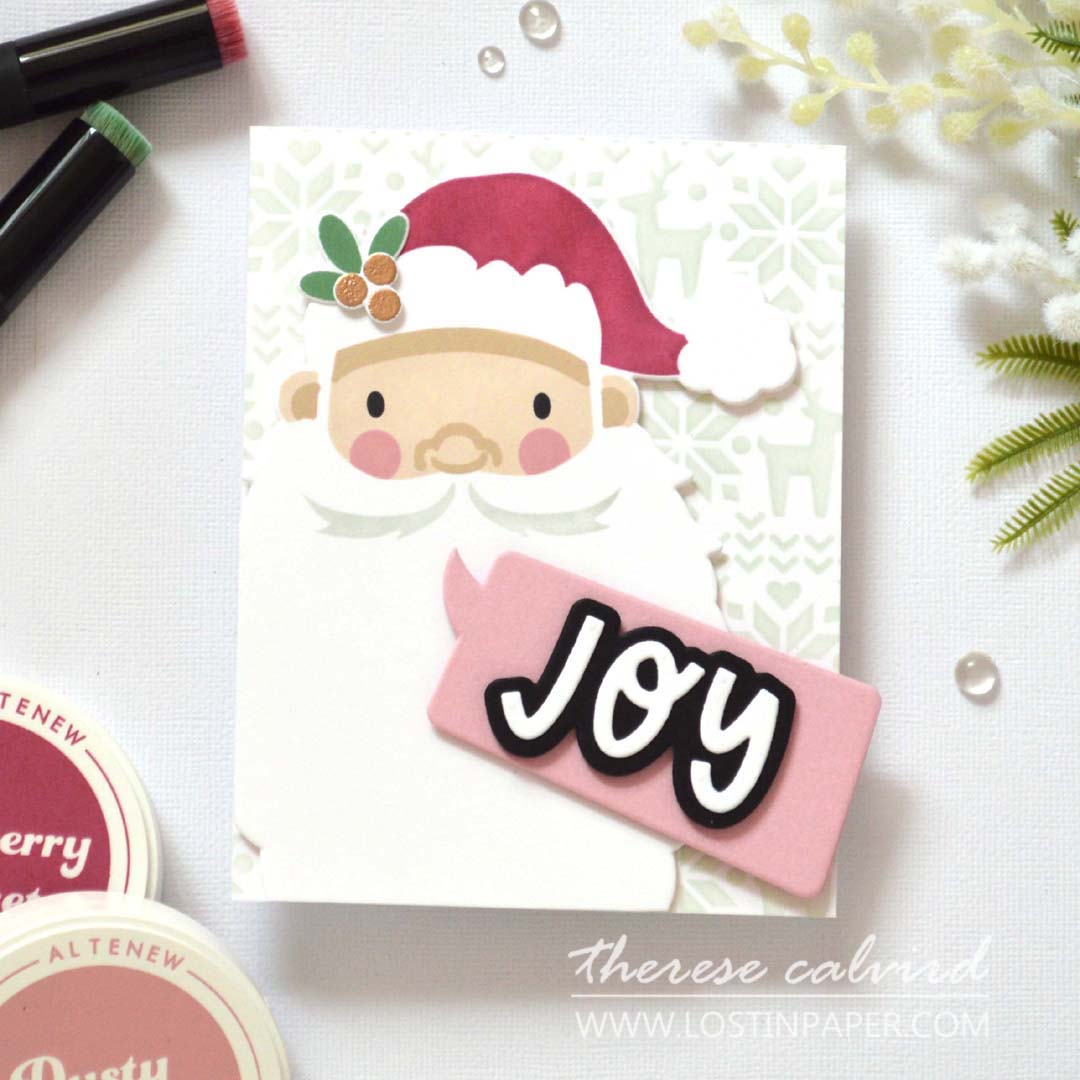
Card #1 – Modern Santa
For my first card, I kept it classic with a simple ink blended background – one of the easiest ways to add color and depth without stealing the show.
I paired it with a fun multi-layered stencil of Santa’s head to create the focal image. The layering does all the hard work here, so you get a crisp modern Santa without any coloring needed.
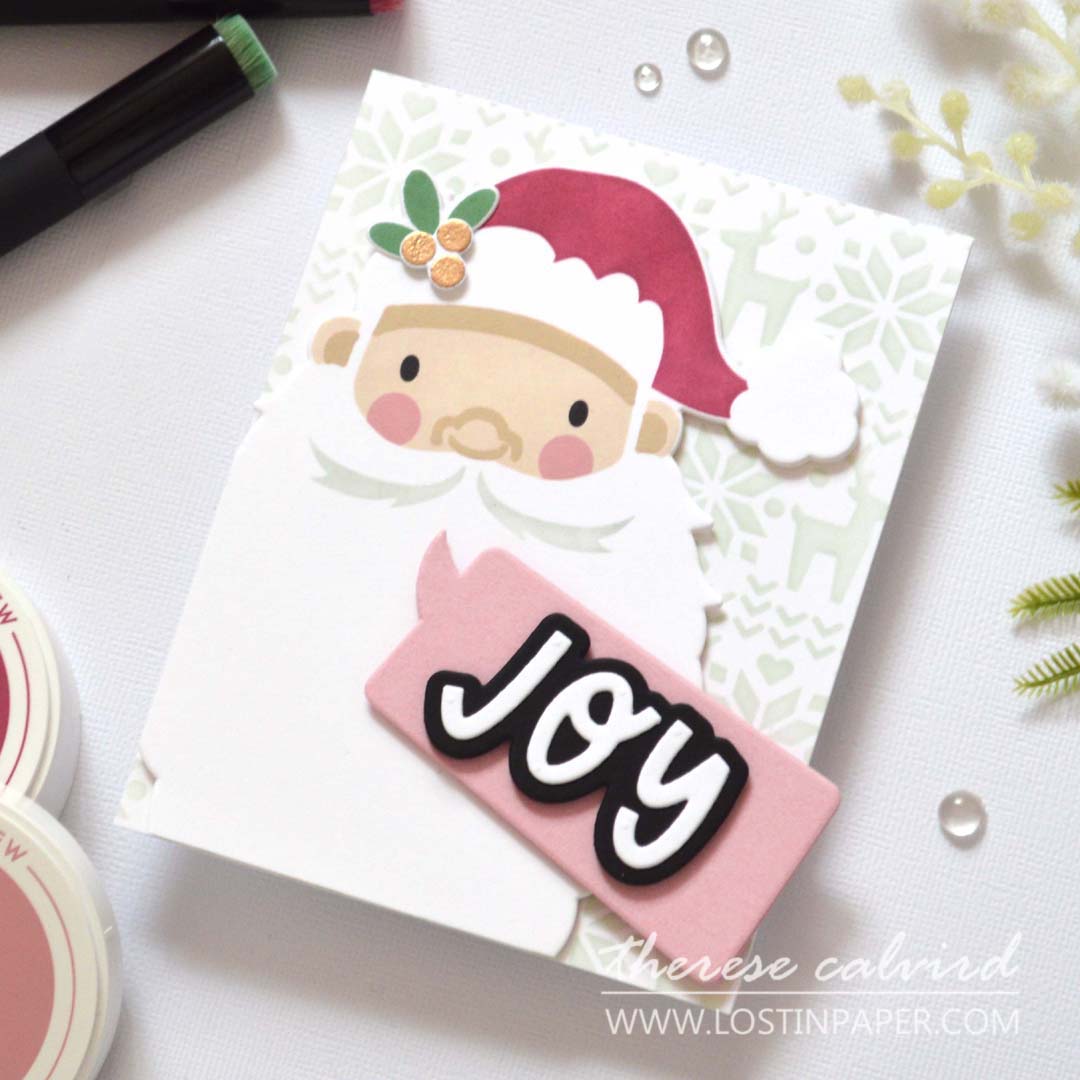
BONUS IDEA: Post friendly option? Instead of die cutting the Santa image and popping it up, use the coordinating mask stencil to create a one-layer design instead.
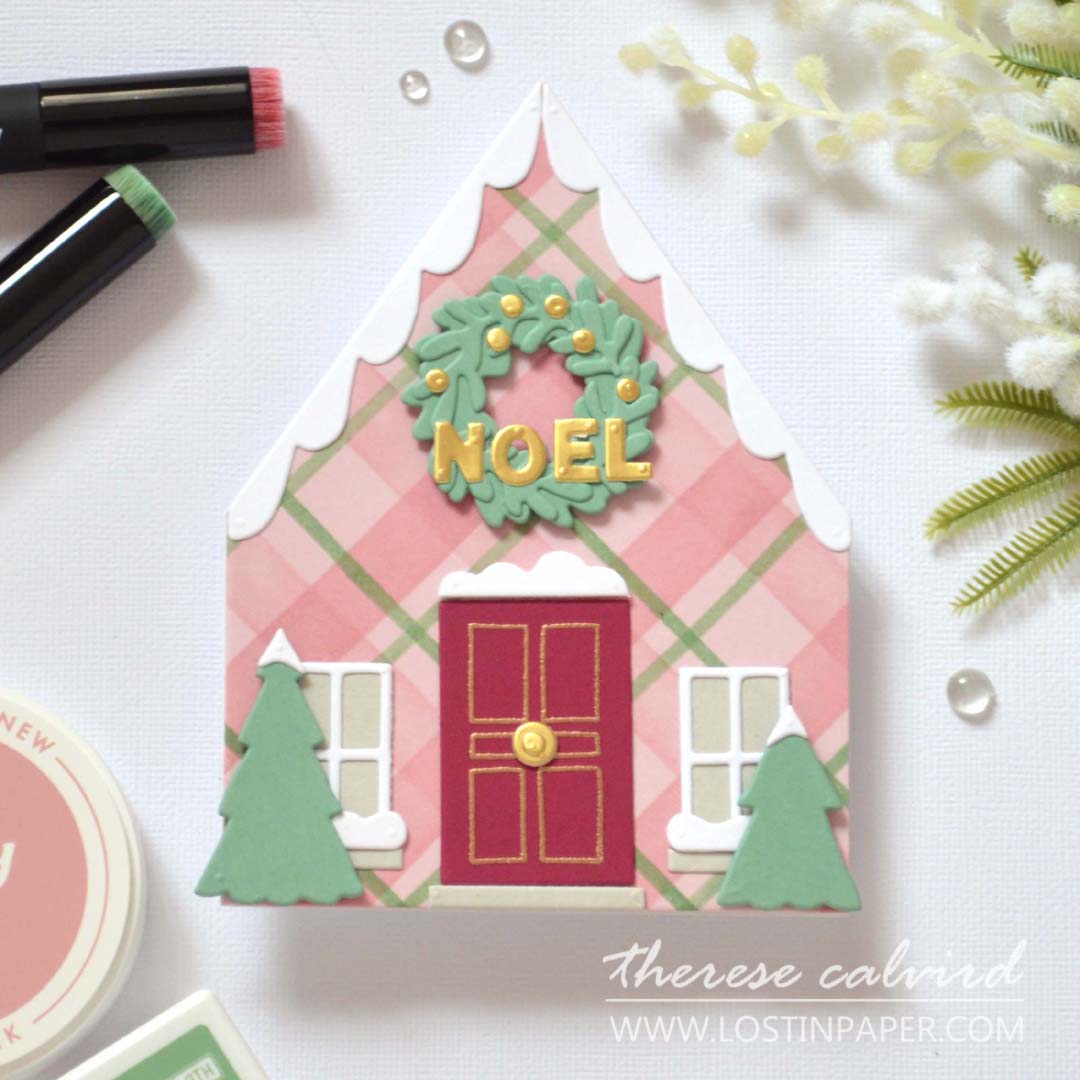
Card #2 – Plaid House
For this card I started with a tone-on-tone stenciled background – blending ink in a shade just slightly darker than my cardstock. It’s subtle but adds instant depth. To step it up, I used the layering stencil to build a plaid pattern that feels cozy and festive.
Now it’s time to stretch these stenciled patterns, I cut this one into a house-shaped card. You could do the same with a circle (bauble), a triangle (Christmas tree), or any other large die you already have in your stash. It’s a fun way to give your stenciled panels a whole new purpose.
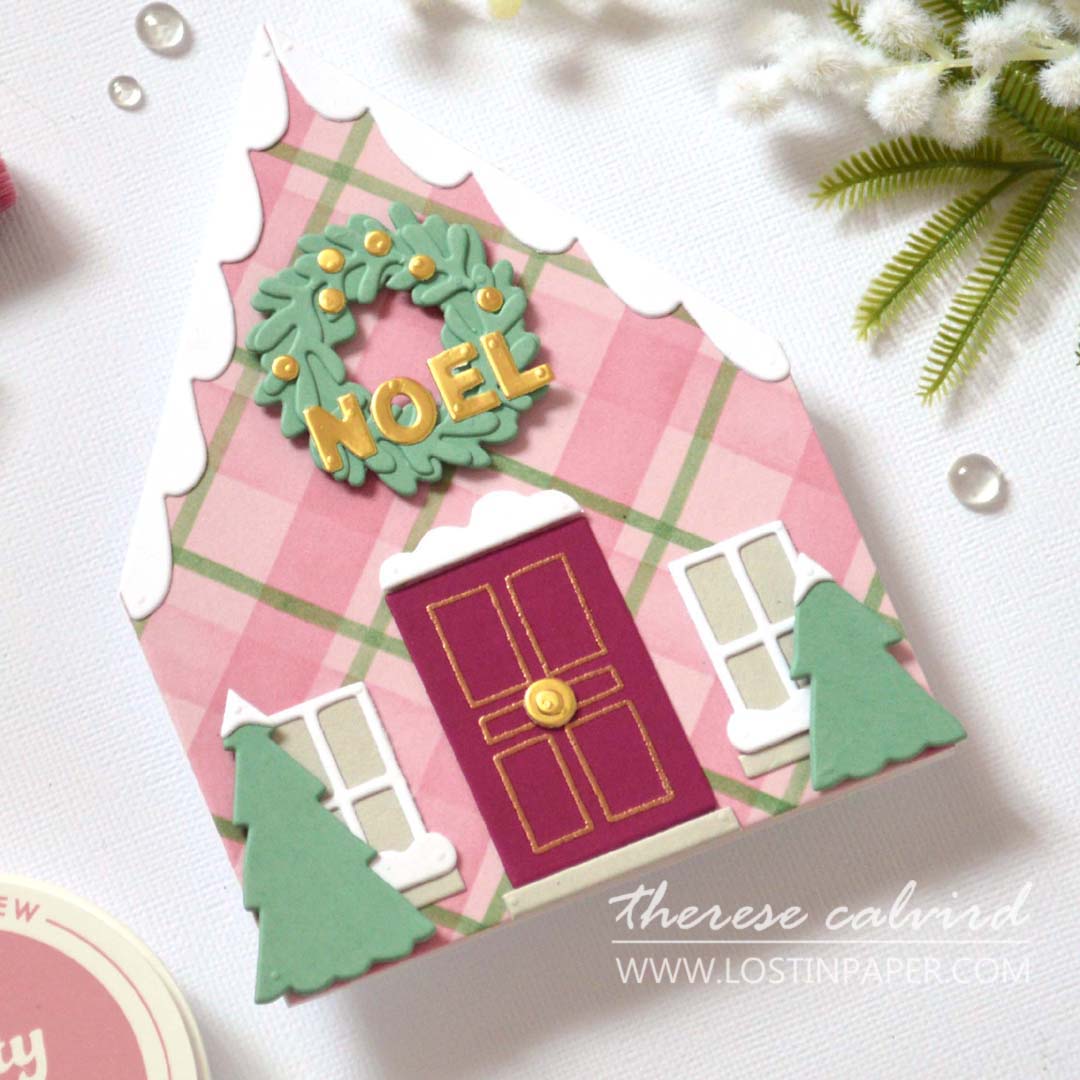
PRO TIP: Ink colours can look different when blended onto coloured cardstock. If you’re not sure about the combo, test your colours first on a scrap piece.
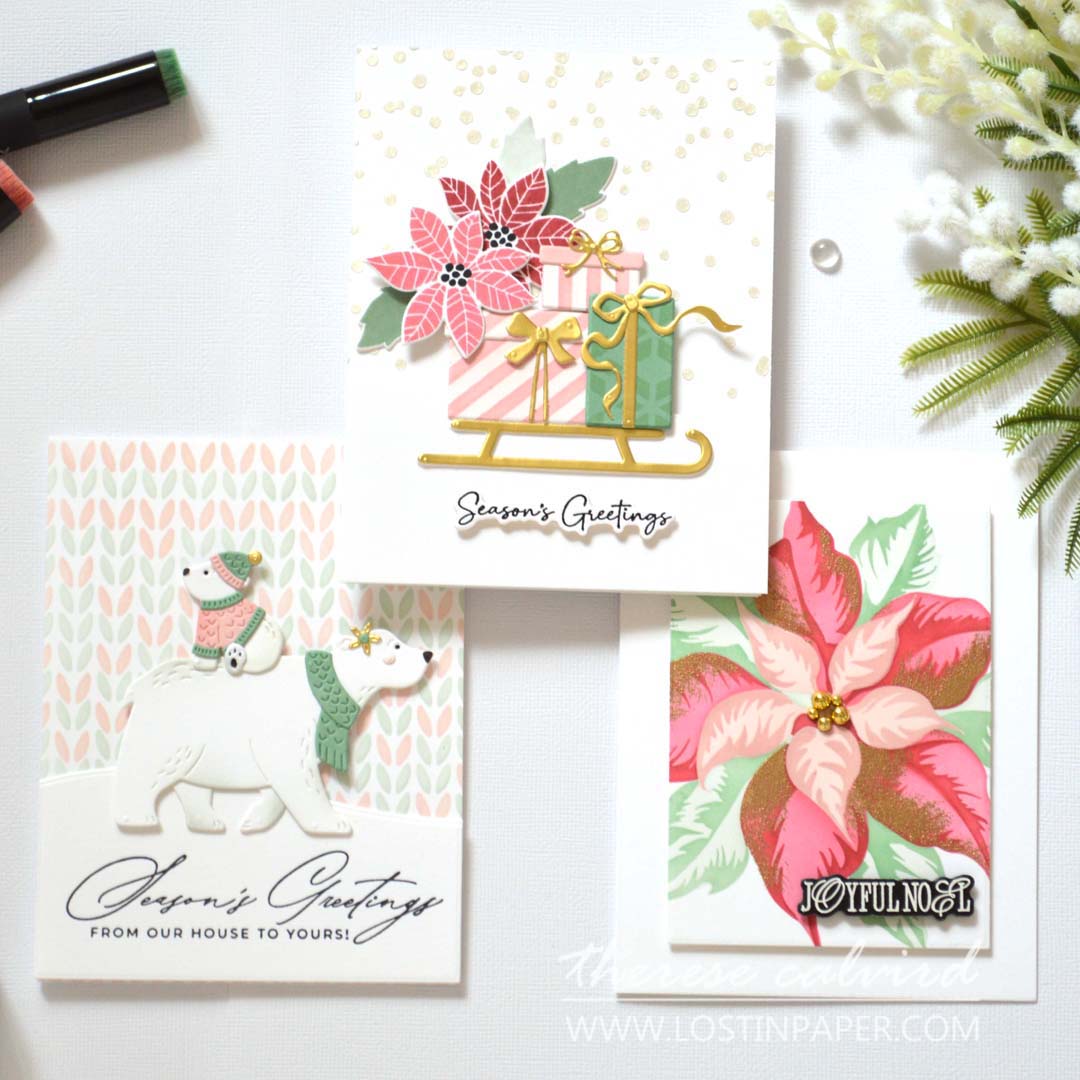
Card #3 – Polar Fleece
This card uses a stencil that pieces together to form a multi-coloured background – perfect if you like playing with bespoke color combos and patterns. To step it up, I dry-embossed one of the stencil layers, carefully aligning it with the pattern for a subtle raised texture that looks a bit like fabric… hence the name “Polar Fleece”, and it may be because there is a polar bear in there too! 😉
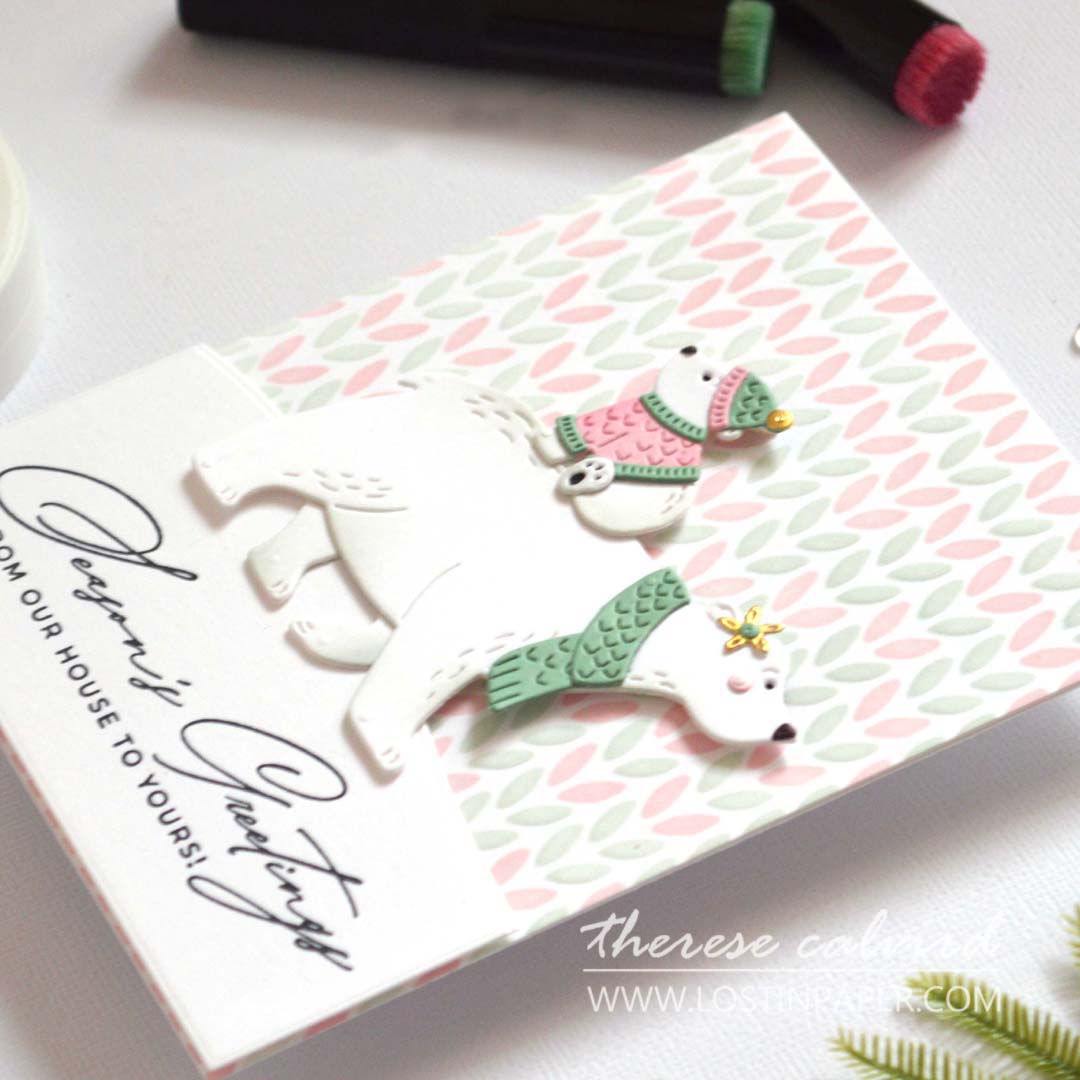
BONUS IDEA: You don’t need a layering stencil to create this look. Use one stencil repeatedly, shifting it slightly and changing up your ink colours, or get bold and mix two completely different stencils together to create your own unique pattern.

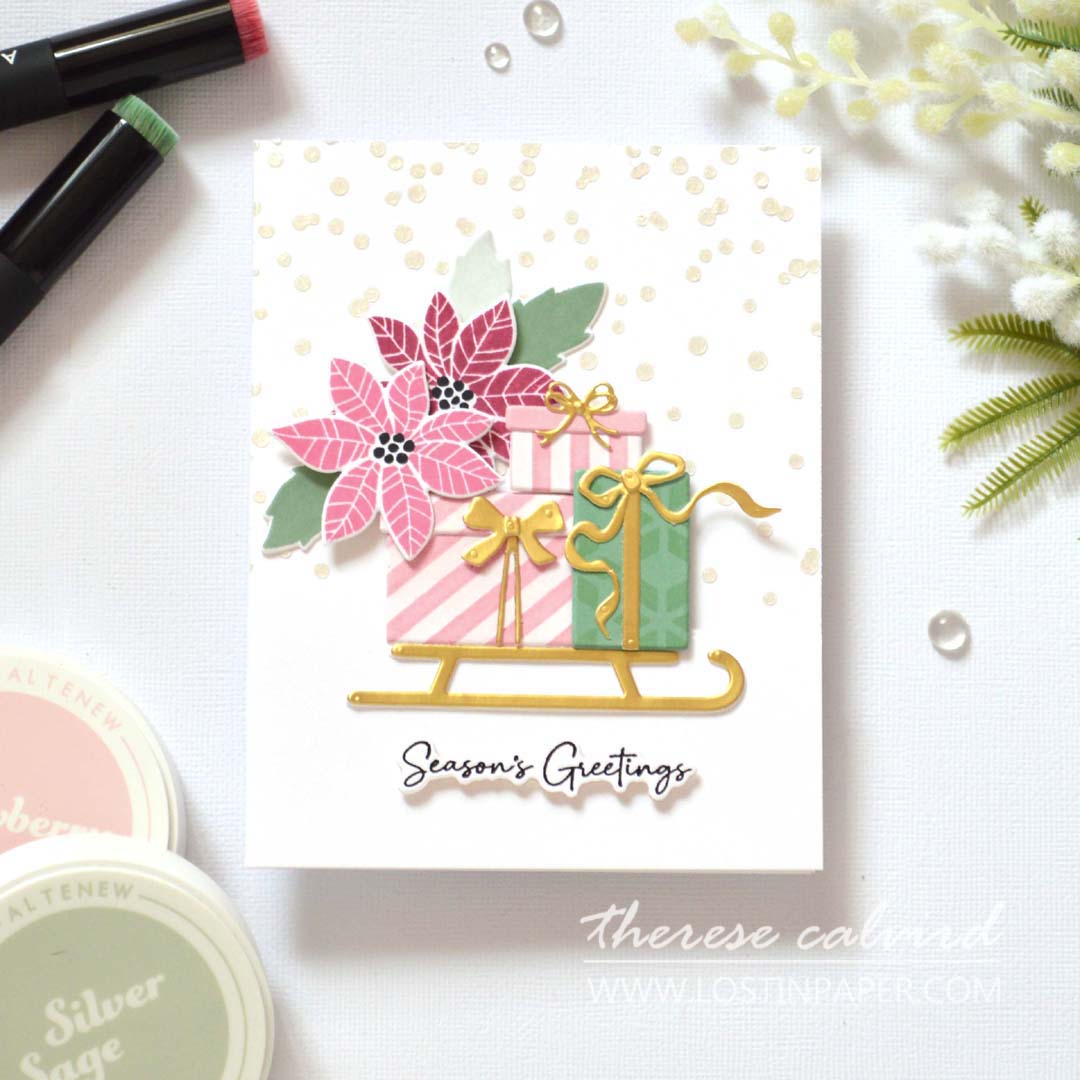
Card #4 – Sleigh of Presents
If you’ve never tried paste through a stencil, you are seriously missing out – it’s one of the most fun techniques to do! For this card, I used a snowy stencil with a shimmery paste to create a sparkling winter background.
But why stop there? Stenciled backgrounds can also double as DIY design paper. Here, I die cut my patterned background into a stack of little presents for a playful holiday card element. It’s a great way to stretch one panel into multiple designs.
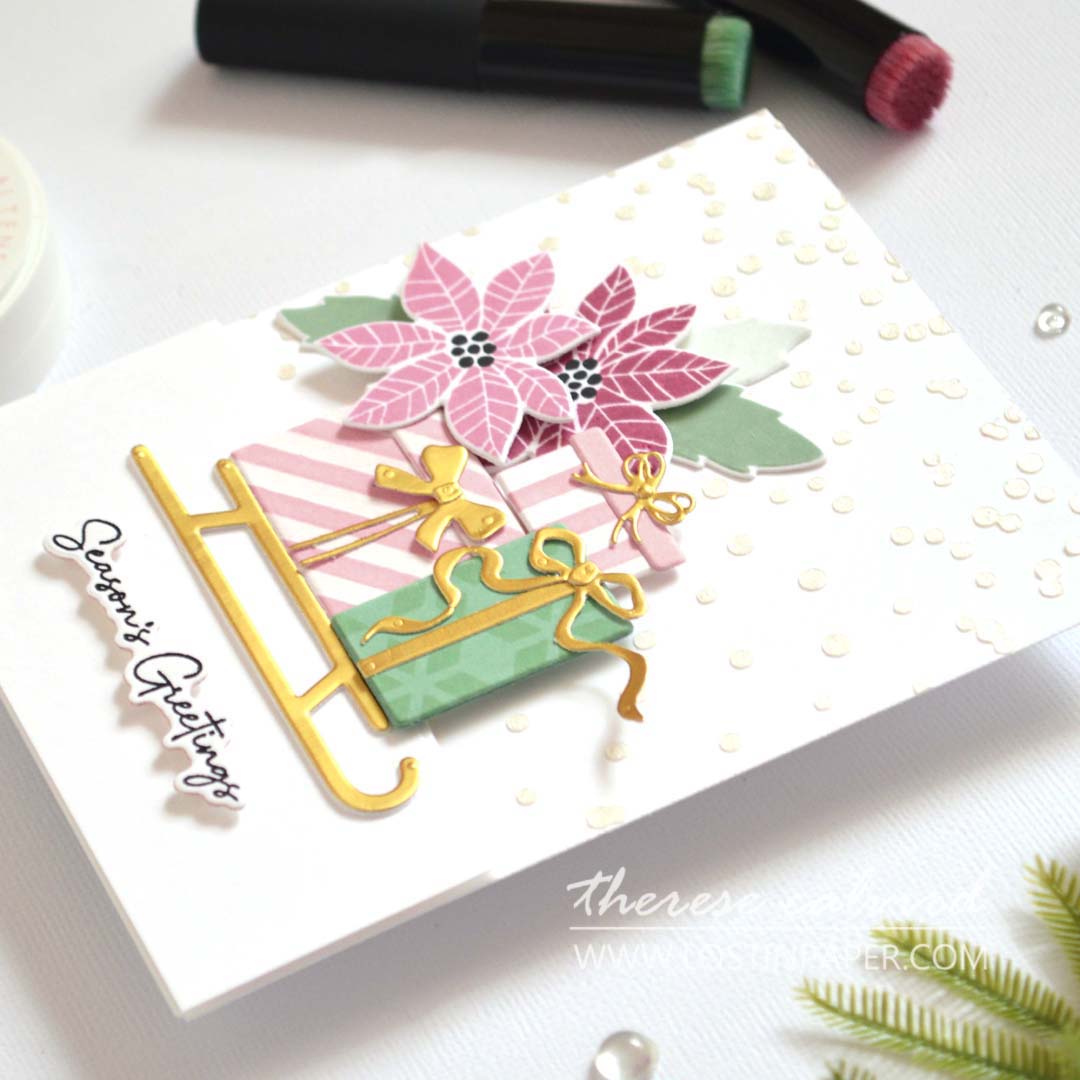
PRO TIP: Always apply paste first when you’re working on a project, and set it aside so it has plenty of time to dry before you assemble your card.
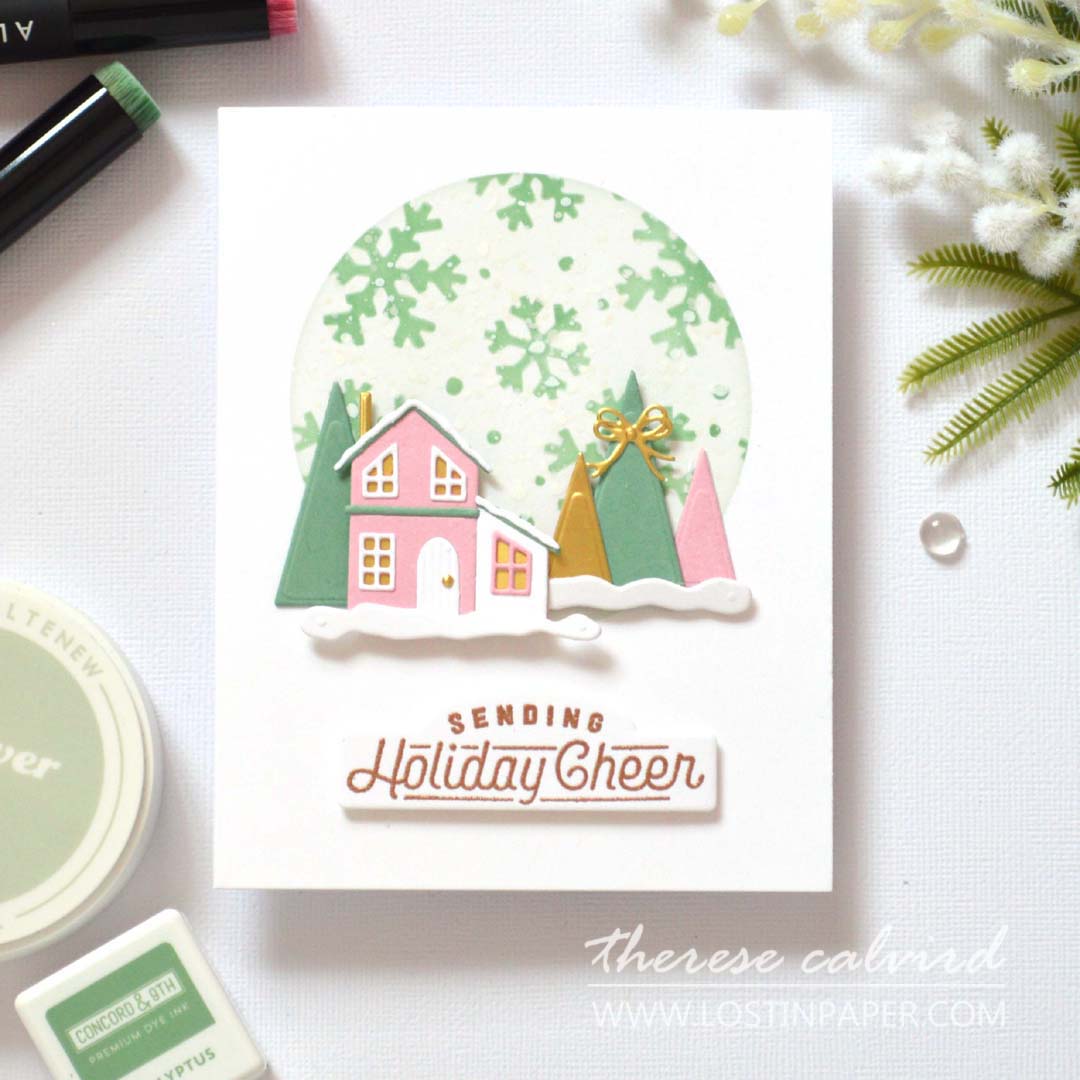
Card #5 – Focal House Scene
You may have tried masking before, but have you ever tried reverse (or negative) masking to create a focal point? It’s such an easy way to draw the eye to one part of the design. You can use any shape you like, but circles and rectangles work beautifully.
For this card, I took it a step further by double stenciling inside the masked area – layering in another stencil and even adding some snowflakes to make the scene feel extra festive.

BONUS IDEA: Don’t have a masking stencil? No problem! Use masking paper or even low-tack tape to die cut your own circle, or simply block off a rectangle.
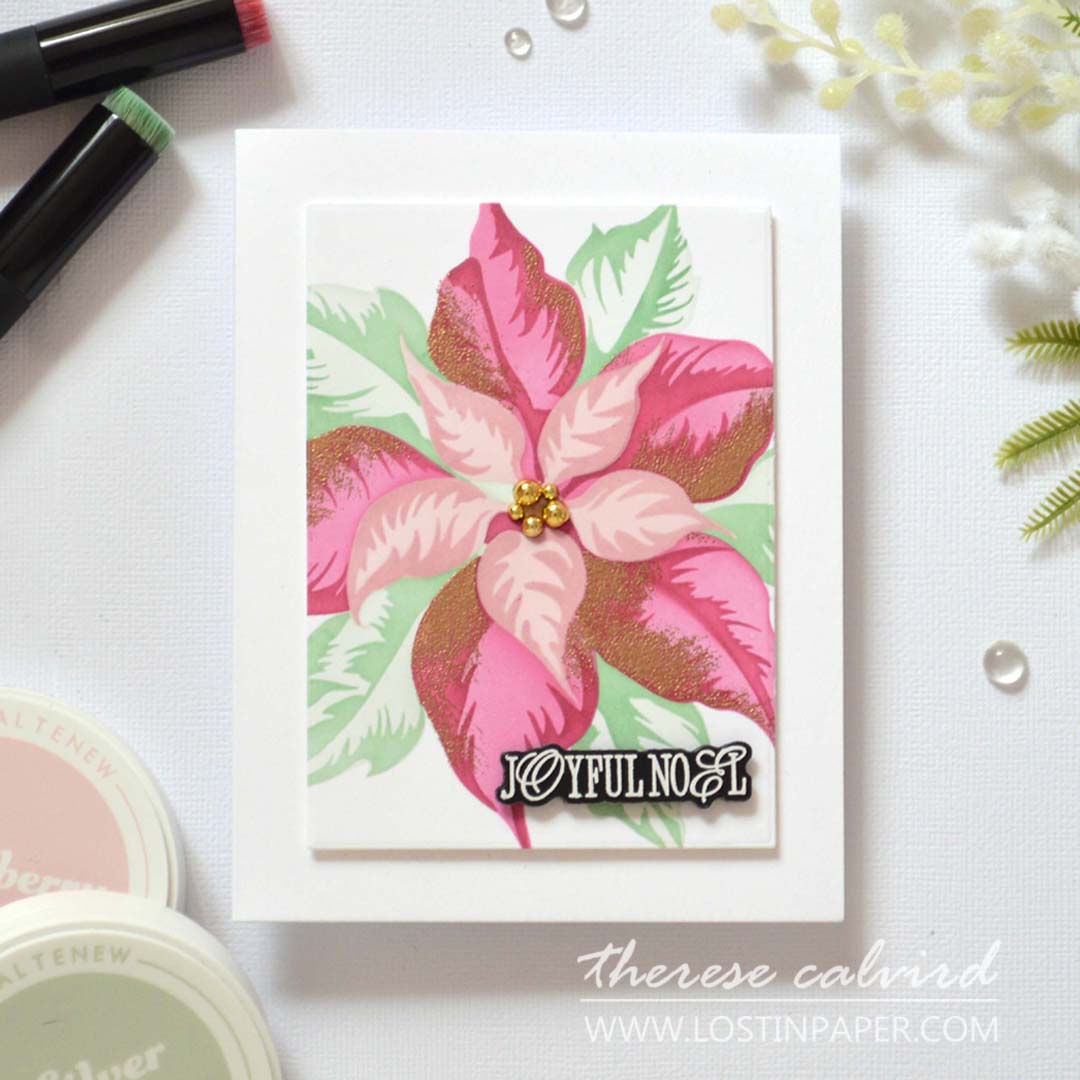
Bonus Card – Golden Poinsettia
I know you want more! So here it is – a beautiful multi-layered poinsettia stencil that’s incredibly easy to color. But instead of keeping it simple, I gave it a little twist: embossing ink through the stencil. On one of the layers, I added a rough swipe of embossing ink just around the edges, then sprinkled on some gold powder. With a little heat, suddenly those edges had the perfect touch of holiday sparkle!
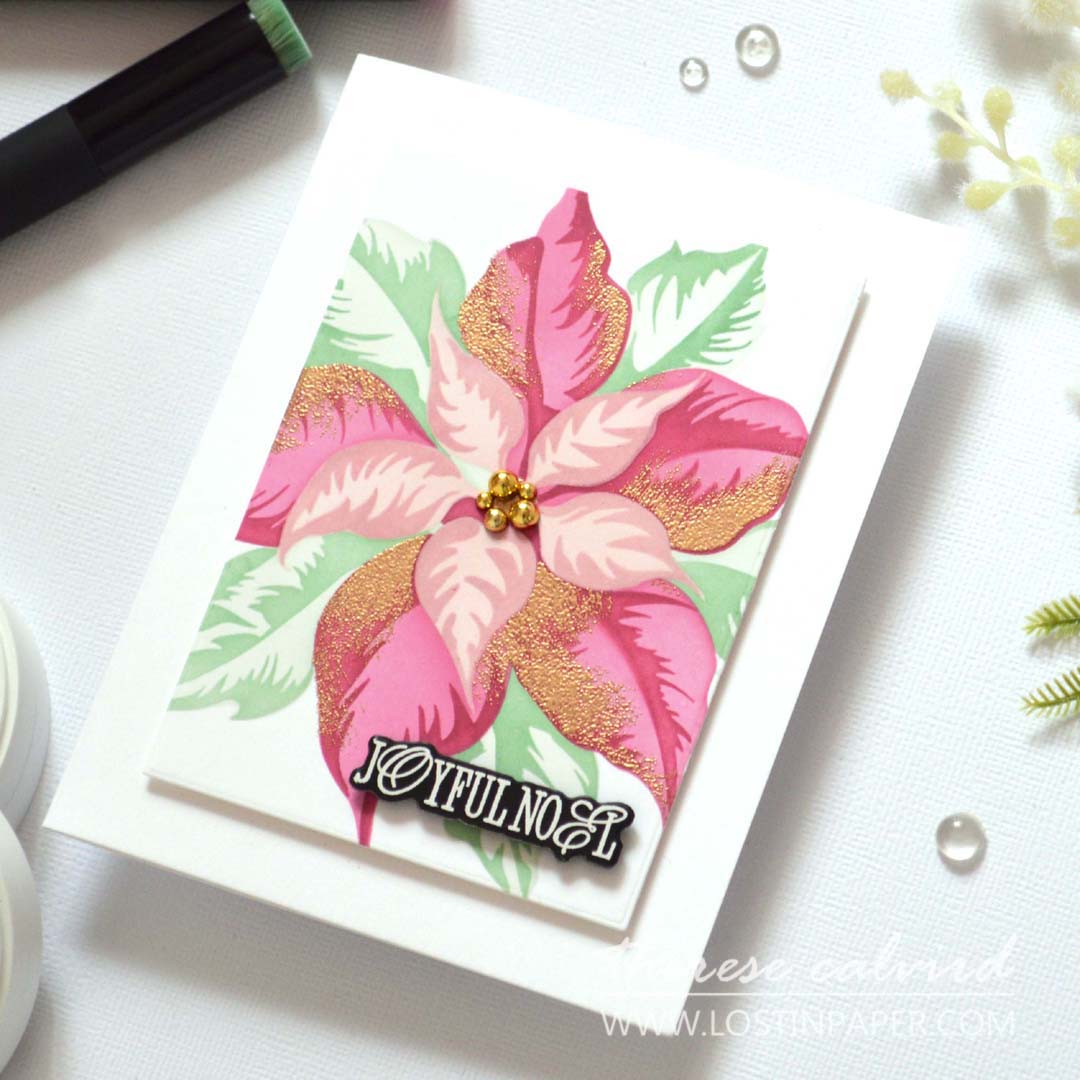
PRO TIP: Did you know that you do not always need to buy coordinating stamps and dies for layering stencils? Some of these images are created to work on their own!
That’s a Stencil Wrap!
I’ve only scratched the surface of what you can do with stencils – these are just a few quick and easy ideas to get you started. From simple ink blending to layered images and sparkly embossing, stencils are one of the most versatile supplies in any stash.
And the fun doesn’t stop here! I’ve got more holiday cardmaking videos coming your way, so make sure to keep an eye out. In the meantime, I’d love to know which stencil idea caught your eye – or if you’ve got a favourite stencil technique of your own. Share it in the comments below, I always love hearing your ideas!
Sending crafty hugs your way,

Special thanks to my crafty assistant, Chad (aka ChatGPT), for helping me stay on track with my Gemini brain, grammar, and spelling… well, all the things! 😄
P.S. Need supplies? Here are the links to the products I used today (some of these are affiliate links, so I’ll earn a small commission if you make a purchase – thanks for supporting my channel 🥰)!
*Certain content that appears on this site comes from Amazon, this content is provided ‘as is’ and is subject to change or removal at any time. As an Amazon Associate I earn from qualifying purchases.
Ink: Altenew – Limestone | Strawberry | Dusty Pink | Blush Rose | Raspberry Sunset | Silver Sage | Eucalyptus – Concord & 9th – Eucalyptus.
Cardstock: Altenew – Jet Black | Blush | Ruby Red | Brushed Gold – Concord & 9th – Eucalyptus | Pebble.
Stencil: Altenew – Diamond Snowflakes (retired) | Classy Stripes (retired).
 Merry Mix Stencils SSS | C9 |  Jolly St Nick Bundle SSS | C9 |  Jolly St Nick Stencils SSS | C9 |  Jolly St Nick SSS | C9 |
 Jolly St Nick Dies SSS | C9 |  Yuletide Lane Bundle SSS | C9 |  Yuletide Lane Dies SSS | C9 |  Yuletide Lane SSS | C9 |
 Sweater Pattern Stencil ALT | SSS |  Polar Bear Pals SSS | SB UK | SB US |  Christmas Cheer SSS | SB UK | SB US |  Snow Flurries C9 |
 Sleigh Full of Cheer Bundle SSS | C9 |  Sleigh Full of Cheer SSS | C9 |  Winter Bouquet Bundle SSS | C9 |  Winter Bouquet SSS | C9 |
 Winter Bouquet Dies SSS | C9 |  Merry Messages SSS | SB UK | SB US |  Masking Circles C9 |  Cozy Homes ALT | SSS |
 Nesting Triangles ALT | SSS |  Seasons Greetings Bundle C9 |  Seasons Greetings SSS | C9 |  Seasons Greetings Die SSS | C9 |
 Chiming Christmas SSS | SB UK | SB US |  Festive Poinsettia Stencils SSS | C9 |  A2 Layers Die SSS |  Altenew Cardstock ALT | SSS |
 Concord & 9th – Cardstock SSS | C9 |  Neenah Solar 110 AMZ | SSS | Neenah Solar 80 AMZ | SSS |  Brushed Gold ALT | SSS |
 Shimmer Relief Paste – Pearl ALT | SSS |  Palette Knife Set ALT |  Black & White Foil SSS | SB US |  Nocturne SSS |
 Versamark Ink SSS | C9 |  Blushberry Bliss ALT | SSS |  Frosted Foliage ALT | SSS |  Rock Collection ALT | SSS |
 Concord & 9th Ink SSS | C9 |  Large Blending Brush ALT | SSS |  Mini Blending Brush Set ALT | SSS |  Fashion Gold SB US |
 Pure White Spray ALT |  Pure White ALT |  Powder Tool SSS |  WOW Heat Tool SSS |
 Perfect Picker ALT | SSS |  Tweezers ALT | SSS |  Antique Gold ALT |  Perfect Align Tool C9 |
 Stampwheel ALT | SSS |  Bone Folder ALT |  Score Board ALT | SSS |  Sticky Grid Mat Ultra ALT | SSS | SB US |
 Mini MISTI SSS |  Platinum 6 ALT | SSS | SB UK | SB US |  BetterPress SB ALT | SSS | SB UK | SB US | 9″ Fiskars Paper Trimmer AMZ |
 Precision Glue Press AMZ | SSS | Bearly Art Glue AMZ | SSS |  Glue Tape ALT | SSS |  Foam Tape NEW sizes! ALT | SSS |
 Satin Masking Tape ALT |
3 Creative Focal Point Card Ideas with Embossed & Stenciled Backgrounds!
Therese, this is one stellar line-up of cards! I’m loving your non-traditional colors on all of them. That sweet polar bear pair is my favorite with that sparkly poinsettia coming in at a close second!
That Polar bear set is such fun (and I love that it’s not just for Christmas either), but I would have to say that Poinsettia is my fave… it’s a classic design ASD rocked it!
Well, I now want a plaid house to live in!! What would the neighbors think? hmmm – ask me if I care.
Your cards are magnificent, Therese!
=]
Who cares what the neighbours think lol. As long as you are happy my friend x
Thank you so much for all this Christmas cheers here.
I really love adding the gold embossing powder to alex Siberia’s poinsettia stencil.
All the cards are case worthy truth to be told.
I think that was my fave too…. but then, it’s a Poinsettia, right!
Oh my goodness… these are gorgeous. LOVE the colors and all the stencil ideas.
Yippee!!
Thank you for showing us how you made these lovely cards! ❤️❤️. I loved them all!
How wonderful Karen, I’m so happy you enjoyed them!