
Are you ready to release the power of the single stencil?
If you’ve been following my 5-Minute Card Series, you already know how much fun it is to create quick, beautiful designs – and today, we’re tackling 5-minute stencil backgrounds!
In this post (and video), I’m sharing five easy stencil techniques where using just one stencil can take your cards from simple to WOW in minutes. These ideas prove you don’t need fancy supplies – just one stencil, some ink, and a little creativity.
Let’s take a peek at today’s cards?
You can watch how I made these 5-minute stencil backgrounds in my latest video below – I’ll walk you through each technique step-by-step so you can try them too! Or watch it in HD on YouTube HERE. Scroll for more pics and details.
I use affiliate links, which means that if you click on a product link, I’ll receive a small portion of the sale at no extra cost to you. It’s a great way to support me and the shops we love 🥰!
#5MINUTE-STENCILBACKGROUNDS
Why Stencils Are a Cardmaker’s Best Friend
Stencils are one of the quickest ways to create beautiful, custom backgrounds for your cards. You can easily match your project perfectly because you’re using the exact ink colors you love – and you can whip them up in just minutes!
Whether you prefer soft blends, bold patterns, or layered looks, a simple stencil can completely transform your design. Here are a few of my favorite tips for faster stenciling (and keeping your crafty space a little less inky in the process).
🪄 Quick Stenciling Tips
- All of today’s techniques use just one stencil — but you could easily step it up with a layered design if you like.
- Work on a panel size close to what you need to save ink and time… or make a bigger panel and cut it in half for two cards instead!
- Batch it out! If your supplies are already out (and your fingers are inky), make a few extra panels to keep in your stash for quick cards later.
- Clean your stencils between layers to avoid unwanted smudges — and give them a few seconds to dry before using again.
- Start with lighter inks first; it’s faster since you won’t need to clean your brush between colors.
- Use a large blending brush for big areas to make coverage quick and smooth.
Are you ready for today’s 5-Minute Stencil Backgrounds?
Of course I had to turn them into cards – because I know you always love a little inspiration! 😉
I kept them clean and simple with a strong focal point and sentiment – it doesn’t need to be complicated to look amazing.
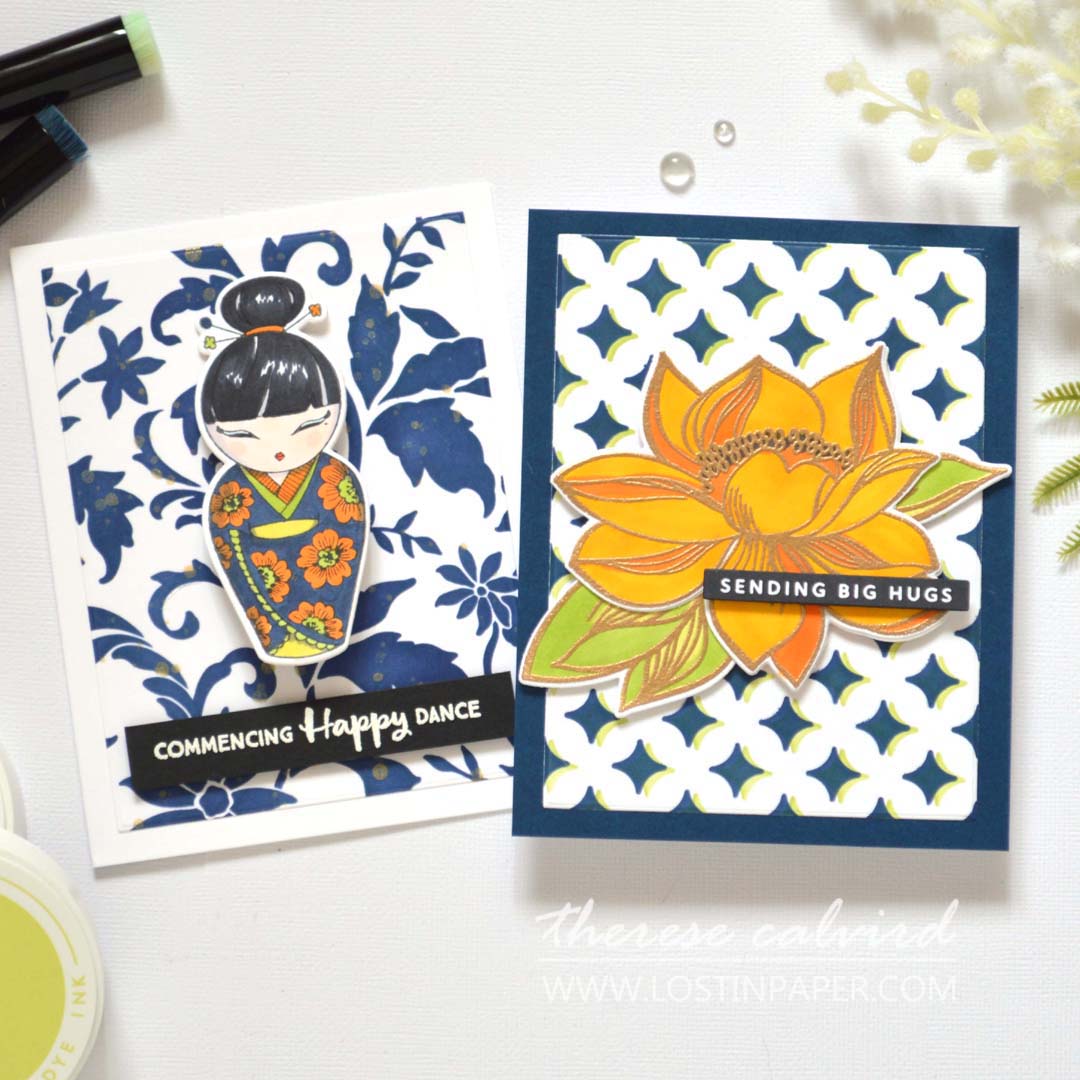
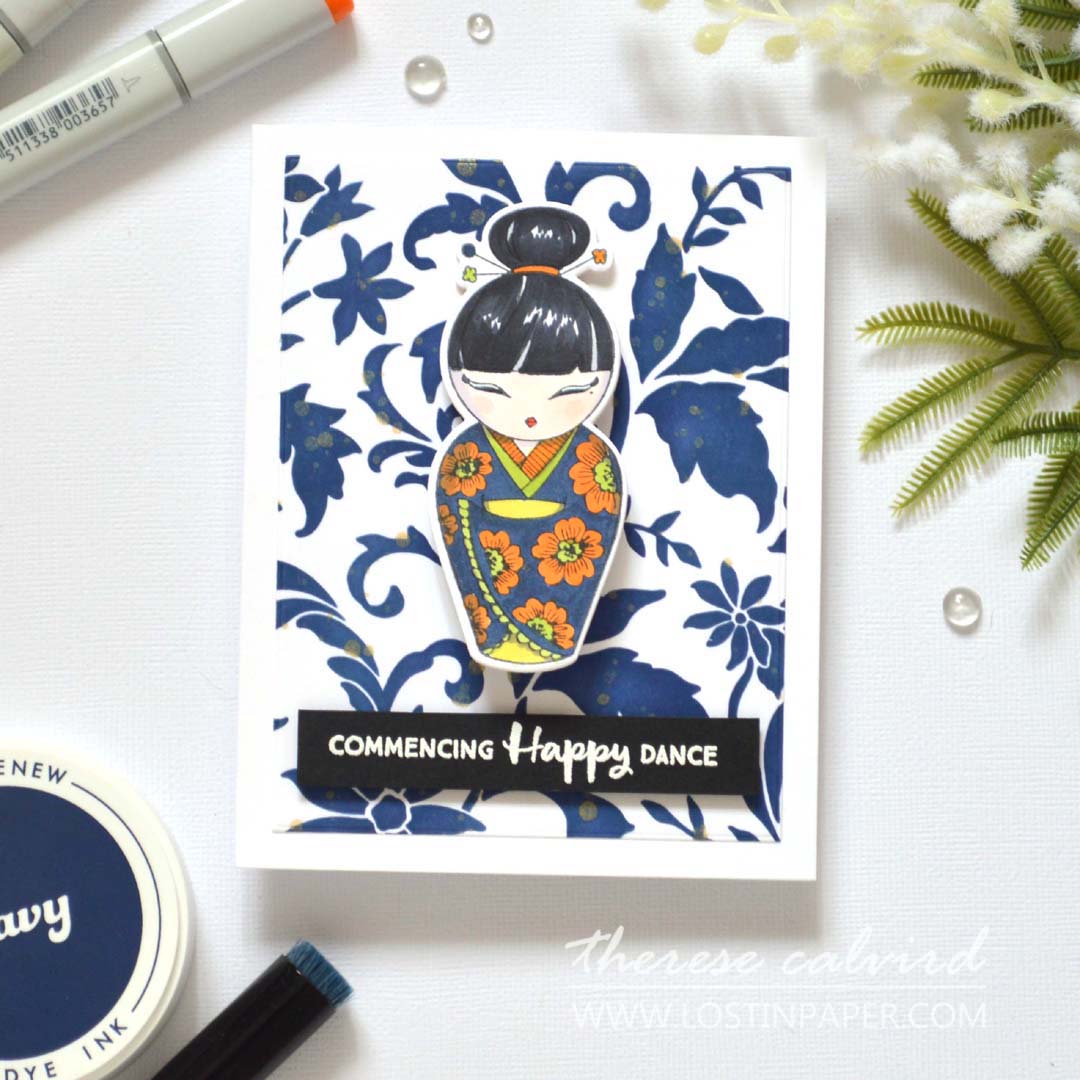
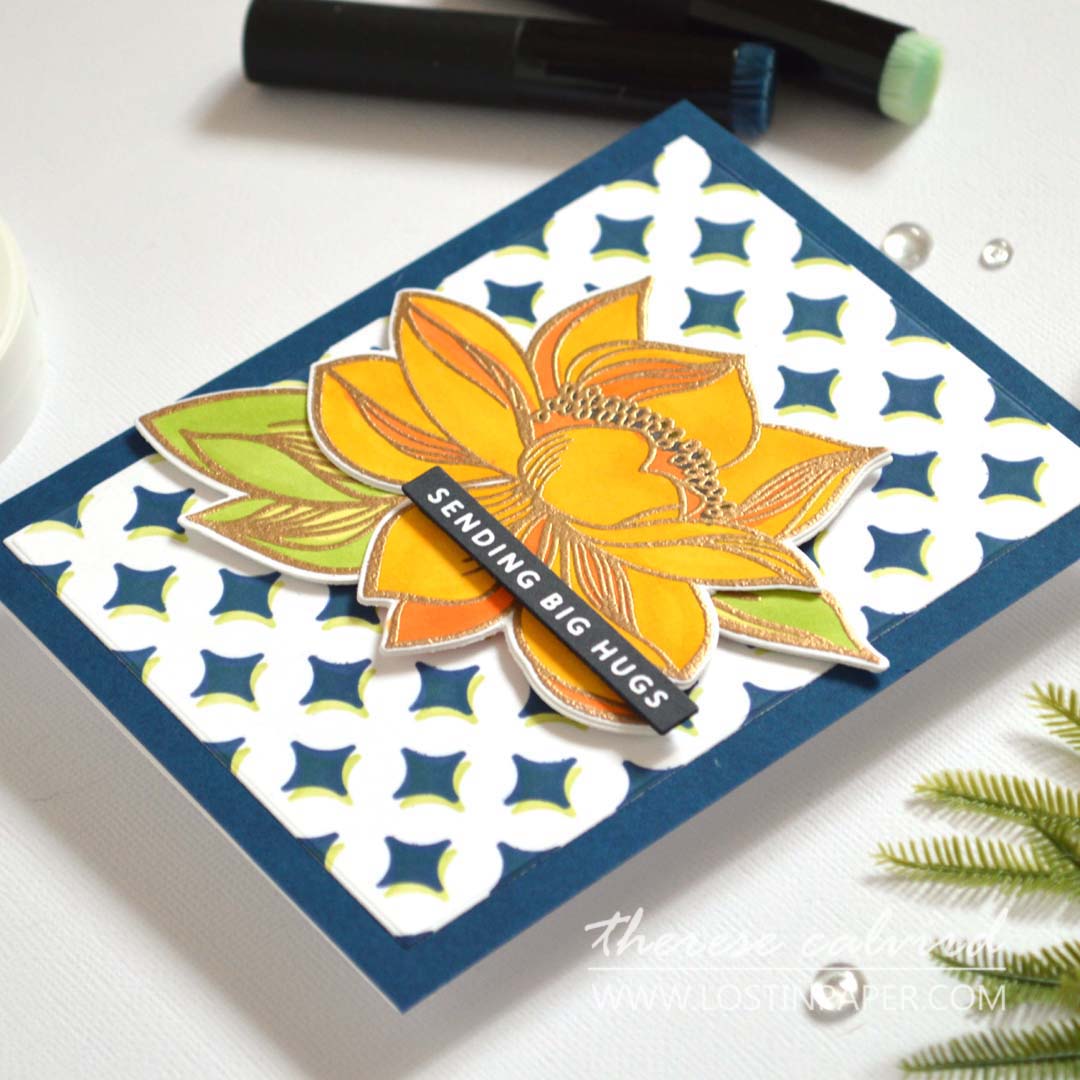
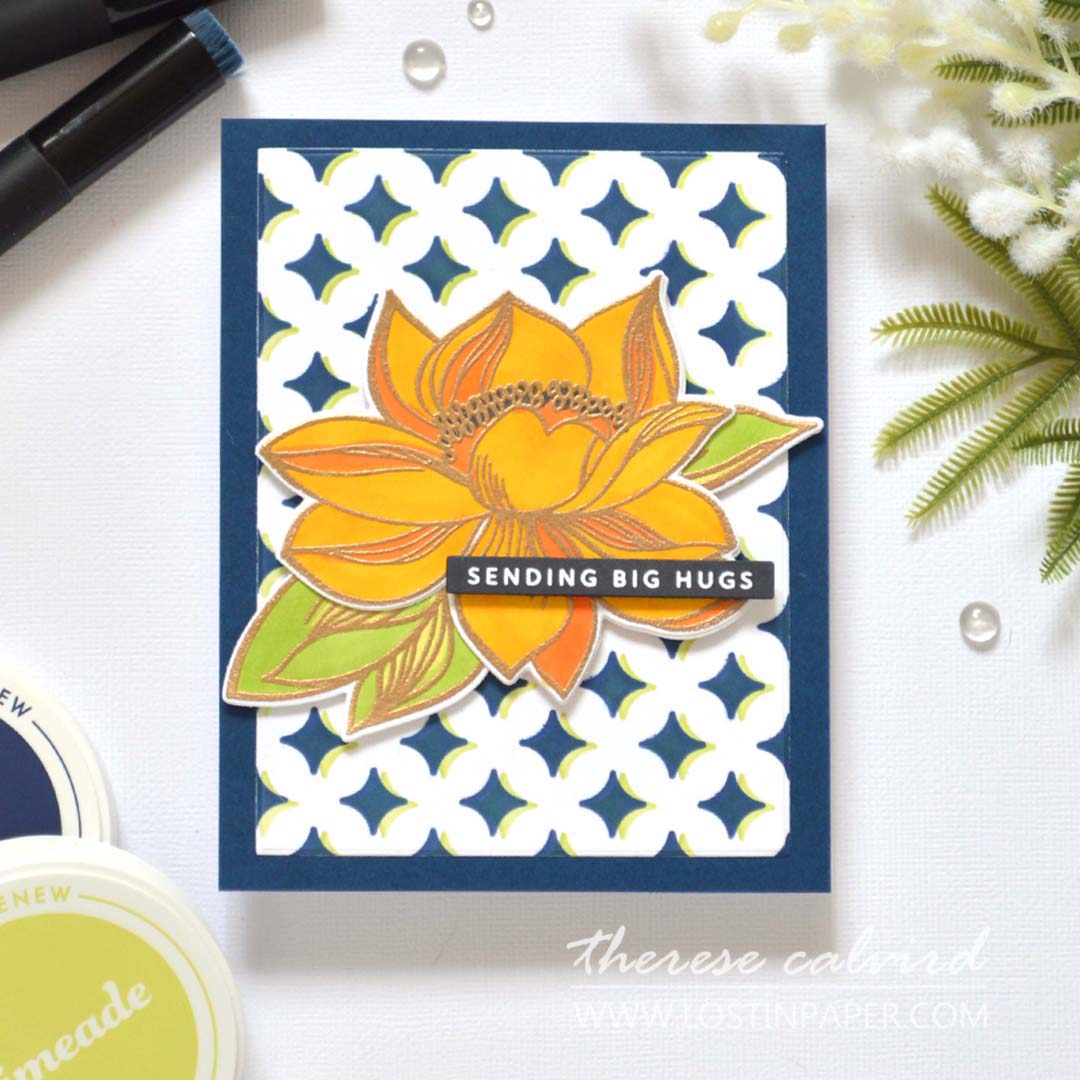
Technique #1 – Silhouette
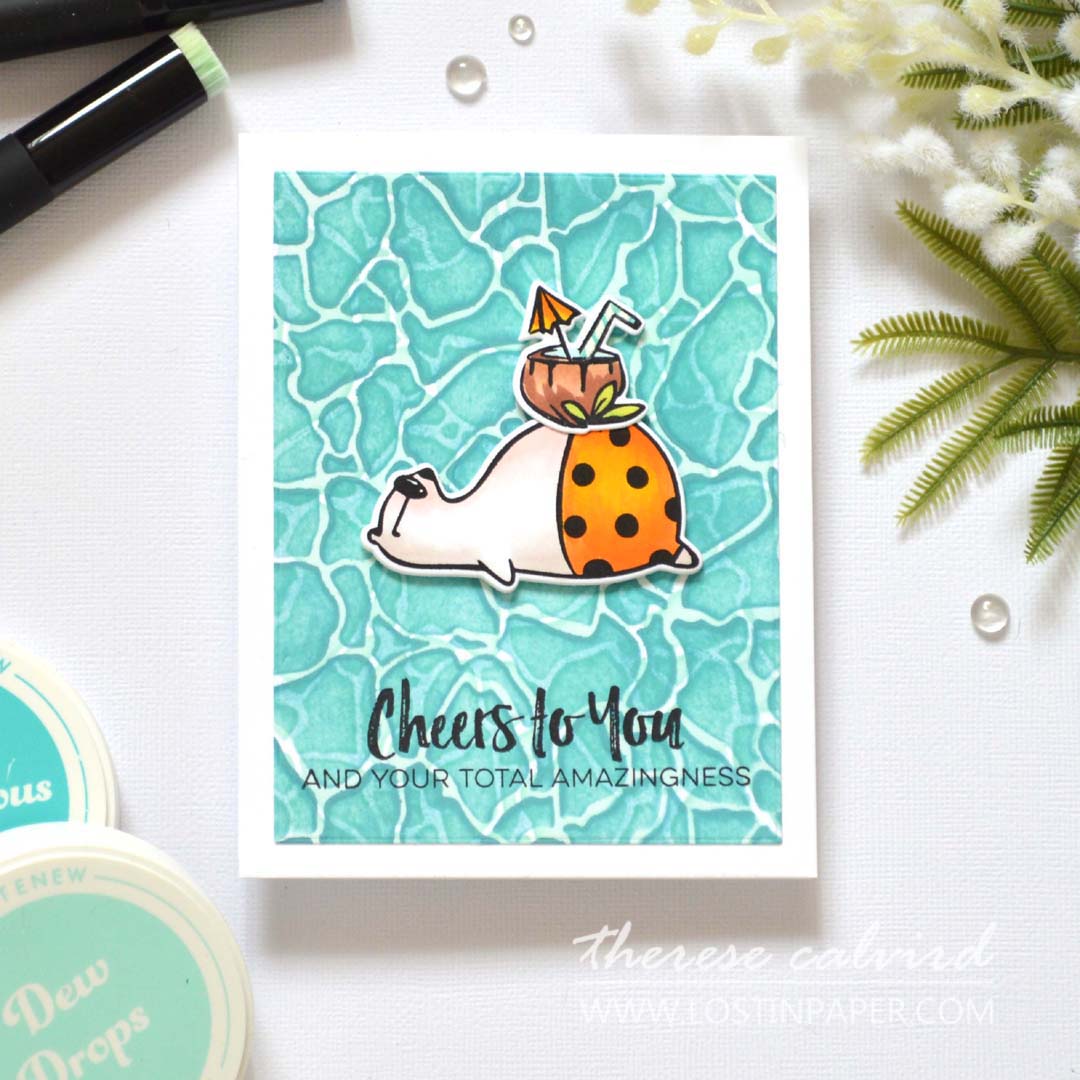
This is the fastest and most simple technique, but it helps to choose your stencil carefully. Look for something with a decorative or detailed pattern, like this beautiful design – it gives the background instant depth and interest.
I went bold with navy ink for a strong silhouette effect that really makes the design pop.
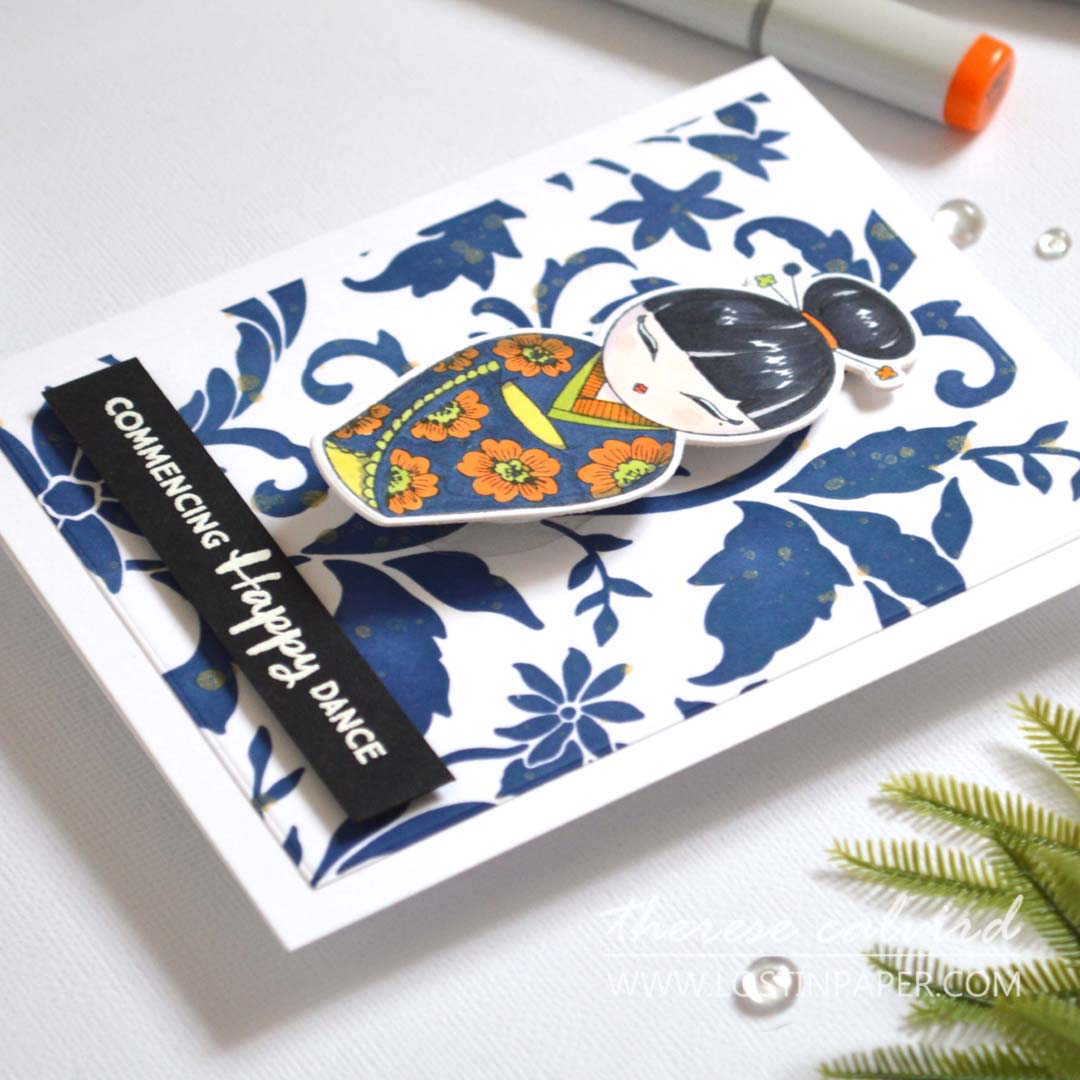
BONUS IDEA: Before removing the stencil, add a light splatter of shimmery gold ink or watercolor through it for a touch of sparkle and extra dimension.
Technique #2 – Color Shadow Offset
If you want to add a little wow to your background, this offset stencil technique is quick, colorful, and gives instant dimension.
Usually, my go-to for creating a shadow effect would be a neutral grey, but this time I wanted to add some extra color and energy – so I layered a second hue just slightly offset from the first. It’s a simple shift, but it makes a big difference!
Try pairing colors from the same family for a soft, blended shadow, or use contrasting shades for a bold, graphic look.
PRO TIPS:
- Keep the offset small — just a few millimetres — for the best “double vision” effect without losing that crisp stencil detail.
- Add the darker color on top, as dye inks are transparent and the blend will show through beautifully.
- If you prefer to keep each layer separate (without visible blending), try using a pigment ink instead.
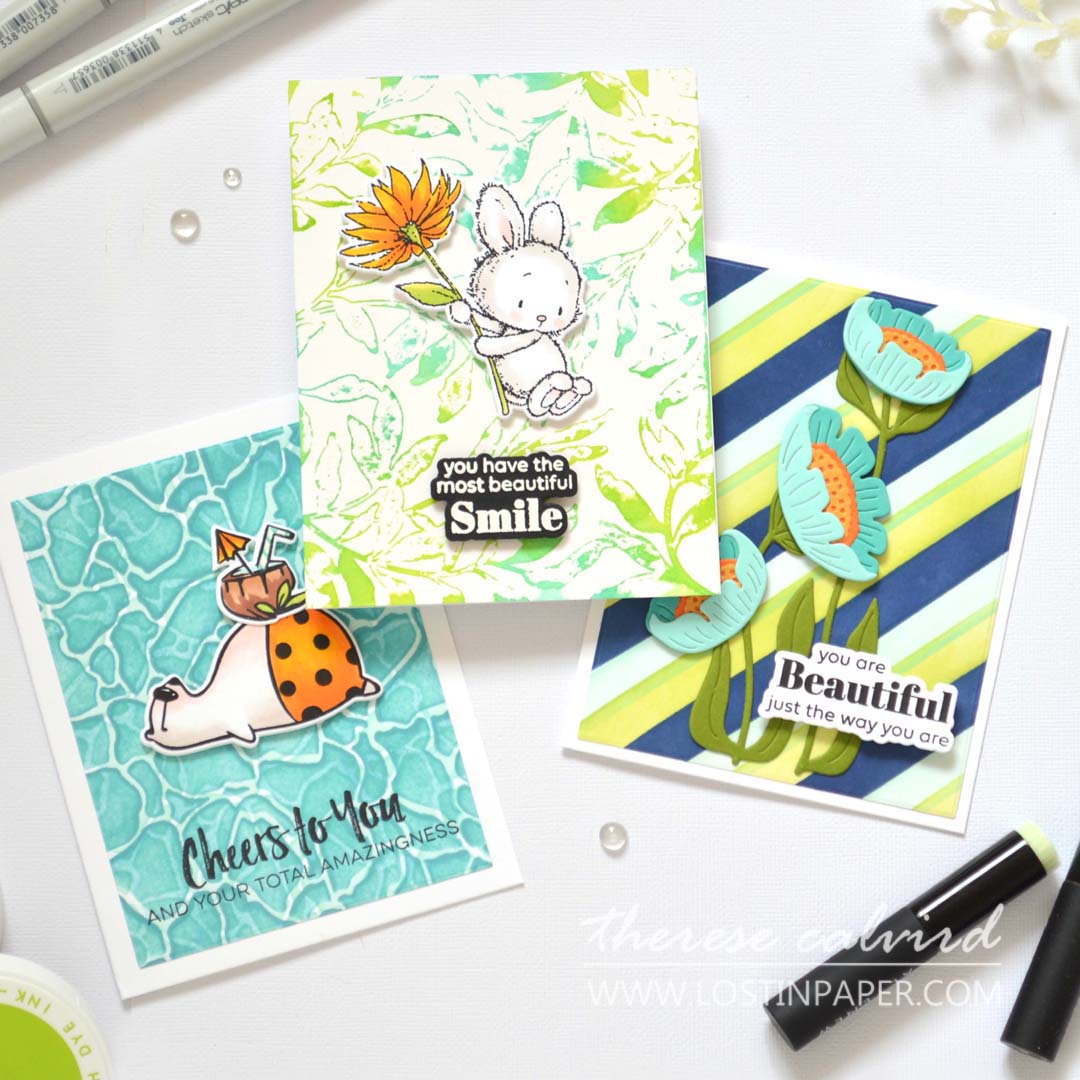
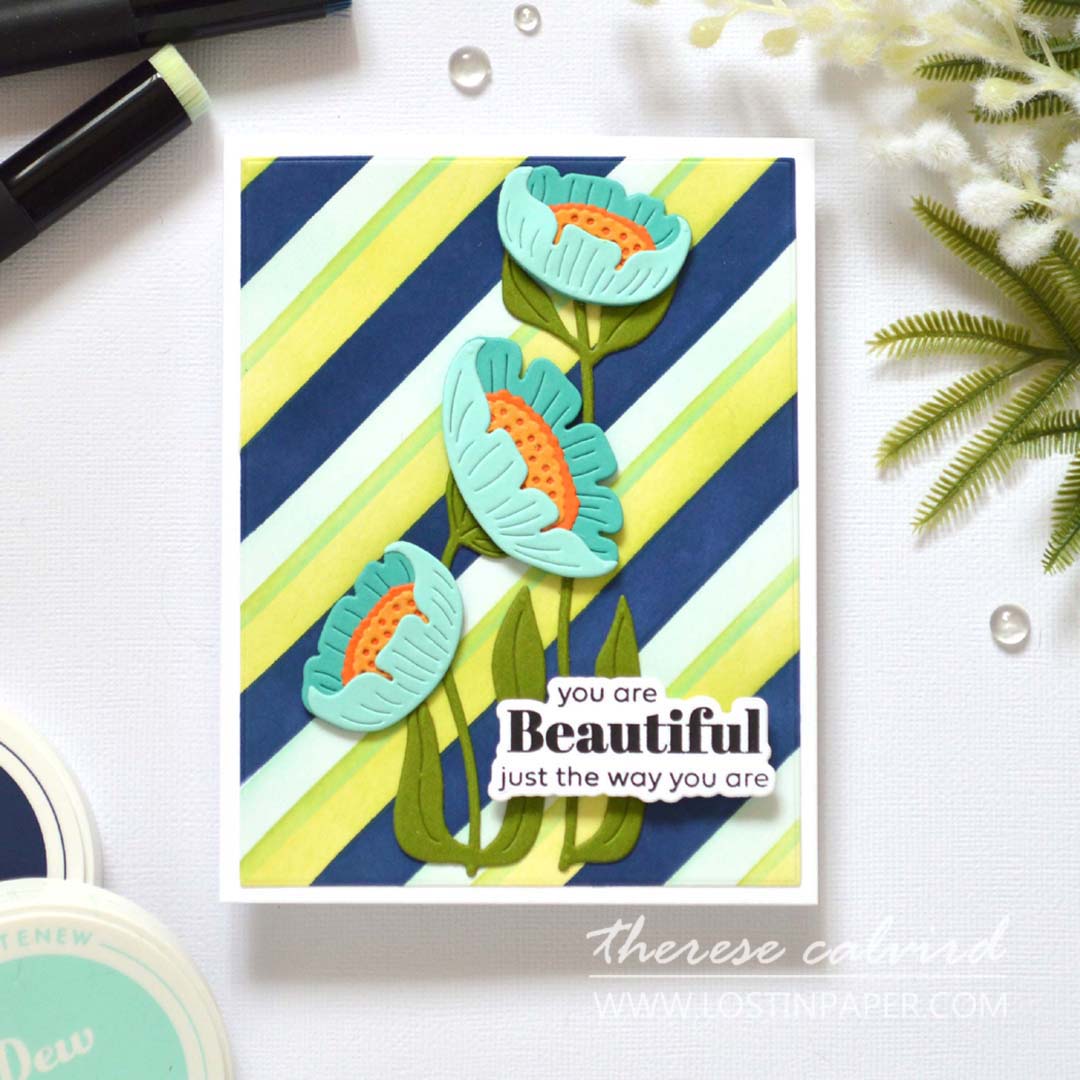
Technique #3 – Overlapping Angled Stripes
If you’ve been here before, you’ll know that angled stripes are one of my go-to designs – and for good reason! They’re quick, bold, and always look polished.
For this card, I kept my stencil on the same angle, but overlapped my inks to create a new blended stripe of color. It’s such an easy way to add depth and a little surprise to a simple background.
Just make sure to choose colors that blend together nicely – I went with a bold navy, but you could make it softer by using lighter colors, or even leaving a little white space for contrast.

PRO TIP: These stripes don’t have to be angled! Try rotating your stencil to create a quick plaid, or switch it up with vertical or horizontal stripes instead.
Don’t have a striped stencil? No problem – it’s easy to recreate the same look using strips of masking paper!
Technique #4 – Single Stencil Flipped
Now, this one’s a little bit of stencil magic!
I used the same stencil twice, but after the first layer of inking, I simply flipped it over and blended again. This creates an instant water ripple effect – the overlapping shapes form a brand new pattern that looks way more detailed than it really is.
This technique won’t work with every stencil style, but it’s worth a look through your stash. Something with a more organic, loose design tends to work best, whereas a bold, graphic pattern might not give quite the same result.
I did my darker ink blending on the second layer to mimic the ripples of water, but depending on your stencil, it may suit you to switch up the colors instead. It’s definitely worth a try – you know… it’s only paper after all (and that’s one thing we papercrafters have an abundance of)! 😄
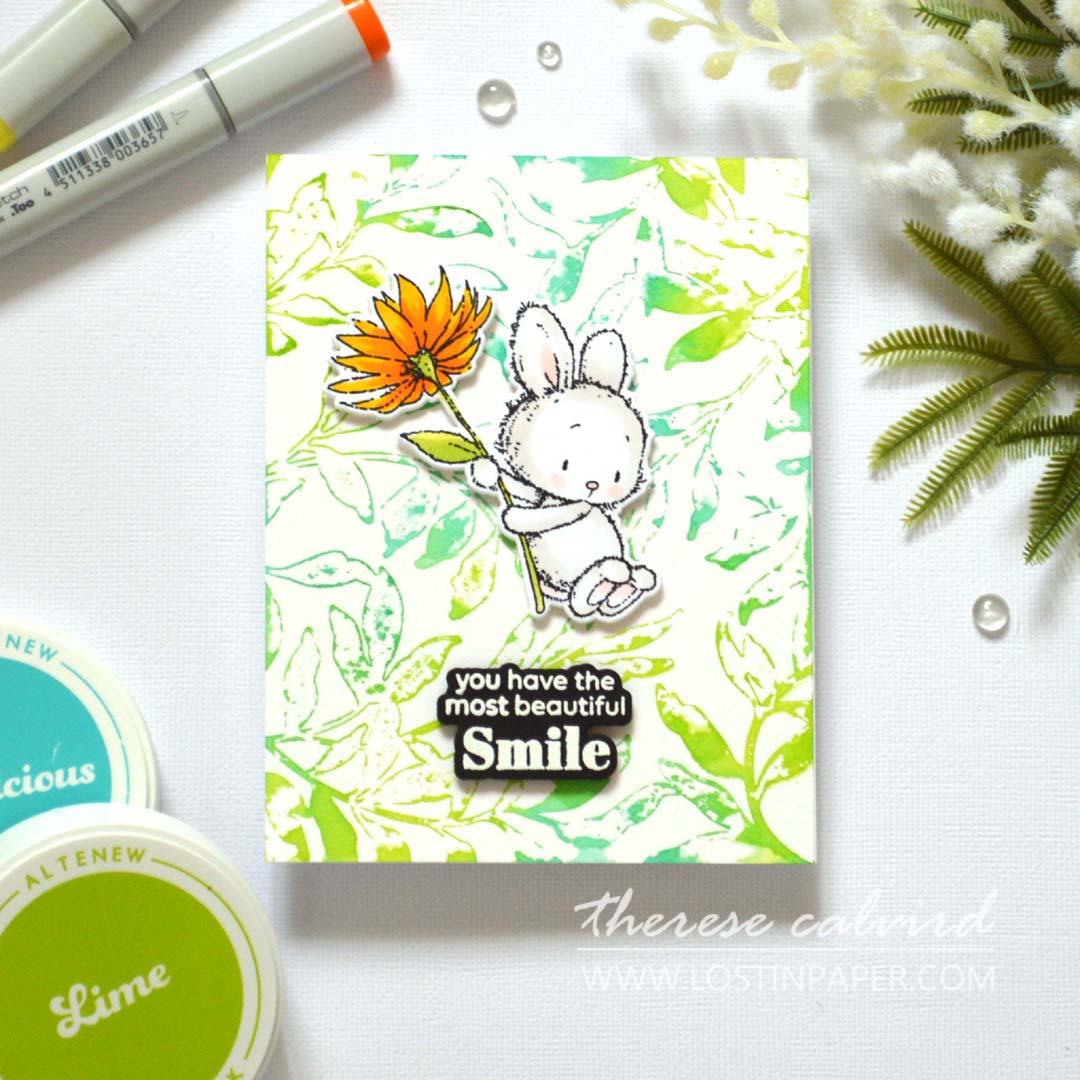
Bonus Technique – Reverse Stencil Print (Watercolor Look)
This one looks fancy, but it’s honestly one of the easiest ways to create an artsy background – no paintbrushes required!
All you need to do is ink up your stencil, give it a light spritz of water, and then press it onto your cardstock like a stamp. When you lift it off, you’ll reveal a soft, watercolor-style print that has all that beautiful organic texture without any effort at all.
It’s a great way to get a different look from your stencils, and you can even use the leftover inky water for a second “ghost print” – double the backgrounds in the same amount of time
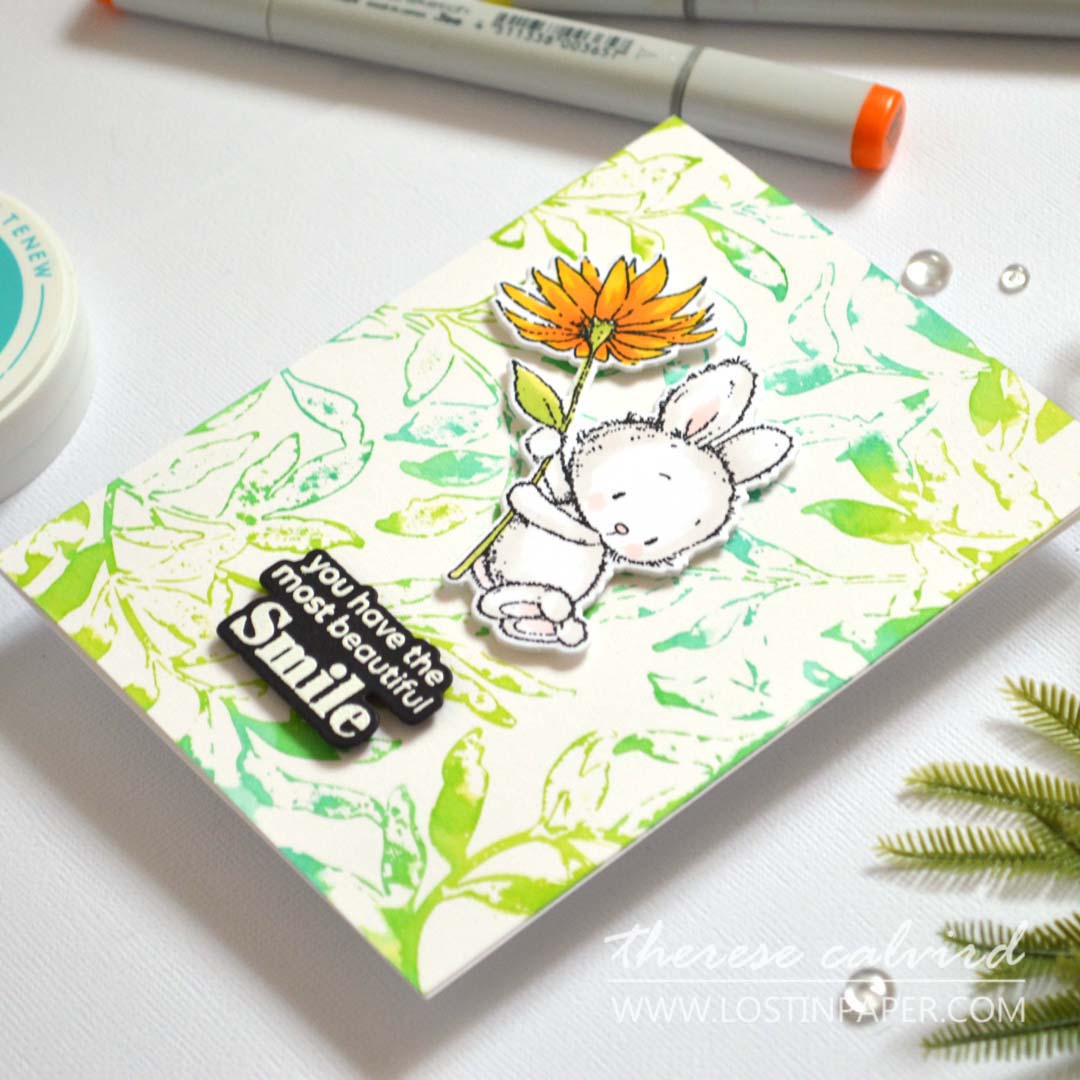
PRO TIP: Use water-reactive inks (such as dye Inks) for the best watercolor effect and use smooth watercolor cardstock to help capture the detail. If you have a brayer this may help add a little pressure to help transfer the color.
That’s a Stencil Wrap!
I hope these ideas have inspired you to take another look at your stencil stash and see just how quick and easy it can be to create WOW-worthy backgrounds in minutes!
Remember, it’s all about experimenting – try different color combos, flip those stencils, overlap your inks, and just play. You might be surprised at what you create when you let go of the rules (and the timer 😉).
If you give any of these techniques a try, I’d love to see what you make! Share your creations and tag me – you know I’m always excited to see your cards and hear what worked for you.
Happy papercrafting,

Special thanks to my crafty assistant, Chad (aka ChatGPT), for helping me stay on track with my Gemini brain, grammar, and spelling… well, all the things! 😄
P.S. Need supplies? Here are the links to the products I used today (some of these are affiliate links, so I’ll earn a small commission if you make a purchase—thanks for supporting my channel 🥰)!
*Certain content that appears on this site comes from Amazon, this content is provided ‘as is’ and is subject to change or removal at any time. As an Amazon Associate I earn from qualifying purchases.
Stencils: Altenew – Castle Motifs Stencil (retired) | Alex Syberia Designs – Shiny Diamonds (retired)
Stamps: My Favorite Things – Anything But Basic Birthday Wishes | Uncorked (retired) – Waffle Flower Crafts – Stay Cool (retired) – Penny Black – Flying By.
Cardstock: Altenew – Jet Black | Chamomile | Orange Cream | Olive | Desert Night – Concord & 9th – Aqua Sky | Oceanside.
Inks: Altenew – Dew Drops | Aqualicious | Navy | Limeade | Lime.
Alcohol Markers: Copics – 0 | E000,25,34,40 | R00,05 | Y19 | YR04 | C3,9 | T4 | BV20 | BG11,13 | YG03,21 | W7 – Sketchmarker Pro – B80.
 Kokeshi Dolls BP SSS | OTH | OTH | SB US |  Striking Flowers Bundle ALT | SSS |  One-Go: Solid Sentiment Strips Bundle ALT | SSS |  Merry Mix Stencils SSS | OTH |
 Fresh Picked Anemones SSS | OTH | SB US |  Billowing Peonies ALT | SSS |  Water Stencil ALT | SSS |  Leaf Bed Stencil ALT |
 A2 Layers Die SSS |  Neenah Solar 110 AMZ | SSS | Neenah Solar 80 AMZ | SSS |  Altenew Cardstock ALT | SSS |
 Concord & 9th – Cardstock SSS | OTH |  Watercolor Paper Set ALT |  Tuxedo Black SSS |  Nocturne SSS |
 Versamark Ink SSS | OTH |  Marine Life ALT | SSS |  Sweet Dreams ALT | SSS |  Whispering Woodland ALT | SSS |
 Large Blending Brush ALT | SSS |  Mini Blending Brush Set ALT | SSS |  Copic Markers SSS |  Antique Gold Spray ALT | SSS |
 Pure White ALT |  Antique Gold ALT |  Powder Tool SSS |  WOW Heat Tool SSS |
 Perfect Picker ALT | SSS |  Tweezers ALT | SSS | Scissors AMZ | SSS |  Fine Mister Spray ALT | SSS |
 Triangle Tray OTH |  Magnetic Glass Mat cm OTH |  Perfect Align Tool OTH |  9X12 Ultra Sticky Mat: Grid ALT | SSS |
 Media Grip Mat SSS |  Bone Folder ALT |  Score Board ALT | SSS |  MISTI SSS |
 Mini MISTI SSS |  Platinum 6 ALT | SSS | OTH | SB US | 9″ Fiskars Paper Trimmer AMZ |  Precision Glue Press AMZ | SSS |
Bearly Art Glue AMZ | SSS |  Glue Tape ALT | SSS |  Foam Squares – Black mix SSS |  Foam Tape NEW sizes! ALT | SSS |
 Satin Masking Tape ALT |
3 Creative Focal Point Card Ideas with Embossed & Stenciled Backgrounds!
Great stencil techniques, Therese . Now if I can only remember them all. I definitely will be doing the stripes.
I can see those stripes in so many ways… I like them vertical and horizontal, wide, thin… well, I think you get it lol. Hope you have fun with your stash Bobby x
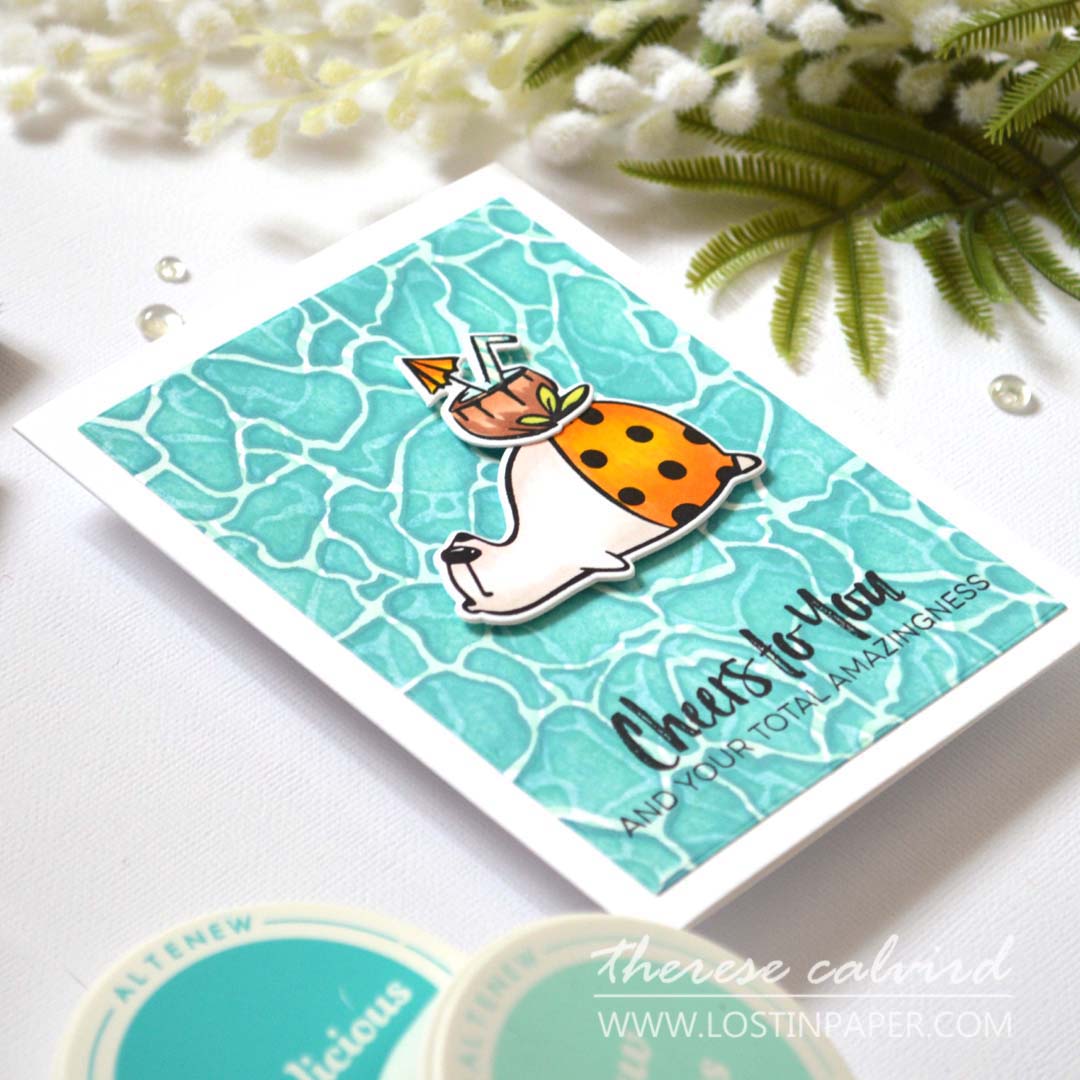
I’d love to know what stamp set has the greeting for card #4 (Cheers to you and your amazingness)!
Hi there Becky, it’s an old set from My Favorite Things called ‘Uncorked’, I’m not sure if you can find it second hand somewhere? But it’s a fun one and perfect for wine lovers. Thanks for taking the time to reach out. Crafty hugs Tx