
Not a fan of swatching??? Then, you NEED to see this, because you are going to change your mind!
Quickly and easily create stunning colour combinations using the exact cardstock you already own! Imagine being able to create amazing colour mixes from your stash, with just a simple turn of a wheel.
Today, I share how I’ve started swatching my coloured cardstock and using it to it’s BEST potential, and I was inspired by my friend Nicole Watt and HER VIDEO from 2021 (sadly for us, Nicole no longer creates card making videos).
AND you can use this for whatever brands/types of cardstock that you have in your stash!
(SCROLL for the link to my Ink Swatch FREEBIE).
You can watch the video here or in HD on YouTube right HERE.
I use affiliate links, this means that if you click on a product that is linked to an affiliate shop then I will receive a small portion of the sale at no extra cost to you).
This is a great way to support me as well as the shops that we love 🥰!
My AHA Moment!
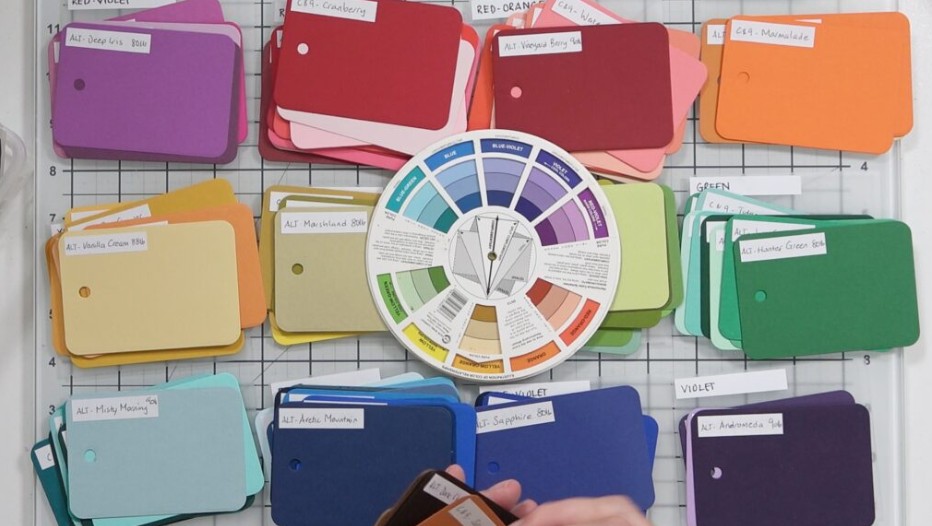
I am a SWATCH girl, but I have never bonded with any methods I have previously tried for swatching cardstock. Until I saw this idea, to me it makes sense. These swatches are a ‘good size’ to work with, and also sorted into what I consider ‘usable’ colour families.
Which means, that I can use them along with the Color Wheel to create MY OWN cardstock colour combinations with confidence. AND I can also use these combinations with my colouring too (I won’t discriminate).
#SWATCH-IT
Supplies
- Gather all your coloured cardstock and, don’t forget your specialty papers.
- Paper Trimmer or Tag Die and Die cutting machine.
- Copy paper and tape runner or sticky labels.
- Thick plastic or Heavy Weight cardstock for dividers (you will need at least 15).
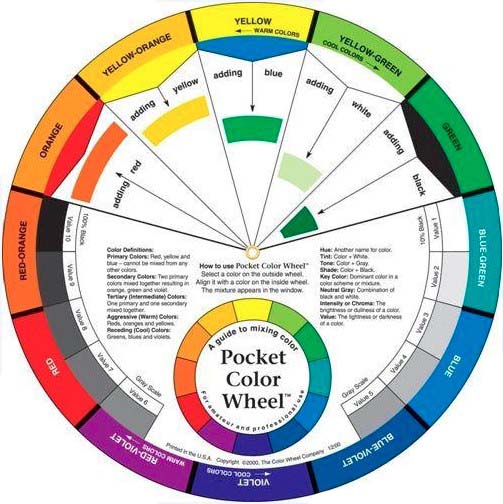
- Colour Wheel (or you can access this free online).
- Container to easily store and access swatches.
Create the Swatches
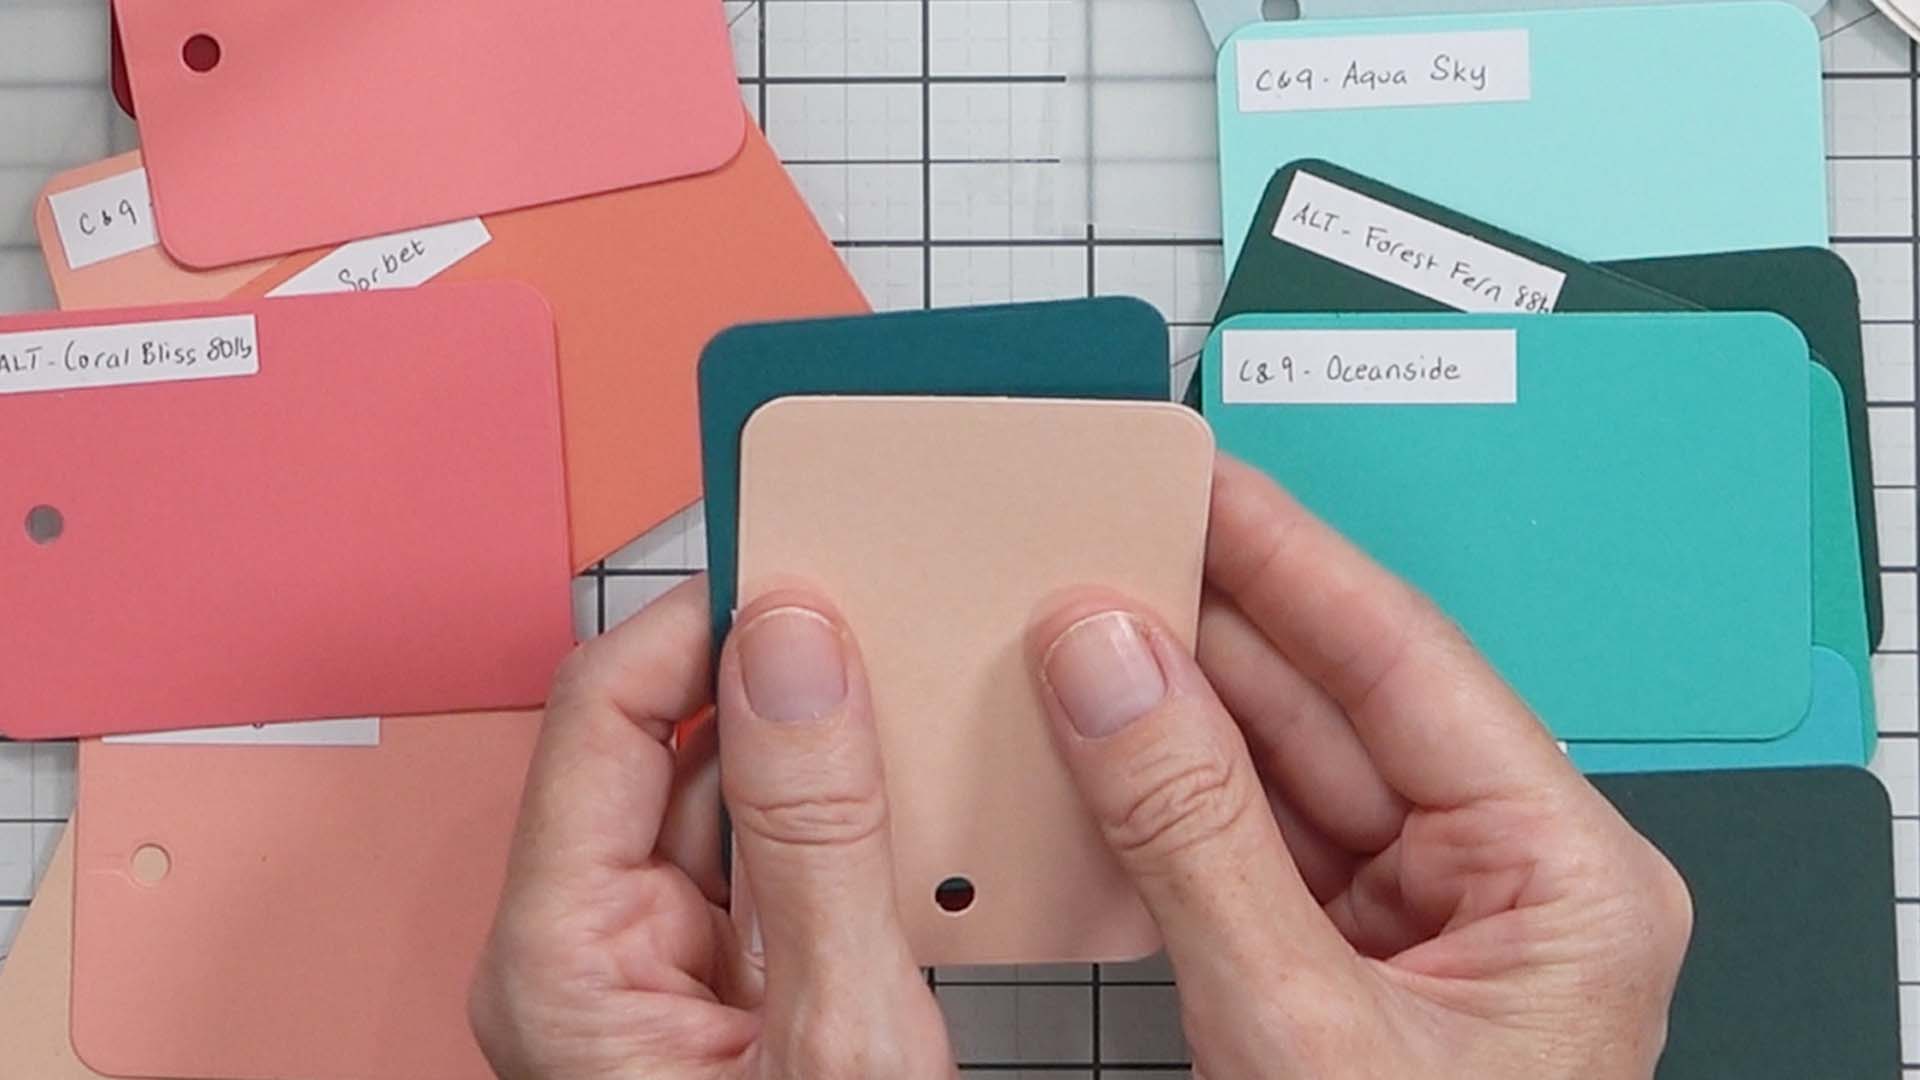
- Die cut or trim swatches to size – mine are 6.5cm X 9cm (2 1/2 X 3 1/2″).
- Add labels. You can include details like brand | colour name | paper weight.
PRO TIP: It’s faster to write these by hand but for a professional look these can be printed by computer - Assemble colours into ‘rough’ basic colour families (Reds/Blues/Greens etc).
- Create dividers and label these using the ‘Pure Color’ names from the Color Wheel (there is a total of 12 – You can find them on the outer edge of the wheel). I made extras, which included Brown | Neutral | Specialty. But you could also swatch your white cardstocks too and add any extras that you think you may need.
- Lay out the dividers in the same order as the colour wheel.
- Then work through the swatched cardstock and align each into it’s appropriate matching colour family, tone, tint or shade. No need to stress too much on this step as long as the colour is similar enough it will be fine.
- I store these in ‘Pure Color’ order in a plastic container with room to ‘flip’ and grow (i.e. add more colours 😉). I also keep the colour wheel in the container as well as the die I used and some spare labels.
- I am LAZY, if something is complex or involves too many steps then I will avoid doing it. So, having it all at my fingertips, makes it much faster and easier.
How Do I Use It?
Once you have the swatches set up, there are many ways that you can use the Color Wheel to make fast and easy colour combinations.
- Maybe you have one base colour that you like… grab it out and look at where it is on the wheel. Decide if you want to create a complimentary, split complimentary, analogous or any other combination. The instructions are on the wheel and easy to follow.
- Or, if you don’t know where to start at all, why not just spin the wheel and find a colour that makes you happy and work from there.
- The combination that you choose will take you to the Pure Color headings (the 12 colour names around the outer edge of the wheel).
- This is when you really get to have fun. Grab out your co-ordinating Pure Color swatches and start choosing, mixing and matching different combinations.
- And you don’t have to choose just one of each, you can certainly use different tints, tones and shades of one Pure Color to take your combinations to the next level.

- The BEST THING is that you have now made a colour combination with the EXACT cardstock you have in your stash!
- And don’t forget that Neutrals are you ‘get of jail free card’! These include browns, creams, black, white, greys, even some metallics and glitter cardstocks… you can add these to any of your combinations knowing that they will coordinate without clashing!
- PRO TIP: If you already have an idea of the colours you want to use, then why not use your swatches and the Color Wheel to ‘double check’ and make sure that the combination will work well together.
- Make sure to KEEP THE SWATCHES NEARBY, you are more likely to grab and use the cardstock that you have in your stash if you have it within reach.
BONUS IDEA: Did you know that these colour combos can be used for more than just cardstocks? You can also use these colour combinations with any mediums, why not try matching them with inks, pencils, alcohol markers or even paints!
Swatch Download
Next? I have always used ‘My Colour Story’, which is a flip folder where I keep track of all my inks, alcohol markers, pencils etc. And, I have used it for cardstock before, but the downside was that I wasn’t able to pick up the colours and hold combos together… and they were small and there was no ‘direction’ to take them other than what I felt looked good. Using the combinations from the Color Wheel feels like it’s taken the guess work away.
My Swatch Download is currently being updated, if you would like a copy or more details email me: thereseatlostinpaperdotcom
#MOREORGANIZATION
I hope this information was of value to you. Remember, that our ever evolving crafty spaces are our own, and what may work for me, may not suit you. But, I know that sometimes there is a little snippet of information that can really be a game changer.
Check out my Craft Room Tour from 2022 RIGHT HERE, time for an update? And, if you want see how I store my cardstock now you can watch this video here.
QUESTION: Do you swatch your cardstock? I’d love to know how you keep track and what works for you. Let me know in the comments below, I would love to hear your ideas (we ALL would)!!
OR perhaps you are with me on this one, do you think you may try storing your cardstock according to the Color Wheel? It’s a great place to start when creating unique and fun colour combinations with your own stash… let me know! And, don’t hesitate to reach out if you have any questions!
Thank you for spending your time with me today, sending crafty hugs your way!

SUPPLIES:
*Certain content that appears on this site comes from Amazon, this content is provided ‘as is’ and is subject to change or removal at any time.
Color Wheel – SSS https://shrsl.com/4b4ru | AMZ https://amzn.to/3PLimEk
Ellen Hutson – Tag Trio Die Set
Simon Says Stamp (similar size tag die) – https://shrsl.com/4tiit
A4 Clear Folders (30 pack) – AMZ https://amzn.to/4gFlkpi
Neat & Nifty Storage Pockets 9 X 11.5″ – ALT https://tinyurl.com/39je2hp7
12 X 12 Paper Holder Storage (I cut the inserts to make the dividers) – SSS https://shrsl.com/4sgy0
Fiskars Procision Trimmer – AMZ https://amzn.to/49MPpRH
Glue Tape -SSS https://shrsl.com/4ofax | ALT https://tinyurl.com/ymzw7tk9
Sizzix Big Shot Die Cutting Machine -SSS https://shrsl.com/4ofau
I like your strategy, and execution, Therese! I won’t be swatch-ing but know I was delighted to watch how you’ve done it!
=]
Thank you x
I certainly swatch my cardstock. I punch a 2″ circle and put on a ring in colour order. I also attach a punched tab to the side of my envelope and of course I label – if I’ve got my label printer attached to my computer I do it on that, otherwise I hand write. If I’ve also got the ink pad & refill I punch out a square for the ink pad (the little square cubes) and a circle for the top of the refill so I can see the colour easily.
I read on someone’s Instagram earlier they have three hobbies 1) the craft 2) the buying and 3) the organising. I certainly have number 2 & 3 down ! 🙂
Fabulous organization ideas Vicki! I am thinking about swatching out my inks onto a ‘ring’ system too… it will make it easier for colour combos, but I still like my book for a quick reference to see what I have.
You come up with such stunning ideas, tips and techniques. I’ve learned lots of this post for sure and thanks for sharing. Hugs xx
Thanks so much Angellica!