
Have you ever created a ‘faux’ letterpress look on your cards? That is just one of the quick and easy techniques that I am going to share with you today!
And today I have a GIVEAWAY……….
But first… Did you know that this video is part of my Take 2 With Therese series of videos that I create for Altenew? You can check out the full playlist right HERE for more inspiration.
I wanted to share 2 EASY ways to create some quick and beautiful cards using a 3D embossing folder.
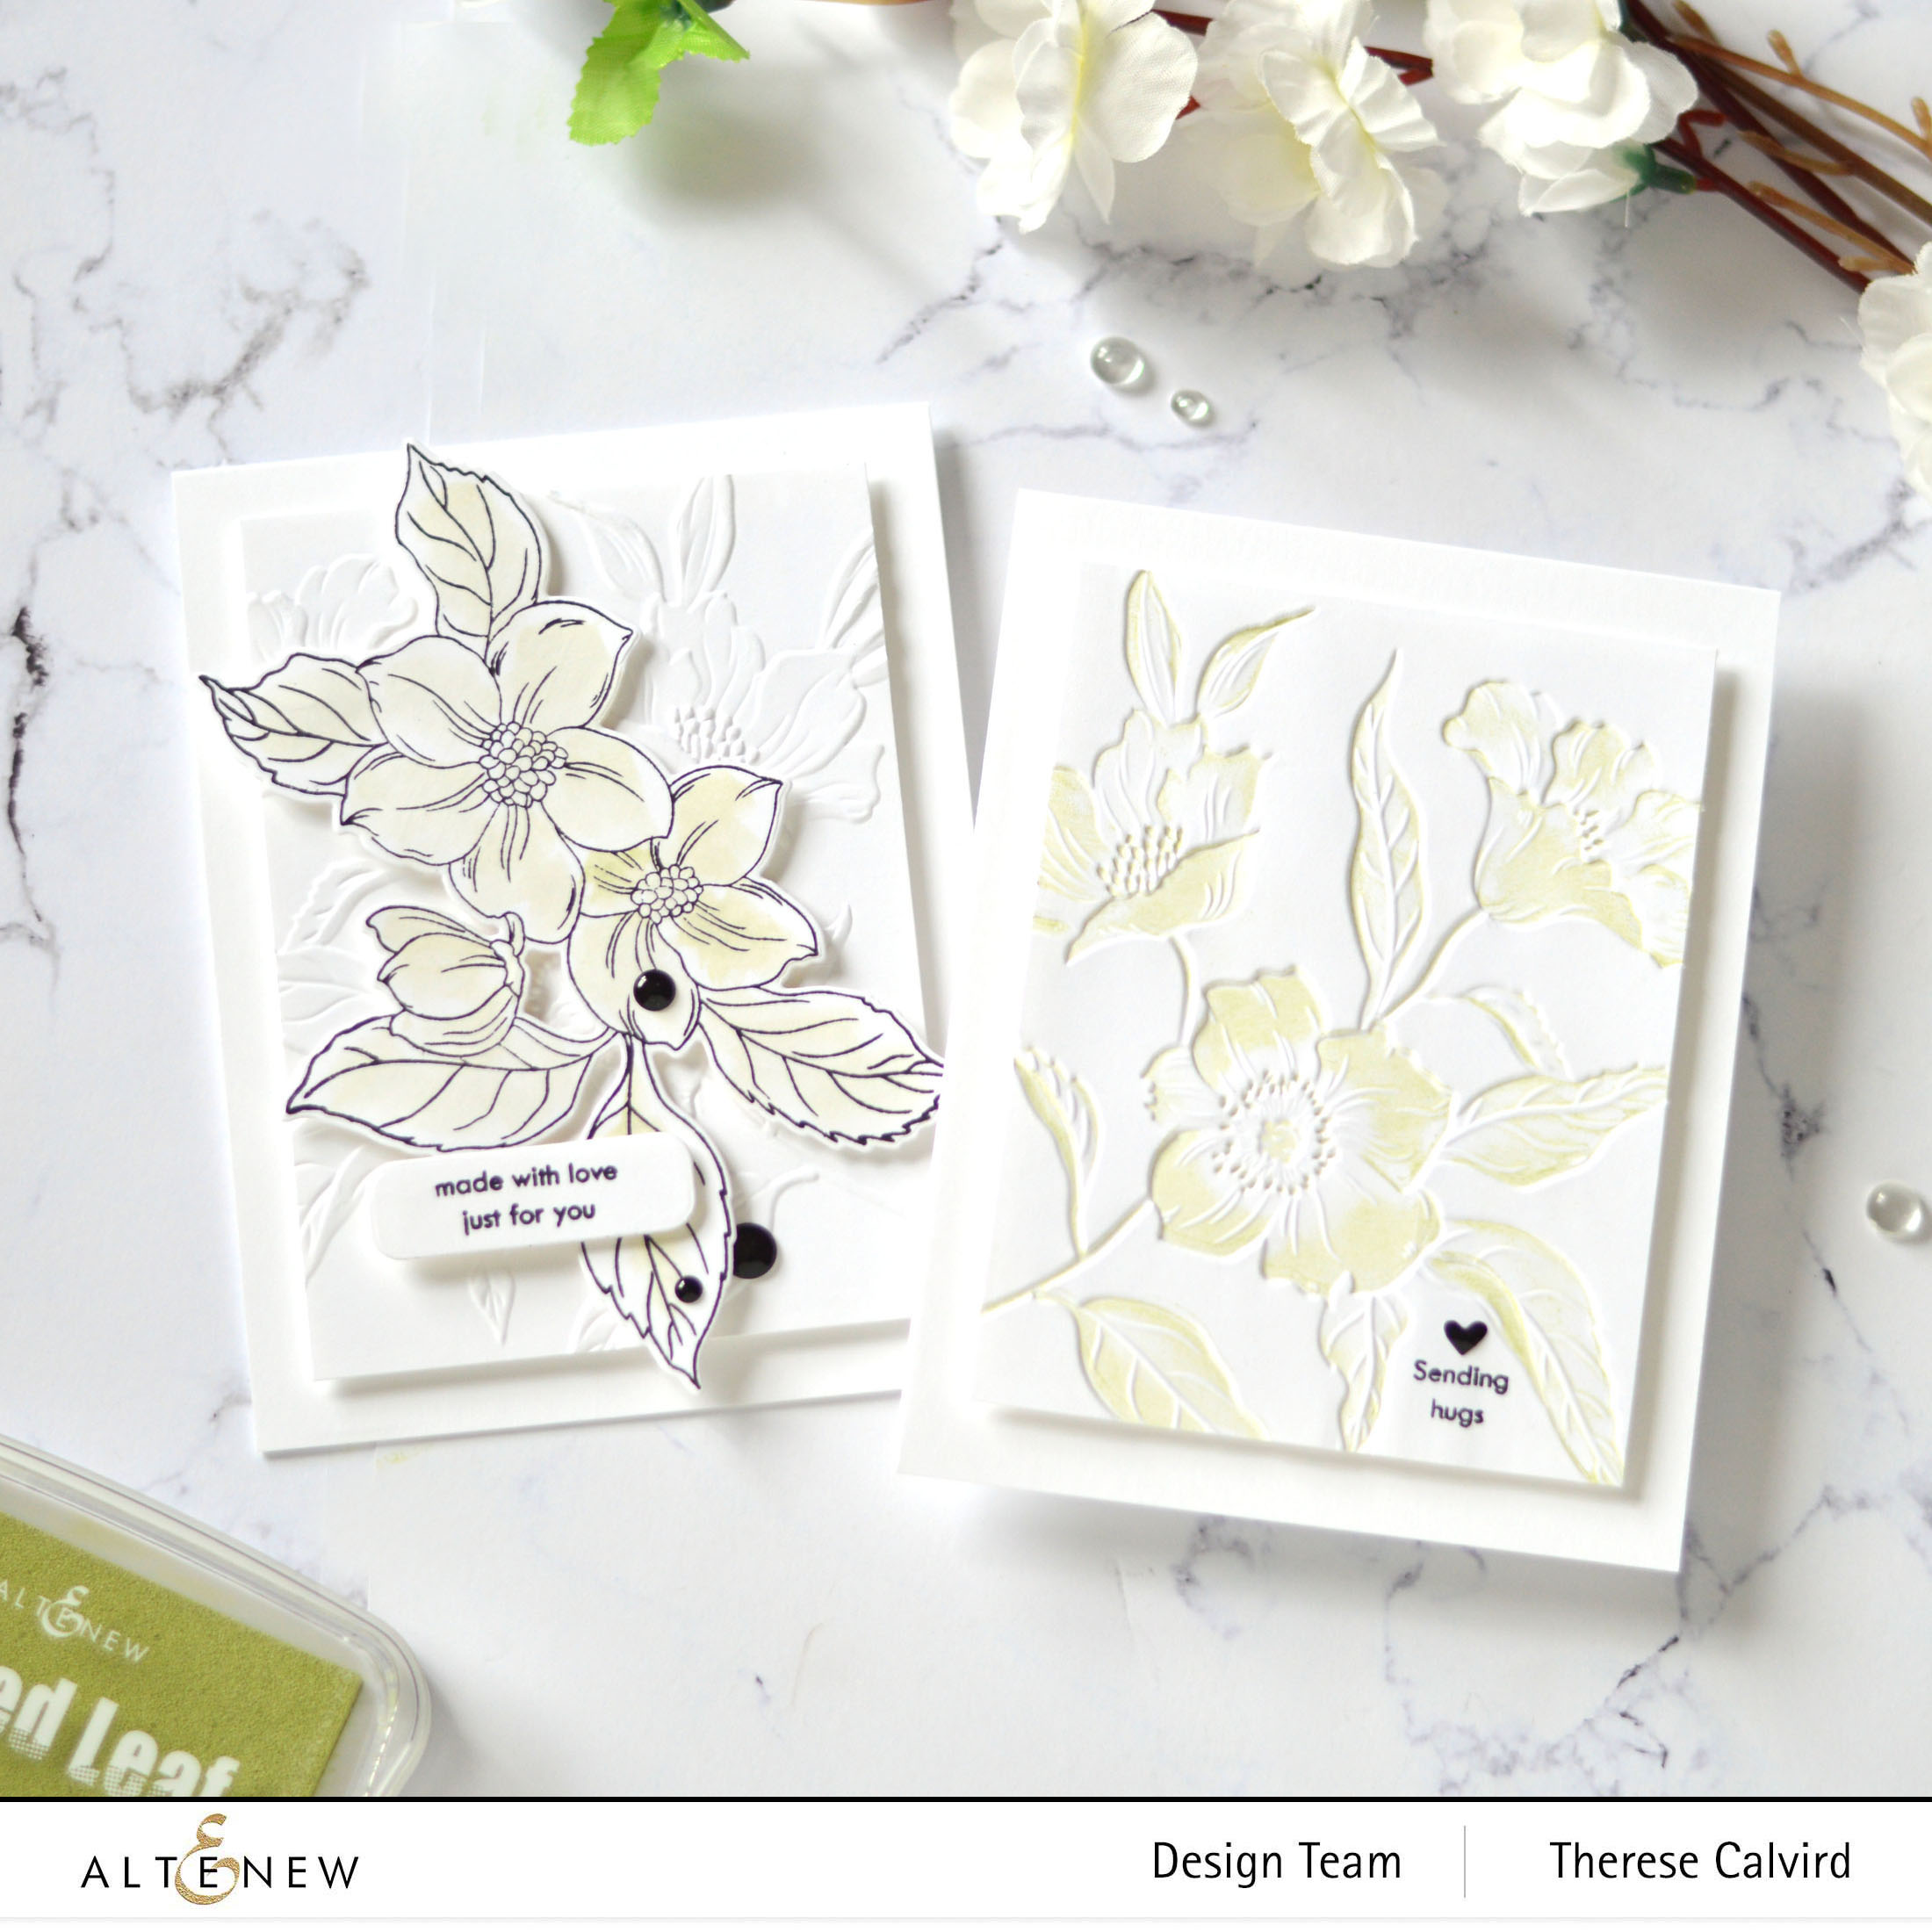
I decided to use the Hello Beautiful Project Kit today.

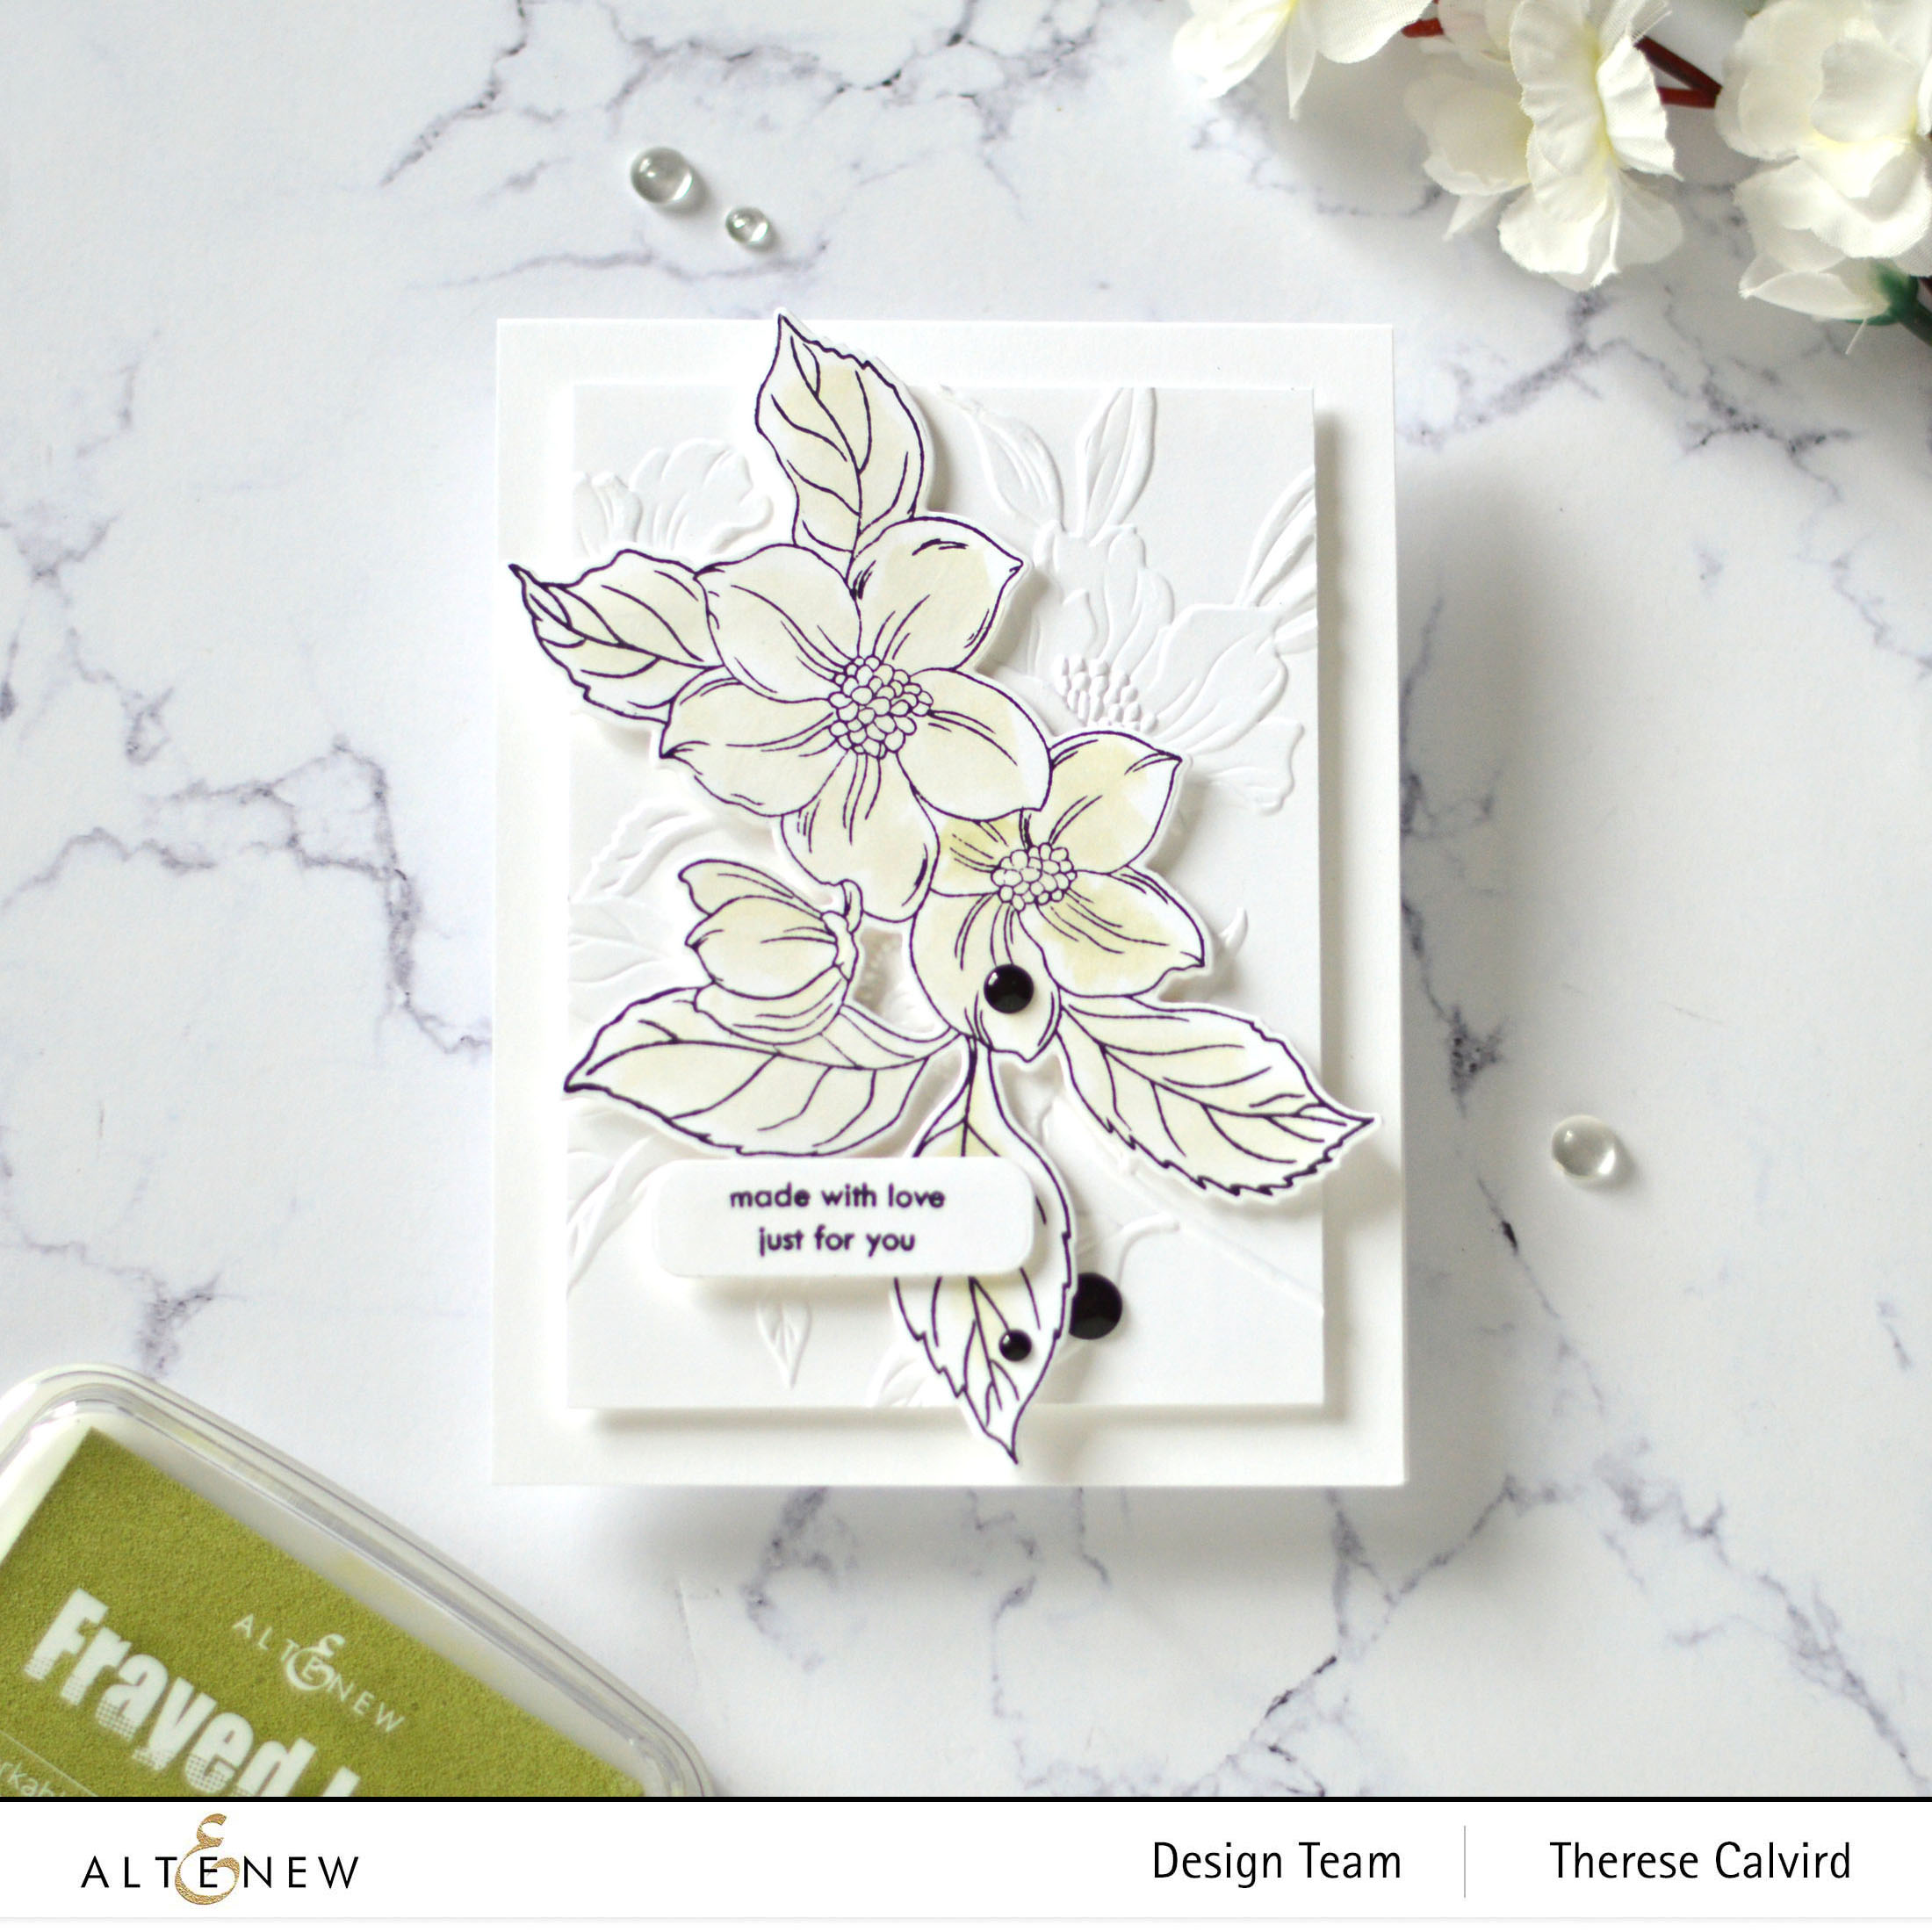
And my first card has a ‘faux’ letterpress look which is extremely easy to do.
I used the Frayed Leaf Pigment Ink and I adore how this pale colour looks on the white.
If you want more inspiration watch this video HERE where I used a Dye Ink and the reverse side of the embossing folder. And the result looked amazing!
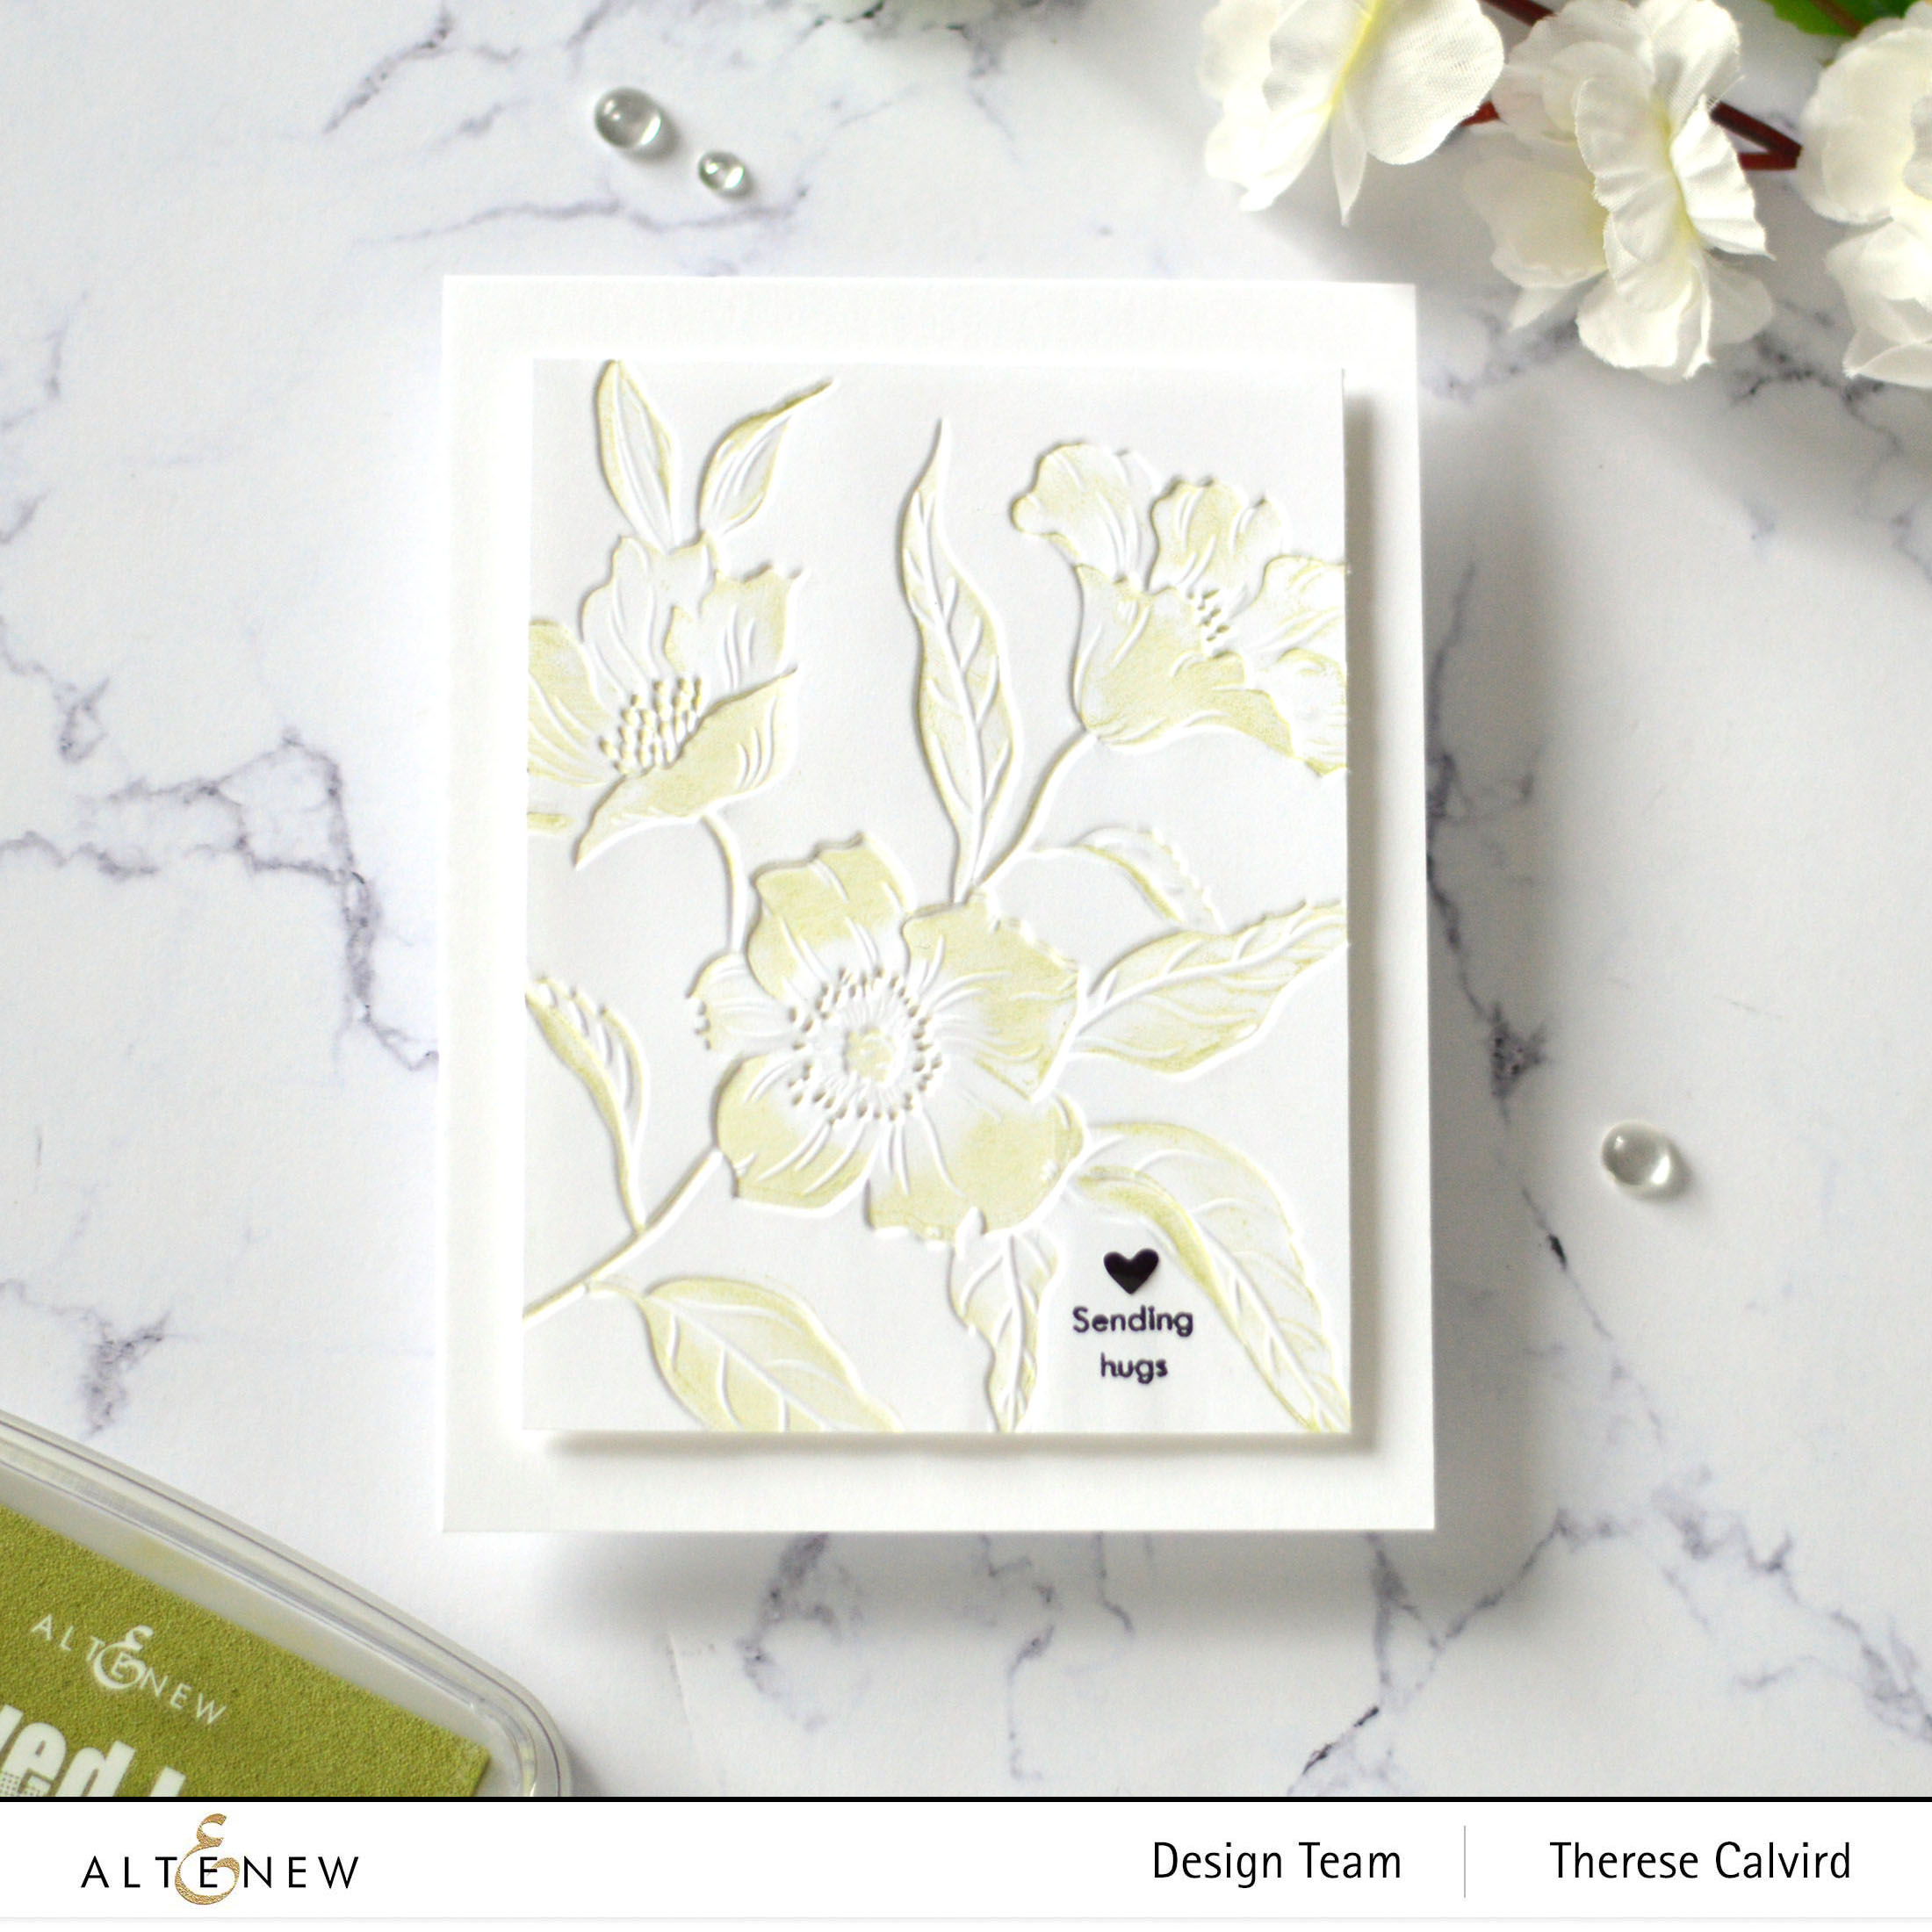
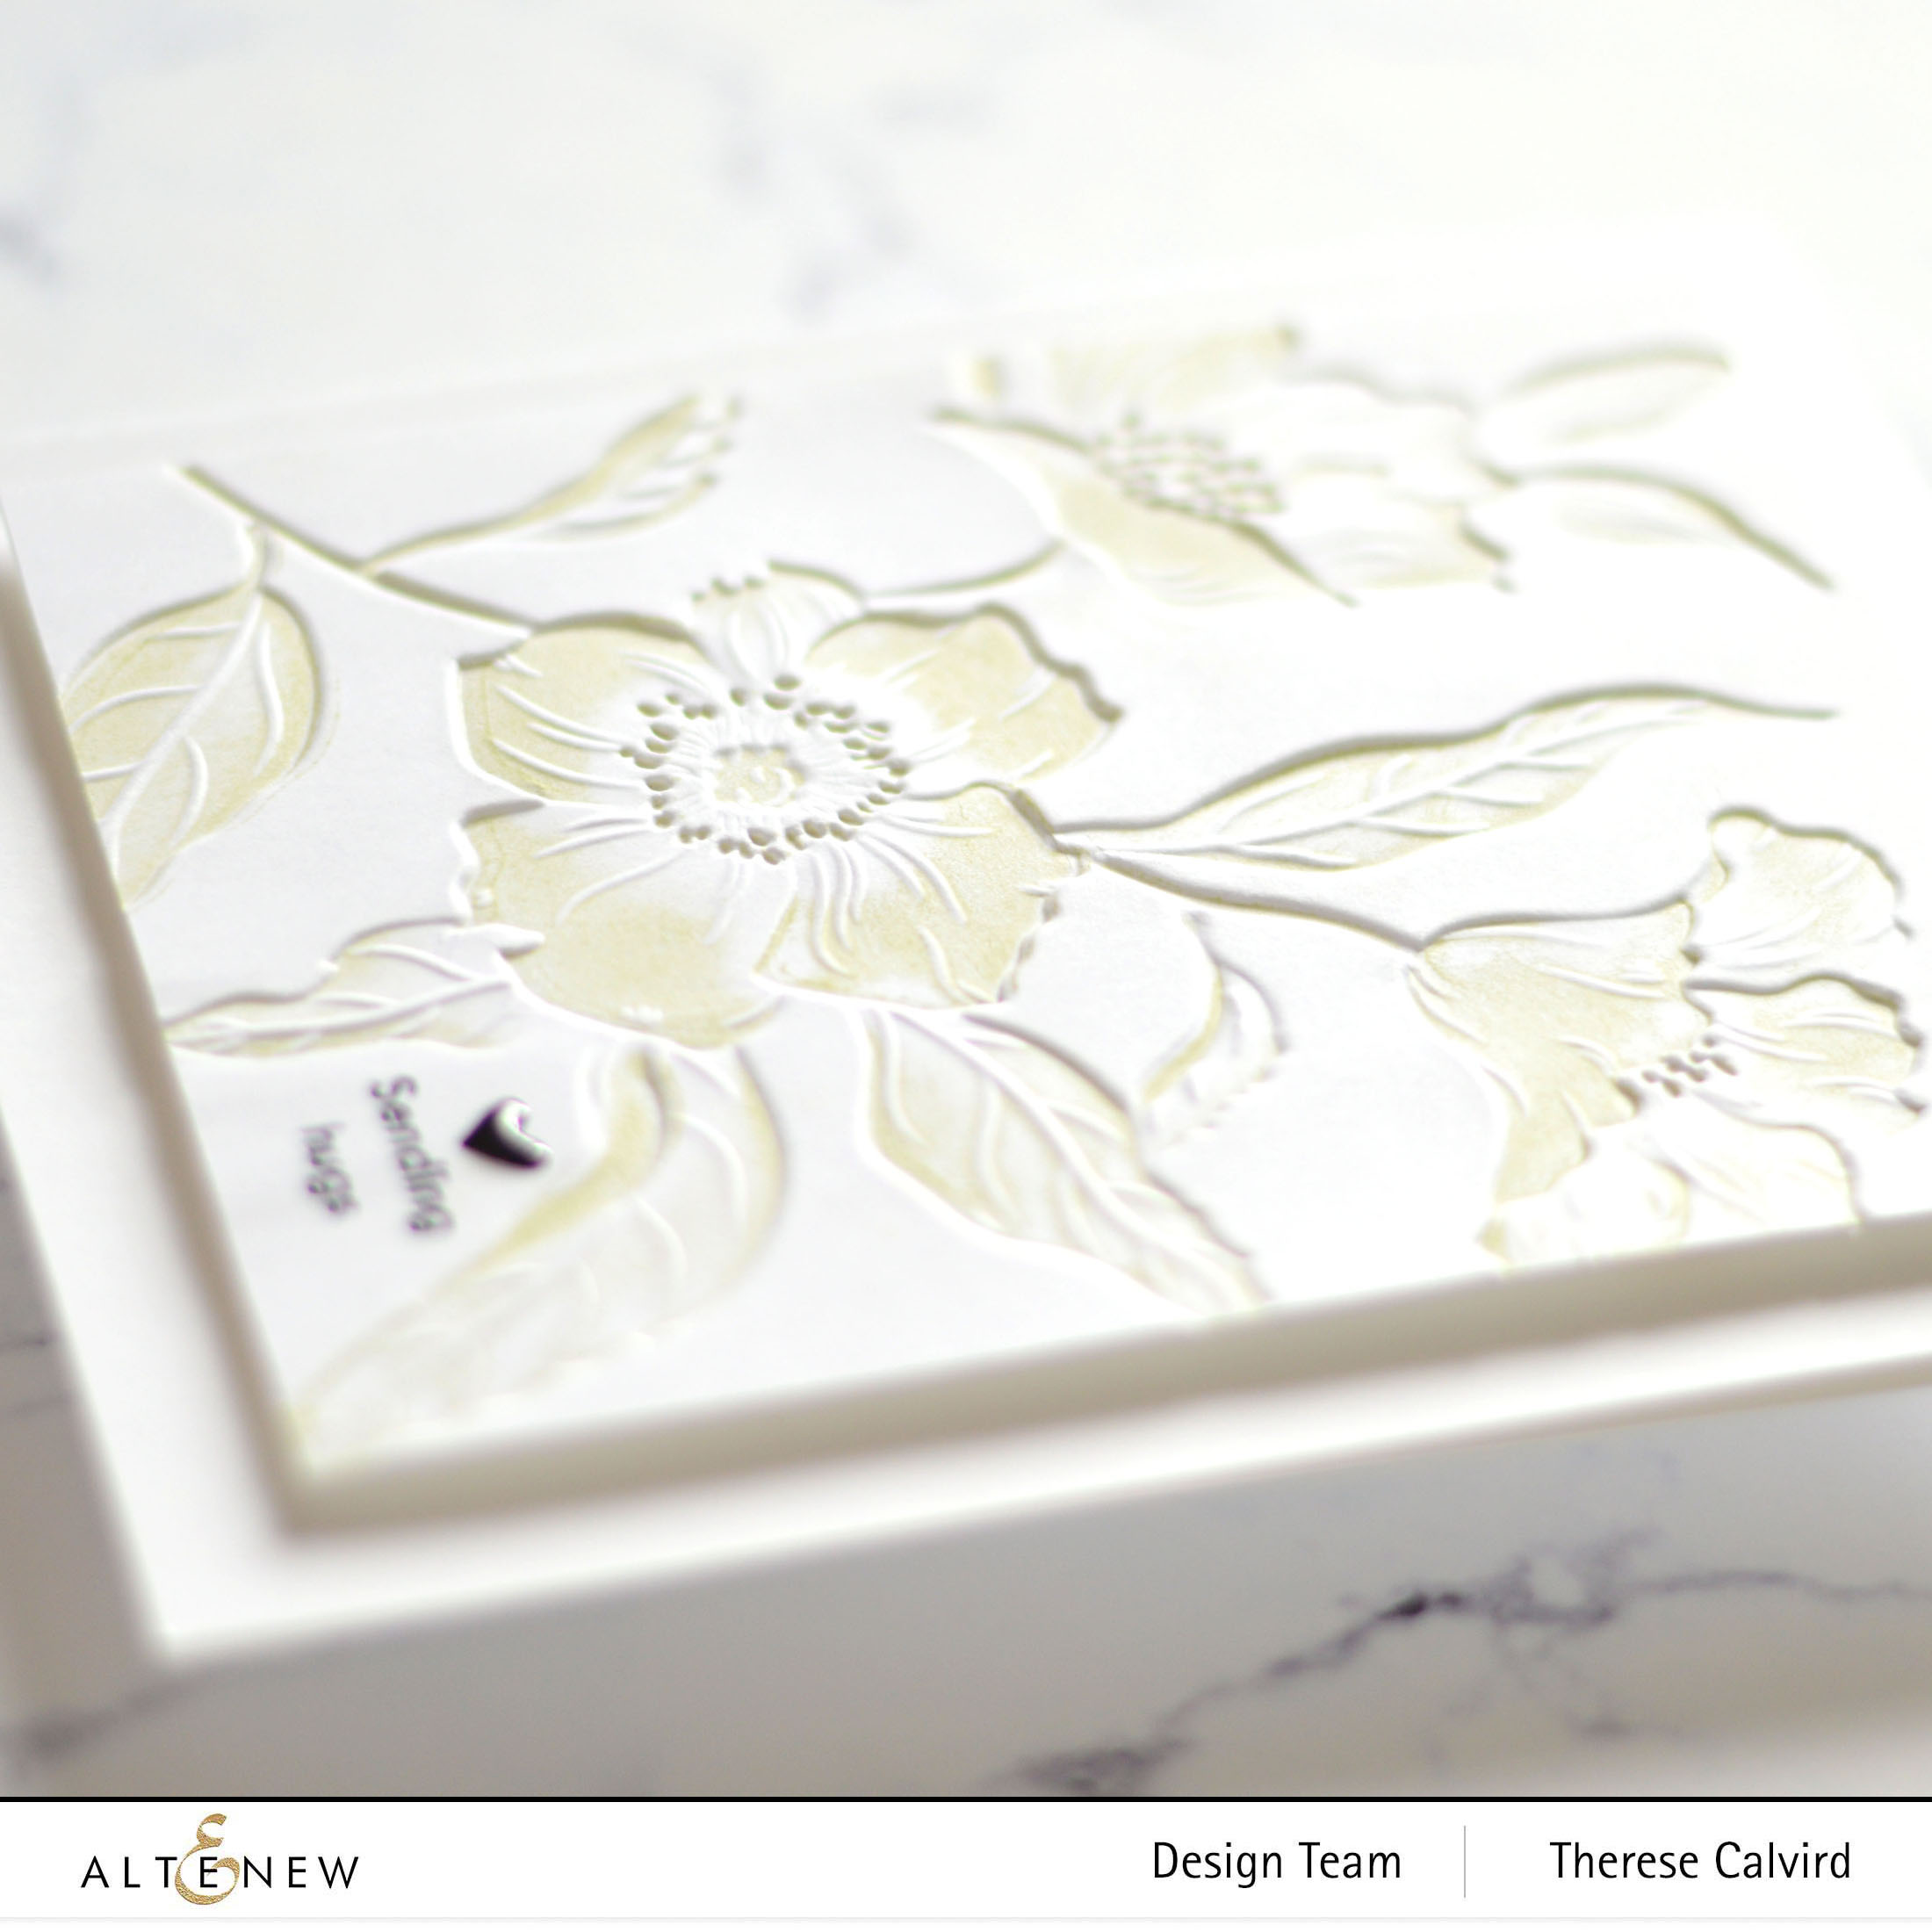
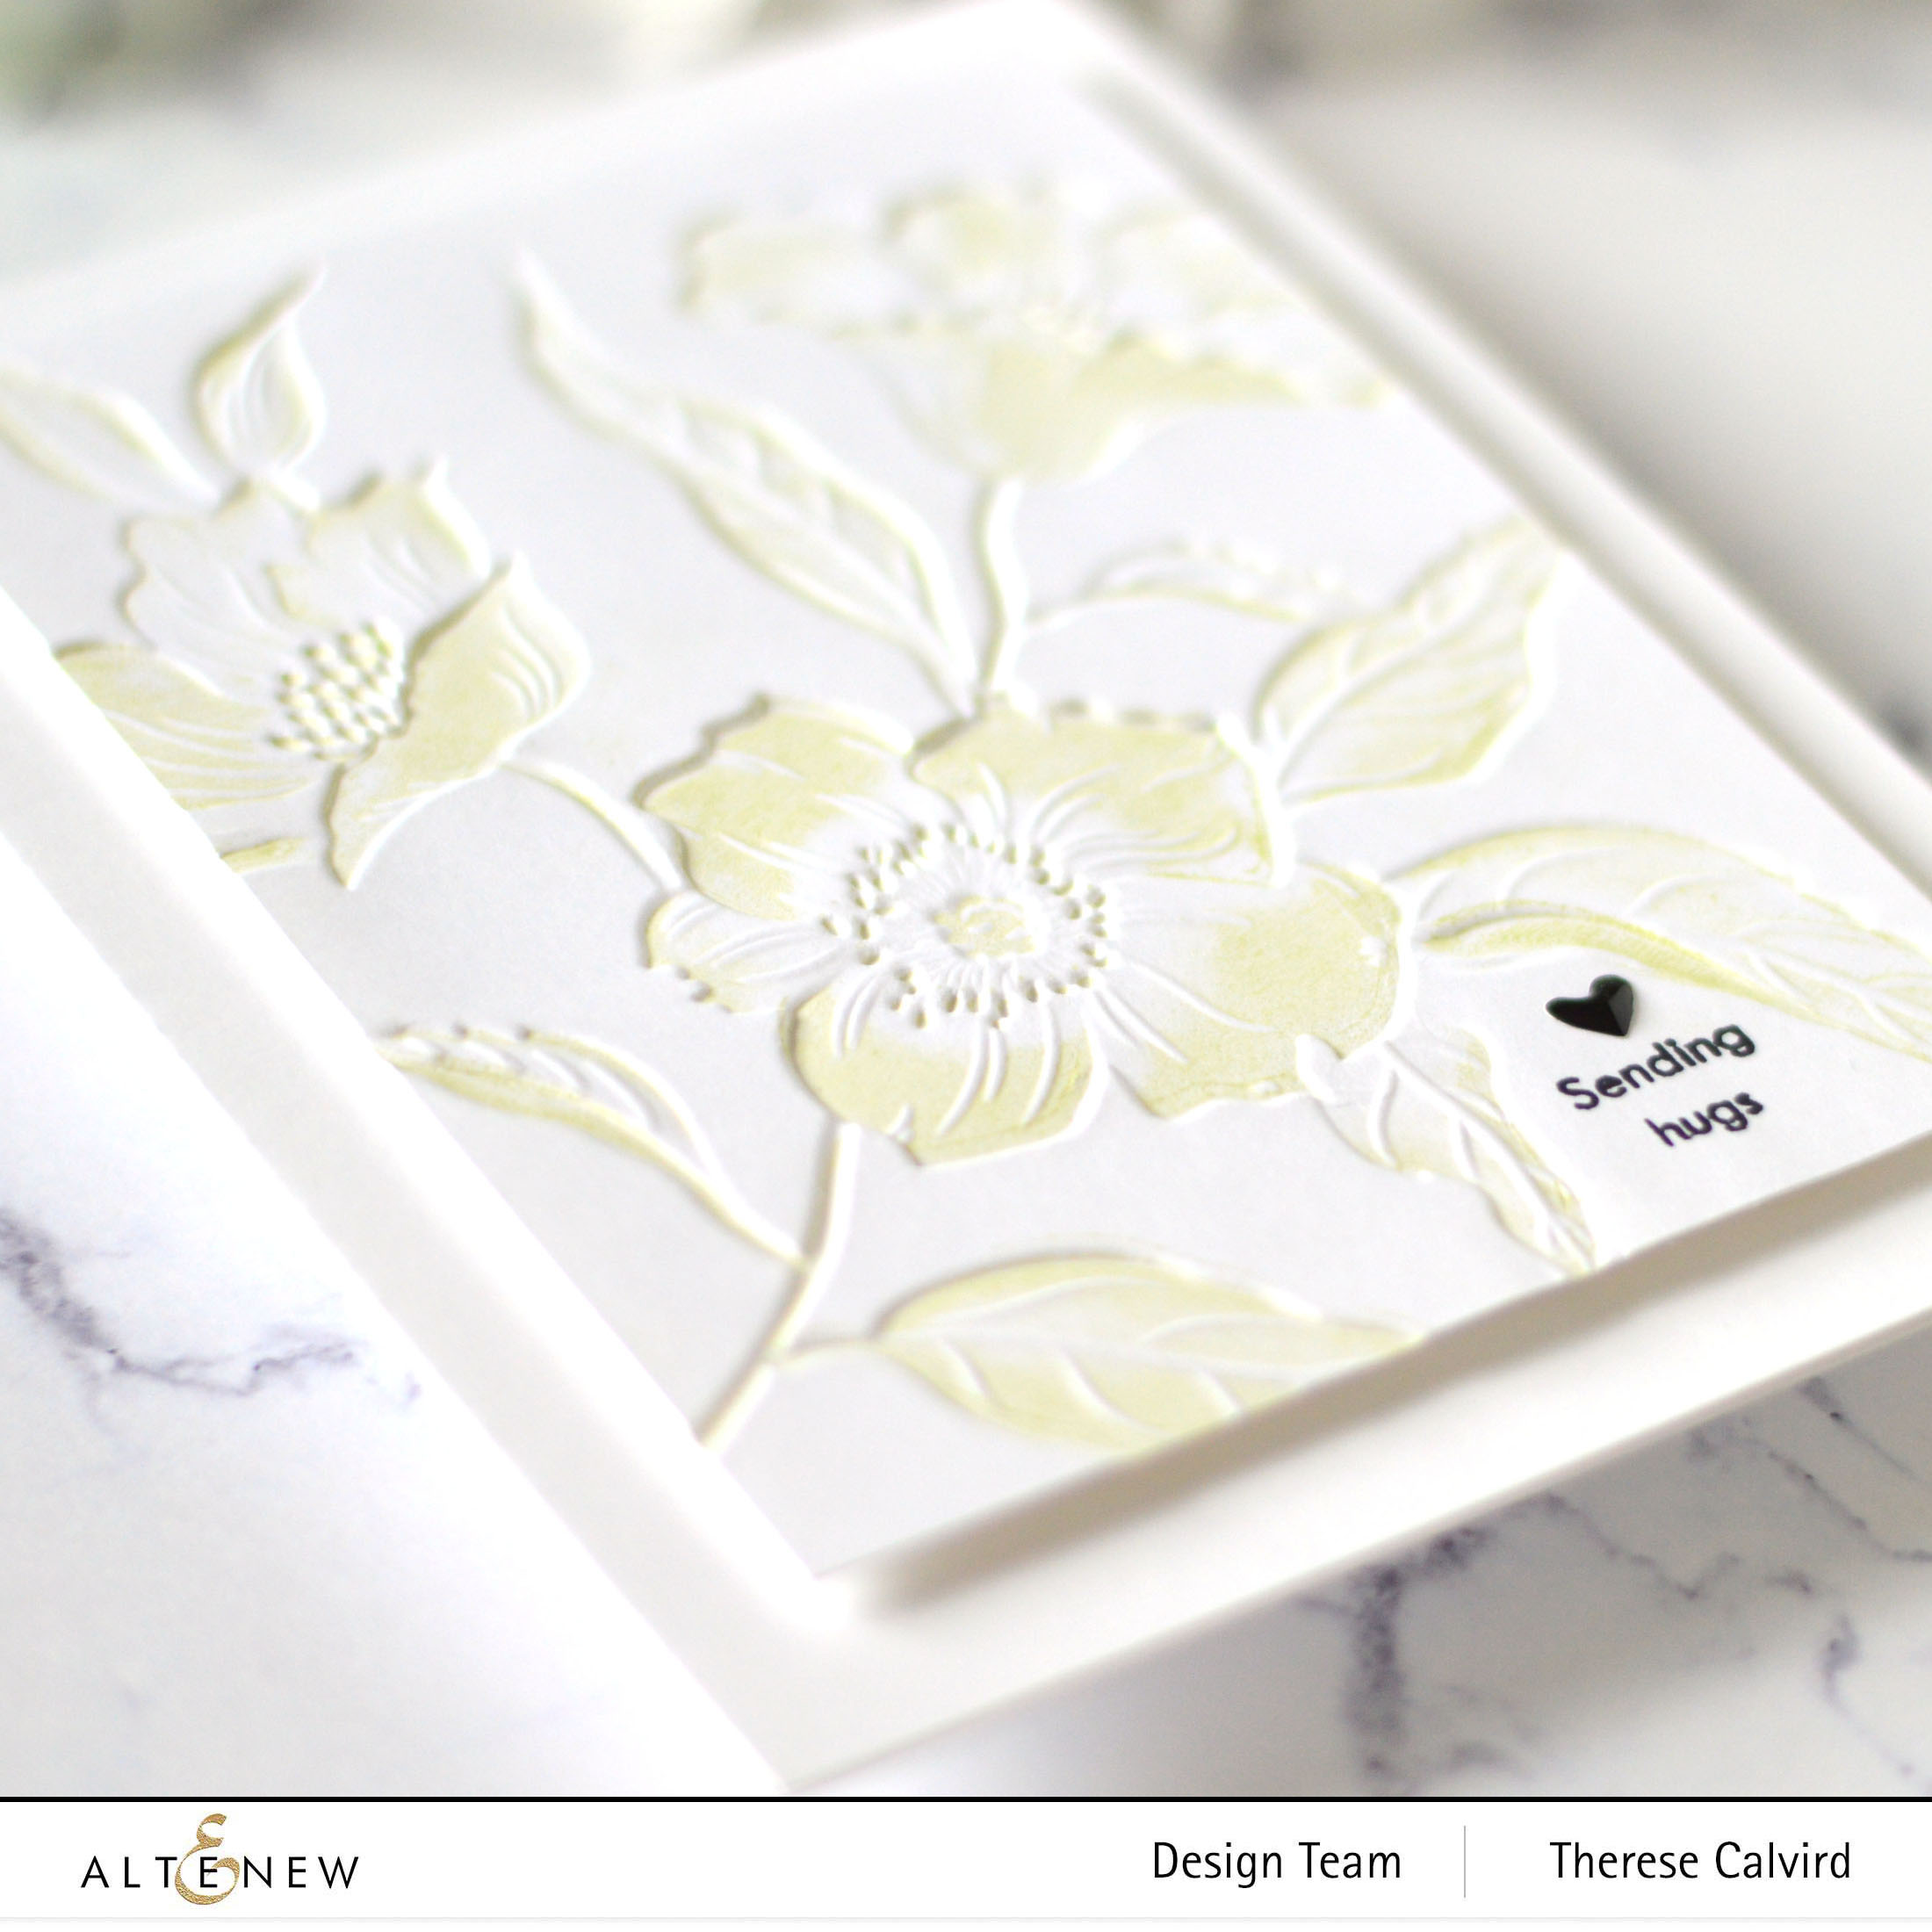
Next, onto my second design. This time I decided to use the embossing folder to create a subtle but interesting background.
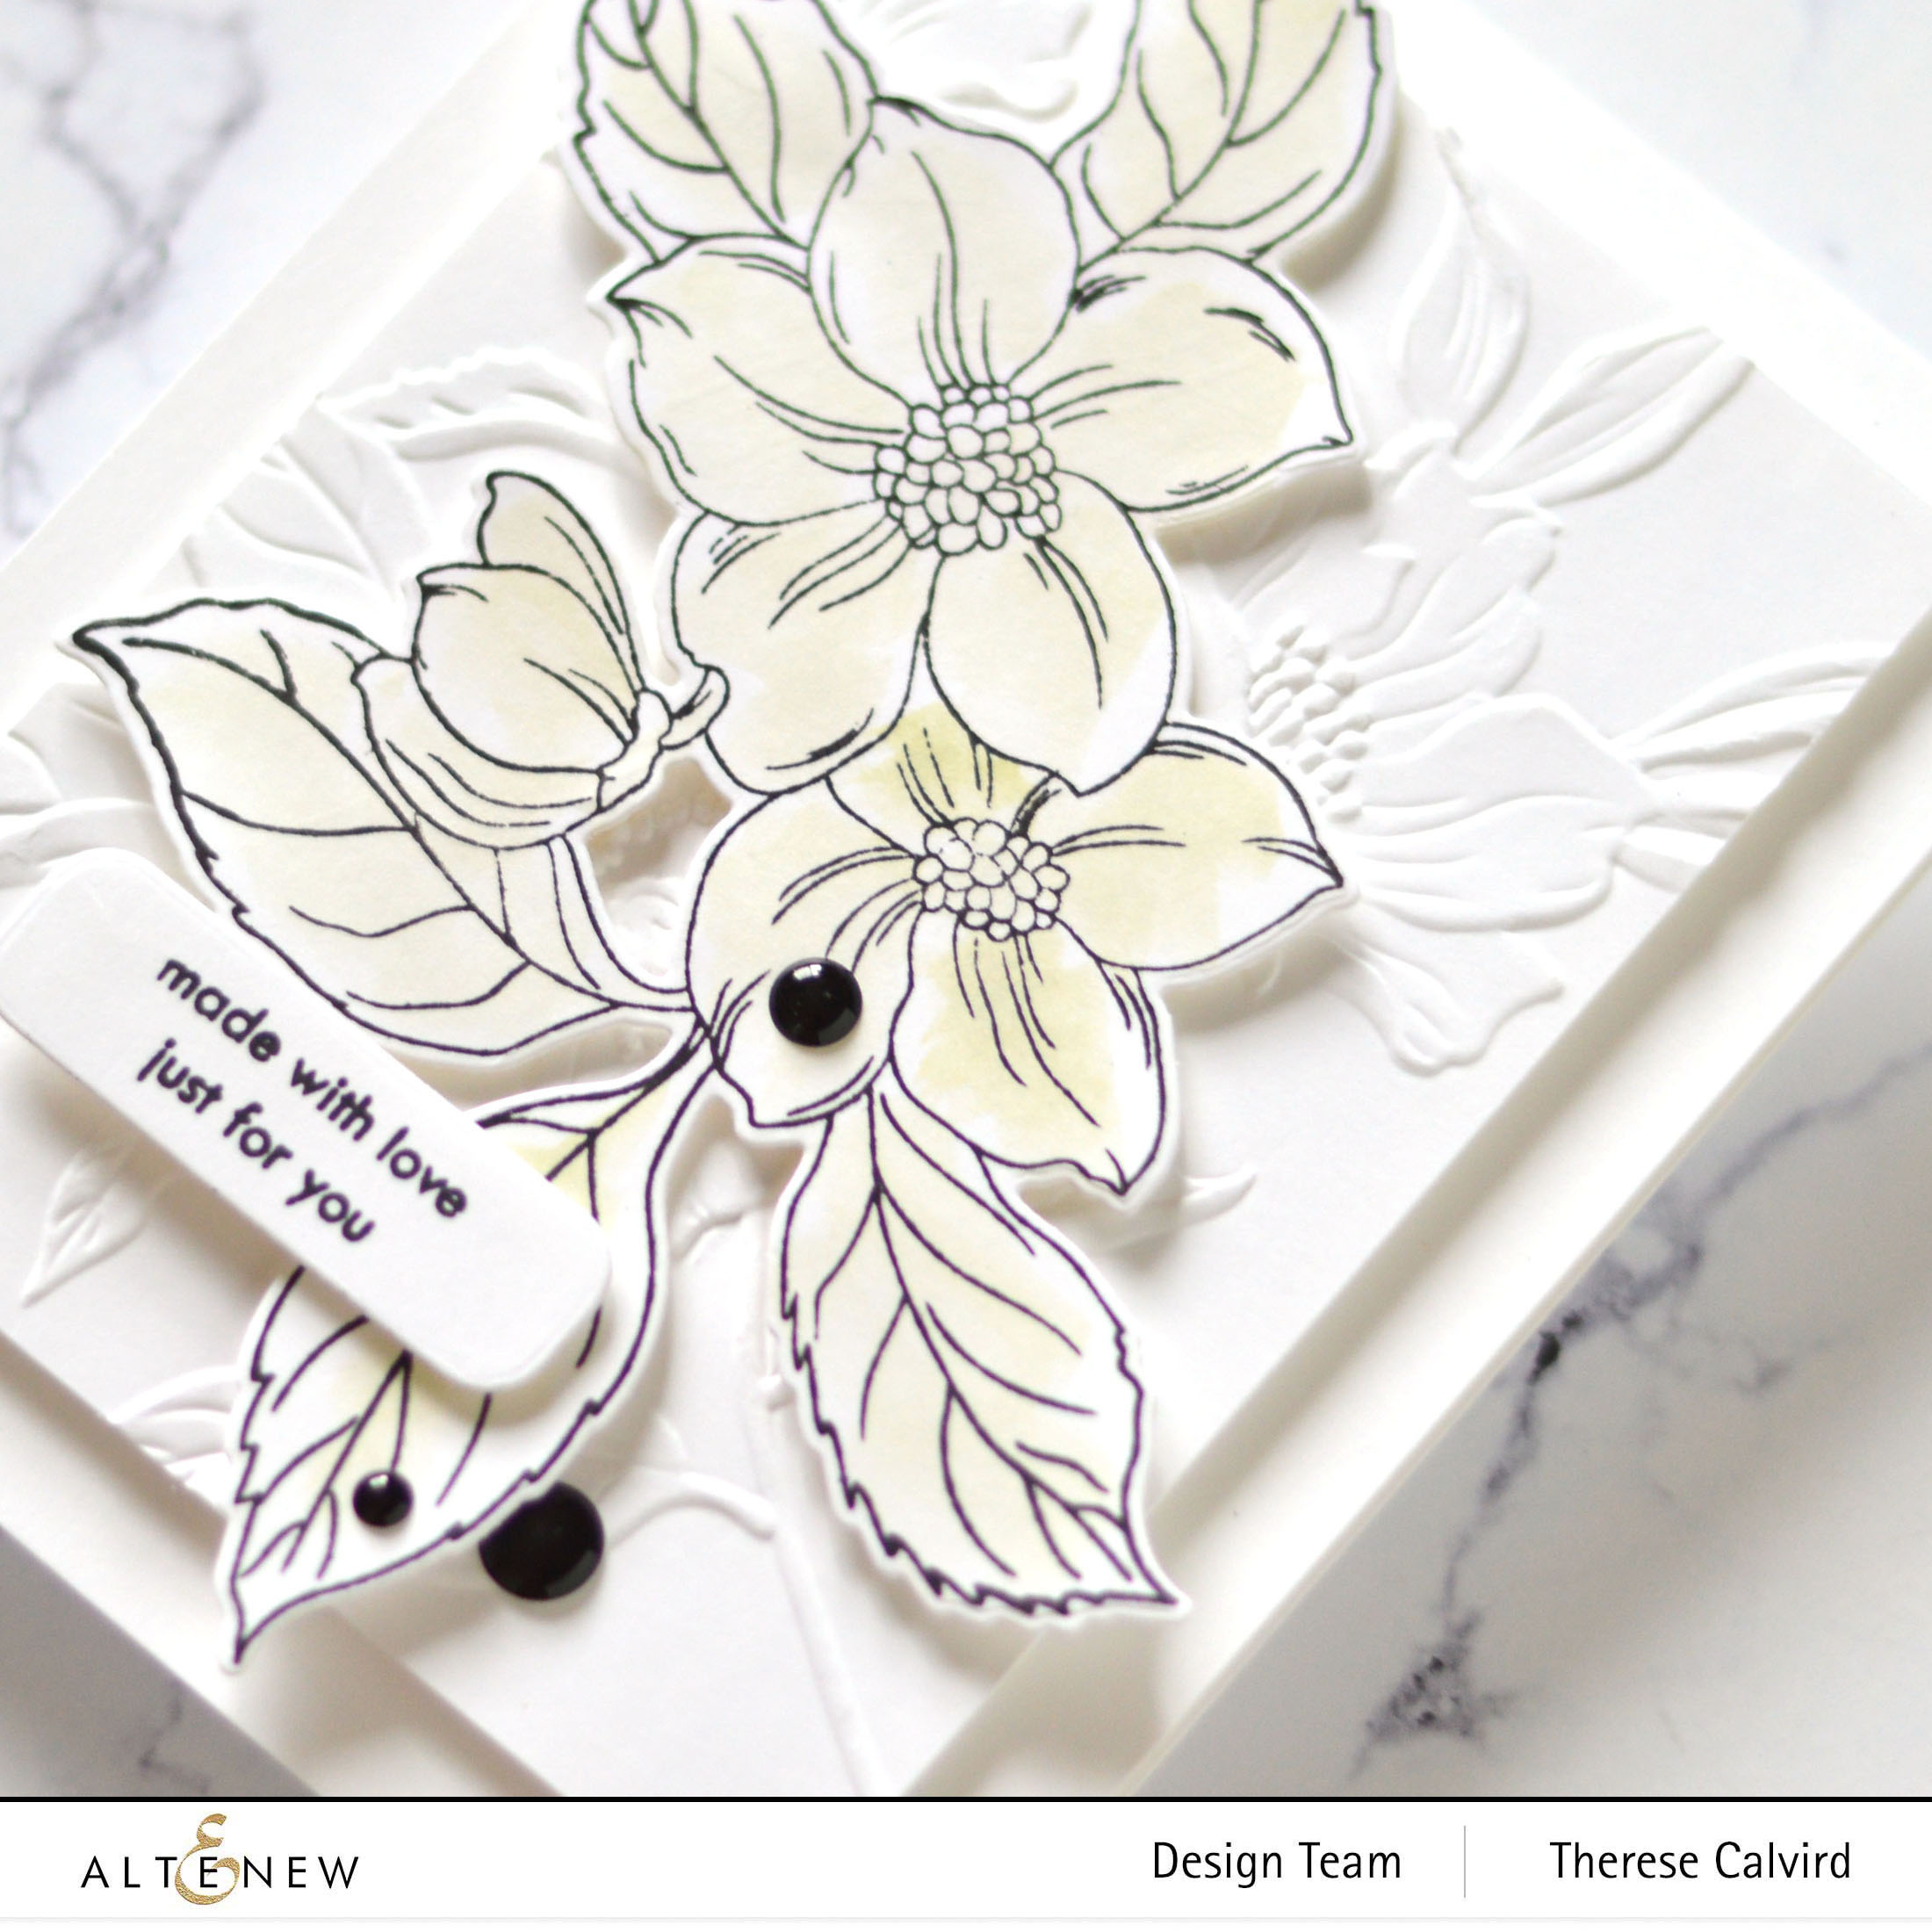
And I added a simple wash of colour to a stamped bouquet using the pigment ink.
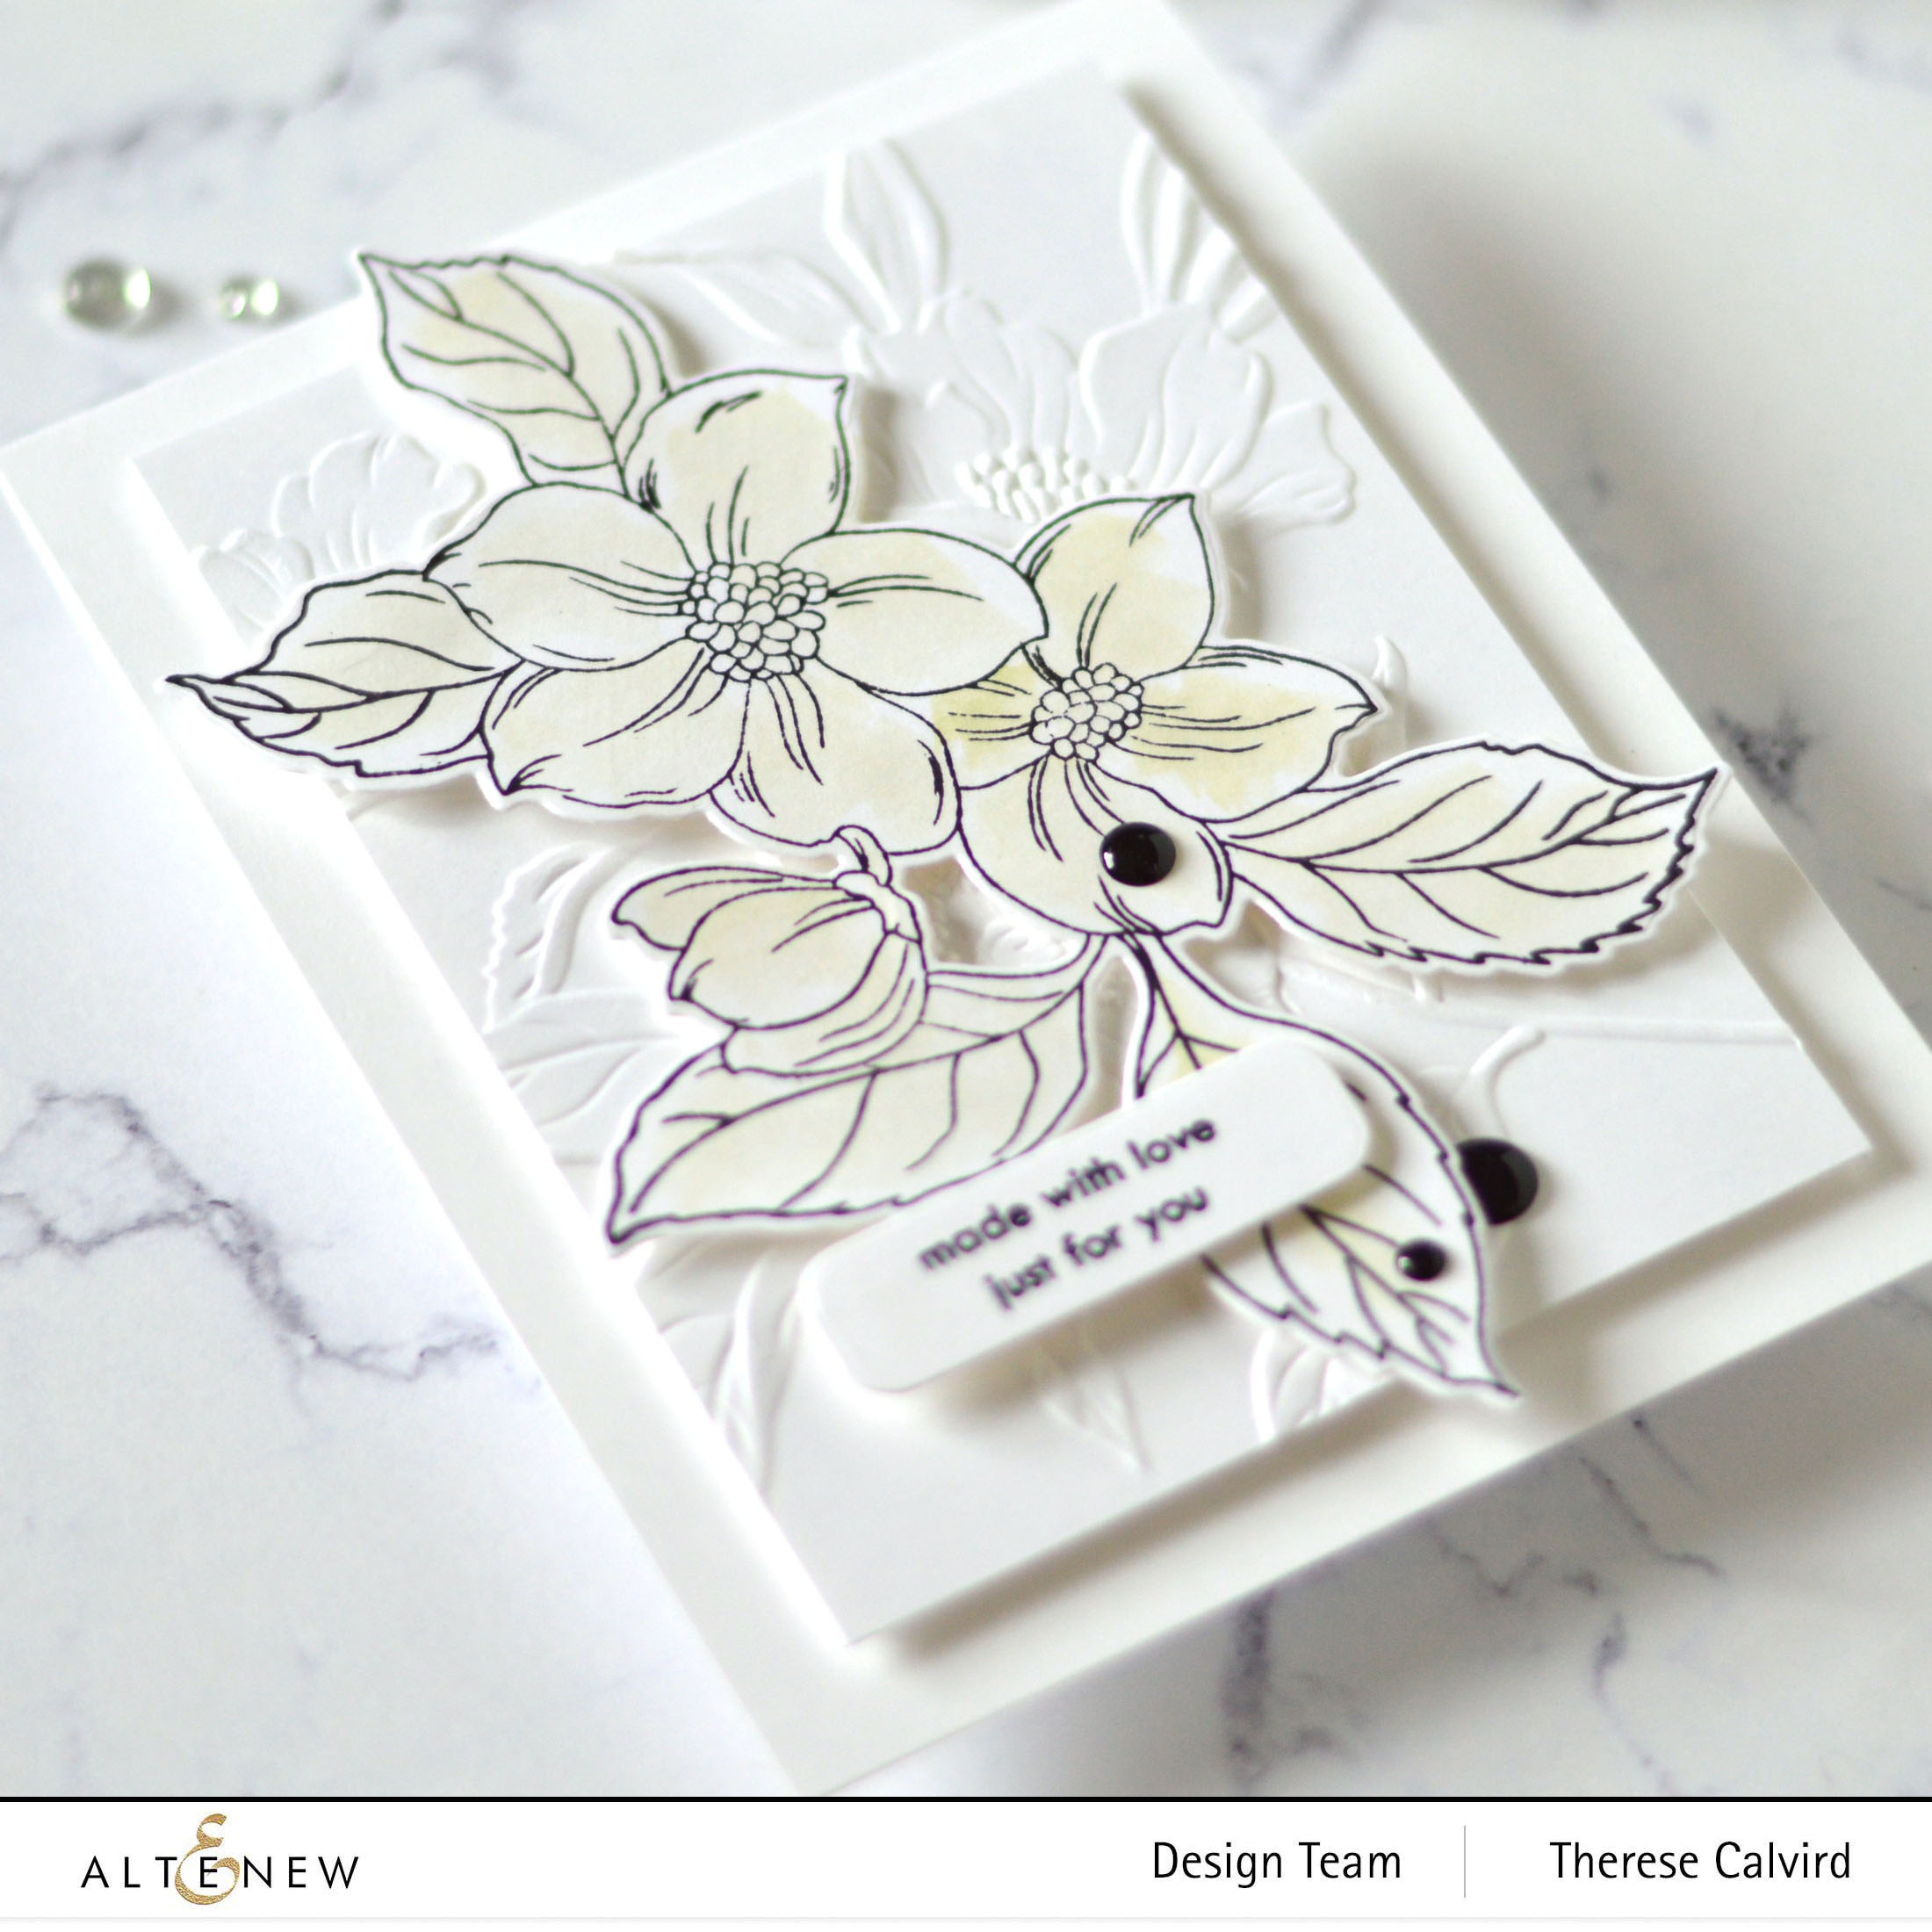
And I used a Featured Sentiments Die to add my sentiment.
You can see my video here or Watch it in HD at YouTube.
GIVEAWAY – I have two $15 Gift Certificates to spend at the Altenew online store to give away. Simply leave a comment here at my blog (only one per person) by Wednesday 10th November!
I hope you are inspired to create with your embossing folders! And if you do, I’d love to see it so please tag me on social media! Thanks so much for stopping by today, hugs,

Other supplies:
Affiliate links are used Classic Crest Solar White 110lb ALT | Classic Crest Solar White 80lb ALT |  Foam SSS | EH |  Hello Beautiful Project Kit ALT | AUZ |
 Featured Sentiments Die ALT | AUZ | EH |  Obsidian ALT | SSS | AUZ | EH |  Frayed Leaf Media ALT | AUZ |  Medium Palette ALT | SSS |
 Watercolor Brushes Round ALT | SSS | AUZ |  Essential Black & White Enamel Dots ALT | SSS | AUZ | EH |  Scissors SSS | AUZ | EH |  Mini Score Board SSS | AUZ | EH |
 Cutting Mat ALT | SSS | AUZ |  Gemini Junior SSS | AUZ | EH |  Bigshot SSS |  MISTI ALT | SSS | AUZ | EH |
 Mini MISTI ALT | SSS | EH |  Magnets OTH |  Tape 1/2 SSS | EH |  Glue Tape ALT | SSS | AUZ |
 Foam Tape ALT | SSS | AUZ | EH |
I love watching your videos, and as usual, your cards are gorgeous.
Your cards are beautiful and I love the embossing folder technique.
It’s an oldie but a goodie and these newer 3D embossing folders truly take it to the next level. Thanks so much Tracy!
Thanks so very much!
These are lovely. It’s been such a long time since I’ve seen any Altenew products. This embossing folder is very pretty. I like the looks of the first card with the ink applied to the folder.
Thank you for the tip to use pigment ink for the debossed card. I’ve tried some dye inks and I do not get great results. I will try this technique with pigment ink.
LOVE, LOVE LOVE the ‘faux’ letterpress look! Simply gorgeous!
Isn’t it a fun and easy way to add impact to a card design!
I so enjoy everything about you – your work, your voice, your sense of humor and laugh! Thank you!
You are so very sweet, thank you Ann!
These are both soooo gorgeous! You have inspired me to break out some of my embossing folders! 🙂
Hope you have fun with them Justene!
Love your cards. Amazing as always.
Thank you Ronda!
I love the faux letterpress look with the 3D embossing folder. In fact, I love it so much I’m going to make some for myself right now!! Your cards are beautiful as always!
I seriously want to make set of cards…. just give me a few more hours in a day lol. Hope you had fun Elizabeth!
Both cards are lovely but I really need to try the letterpress card first. Although it is simple it has a very elegant look. Thank you for showing how simple does not mean plain.
I am so happy you enjoyed this Dawn, I hope you have fun with the technique!
I love your accent and pleasant voice. I love the elegant way you’ve created both of these cards!
You are so sweet, thank you Vicki!
Therese, they are both simply spectacular! Faux letterpress? Yes, please!
=]
I was thinking of you when I made these cards…. and I even thought about going with grey lol.
Oh my! Such wonderful and elegant card! This kit is a must have.
I know right! thanks so much Vickie!
Beautiful simple and simply beautiful!
Mwah! Thank you Sandy!
Simple, but very beautiful cards! Love the letterpress look. I have a Sizzix also and the method you used is what I came up with for the 3 D folders.
I found if I put the embossing folder on top it ‘rolled’ a bit (and the paper cracked more) but the plate on top seemed to help hold it in place. Thanks so much Linda!
Yes they are very elegant – love both ideas and will have to give them a go!
Hope you have fun with them Betty!
Loving how elegant, quick and easy these cards are.
I totally agree Tara, I reckon could make a set of cards in no time at all!
Gorgeous cards. Simple yet elegant and easy to do.
Thanks so very much Nancy!
How stunning are these! Yay for Altenew! 😀
Thanks so much Vicki!
So very lovely! I can not wait to try embossing folders! I am new to manual die pressing and am learning all sorts of new and wonderful techniques through your videos. Thank you
How wonderful! Hope you have fun with your embossing, thanks so much for your lovely visit!
Loved the 1st card….. simply elegant x
Thanks so much Cath!
Beautiful cards and I like your suggestions for making card sets!
Yes, I think I must do that myself lol. Thank you Kate!
Gorgeous cards, Therese!
Thank you Dee!
Always enjoy your videos. Love your designs!!!
Thanks so much Yvonne!
Hey Therese! These are so pretty and classic. Your cards always inspire me (to make card, and to shop at Altenew too! 😂 TFS!
hahaha, I agree, it’s hard not to shop at Altenew lol. thanks so much for your lovely visit Cortney!
I LOVE 3-D embossing folders– they make me look like I know what I’m doing! 🙂
I haven’t tried inking the raised portion of the folder (I’m too messy), but I will definitely try again cuz your’s came out AMAZING!
I agree June, the folders do ‘all’ the work for us lol. Hope you have fun ‘inking the raised’ side…..
I love your “Take Two†segment, it is always inspiring. It helps the versatility of our supplies and lessens the impact of our addiction to have it all! Your projects are always so beautiful!
Yay! Thank you Ana!
The frayed leaf and white combo is very elegant. Great cards!
Thank you Roxanne, I was also thinking a light grey would be nice too… maybe I need to make some more lol.
So in love with that foe letterpress look! thank you so much for the youtube tutorial
Thank you Vickie, hope you have fun with it!
I just found your channel a few weeks ago and have loved everything you do.
Yay! Welcome Sonya, I’m so happy that you are here!
Love the faux letterpress look Therese. The pale shade you used on both cards gives a very elegant and simply beautiful look in more ways than one. Love your Take 2 series. Off to watch the videoâ¤ï¸
Yippee! thank you Delia!
Beautiful cards. So elegant!
Thank you Lissette!
Your cards are very elegant! I love how the soft color looks with the white card stock! Very beautiful!
Thank you Lauryne!
So glad I found you and your videos recently. This is another super video. This pack of stamps, dies etc looks wonderful!
Yay, Thank you Lyndall! And a big welcome to you!!
This is a great Take 2 video! I love 3-D embossing folders – there is so much to do with them. The light color with the white is just right for showing off this letter press technique. Thanks!
I think I am going to have to make some ‘gift sets’ of these, they came together so easily and were such fun to do. Thanks so much Geri!
Absolutely stunning cards Therese. So elegant and beautiful.
Thank you for the wonderful inspiration.
Take care.
T x
Thank you Tracey!
Therese, yes the cards are very elegant. The delicate color lends to the fact that they are elegant. The cards are very simple to make also. I do not have any 3D folders yet, but maybe I will win and can purchase one. LOL TFS
The 3D folders are addictive, I am really enjoying playing with them. Thanks so much for your lovely visit Juanita!
Loved your cards. I don’t have any Altenew yet so I’d love a shopping spree! Please enter me in the contest
Thanks so much Olivia!
Hi Therese, I agree with you, your cards are very elegant. I have this kit and will try inking the raised side, I did it the other way around. Thanks for another inspiring tutorial.
ooh yes, the other way round would look fabulous too Helen, I’ll bet it was divine!
Your projects are always beautiful but these two cards are a step above beautiful! Thanks for sharing your wonderful ideas.
thanks so much Nancy, what I love too is that they were so very easy to make!
Gosh, Therese, so gorgeous! They would also work as sympathy cards. I mention that because I struggle with sympathy cards so much. These are so elegant and crisp. Just stunning. Well done, Therese. 💜
Oh yes, I hear you, they are so difficult to make but I always love the elegance of a sympathy card!
Wow. This set perfectly shows off the techniques you shared.
I agree Julie, it’s such a beautiful kit (ahem… they all are lol)!
Soooooo PRETTY….have not done this technique in such a long time – but, will now – LOL! TFS Therese!
These new 3D embossing folders are perfect for this!
You always make such lovely cards. You’re such an s inspiration. Thank you 🇦🇺â¤ï¸
You are so sweet, thank you Michelle!
Theresa
You never fail to thrill and inspire me.
Both these cards are so elegant and beautiful.
Can’t wait to see the video.
Cheers
Lisa
Yay Lisa, I’m so glad you liked them!
The letterpress look is always so elegant.
When in doubt go CAS lol.
I like your tip about using pigment ink instead of dye ink. I have used altenew minis with good results, but metallic pigment inks are terrific, especially on colored cardstocks. Thanks Therese, love from Sydney
Now you are talking, sparkly pigments inks would be a delight! Thanks so much for your lovely visit here today!
The letterpress effect with that pale celery color just knocks my socks off!” Oh so pretty
I could certainly make a bunch of them and wrap them up for a gift set, it would take no time at all!
I love your artwork! So inspirational!
Thanks so much Margie!
Your cards are beautiful and a beginner can try your techniques. Thank you.
So very happy that you liked them Patricia!
Gorgeous cards, so elegant in those light colors!
thanks so much Melissa!
Your cards are absolutely beautiful well done. Love the leather press look…
It’s always has such a great result! thank you Leslie!
I love these elegant cards and the tonal look!
thank you Amy!
Stunning, love your techniques. I can’t wait to try these as they would make beautiful wedding or anniversary cards. The elegance but simplicity of the card is phenomenal.
Thanks so much Tricia, sometimes it feels ‘too simple’ lol.
Completely love this. I am going to try both tonight with “Statement Flowers” and one of my Altenew embossing folders. Gorgeous!
Oh yes, the Statement Flowers will be perfect for this technique, and ANY embossing folder lol. Hope you have fun!
Simple but stunning! In the photos the ink looks like a pale yellow, whether it’s yellow or green the effect is gorgeous.
Thank you Angie, there is definitely a ‘yellow’ undertone in the ‘real life’ versions lol!
Hello from across the pond 🇳🇿
I love watching your videos have followed many of your tips and you introduced me to Altenew I say thank you my bank account doesn’t 🙄
hahaha I totally hear you about the bank account thing, but I tell my husband, at least I am happy lol.
Love watching your videos! Your designs are spot on and totally inspiring!
Thank you Delina!
I love, love , love this look. Letterpress, leaves, soft subtle color….all my favorites.
Thanks so much Dorothy!
Thank you for the inspirations. I have this project kit and can’t wait to try the technique with the embossing folder.
Hope you have fun with this Emily!
Your cards are just beautiful. I love your videos. Thanks so much.
Thank you so very much Joyace!
Such beautiful cards! Love the simplicity of them…great video.
Thanks for sharing.
Thank you Jeanne!
Oh my gosh, Therese. I just stumbled upon your youtube channel and blog. I am over the moon with your beautiful work. Thanks so much for sharing. I’m going to be a regular visitor!! Cheers!
Yippee! Welcome Barbara, I’m so very happy that you are here!
I adore this simple but elegant design. Always enjoy your videos and ideas. Thanks for sharing!
Thanks so much Kathy!
Love your faux letterpress card. Thank you for the ink info for creating it. What a pleasure it is to watch your video….your sense of humor and laugh add just the right touch! Am also enjoying your CCS for 2021.
Thanks so very much Jane!
Altenew has some awesome embossing folders! And I love to watch your videos. Always a good time and gorgeous cards.
Thanks so much!
I have “discovered†you just recently and I love your tutorials and your cards. I have done the coloring with embossing folders, but not yet with the 3D folders. I just never thought of doing that. Brilliant!! I think these cards with the de-bossed side up might survive the journey from the US to Europe better than vice versa.
Gorgeous cards and your tutorial was great. Thanks!!
Hello and Welcome Anneke! It’s so lovely to have you here and I am happy that you enjoyed the video and cards. I totally agree with you, I do think that these cards will survive the post better than some others… though we both know how ‘brutal’ the post can be lol. Crafty Hugs Tx
You always creat the most elegant looking cards. I love watching your videos for the inspiration but also because they are also so calming. Thank you for sharing!
thanks so much Aisha!
Just simply beautiful.
Thanks Lisa!
I love this letter press look. I’ve only inked the background of an embossing folder and only with dye ink. I can’t wait to try this. I also love this kit. I hope it is still available. Thanks for posting this.â¤ï¸
I agree Mary Ann, it’s a stunning kit!
Love both cards! I really enjoy that you create two different cards showcasing the same prodcts.
Thanks so much Lisa
I’m new to card making and find your tutorials particularly helpful. Love your style; these cards are just so elegant and sophisticated. By the way, listening to your dulcit tones and explanations is very calming and therapeutic. I am definitely getting this set. Thank you.
A Big Welcome to you Hilary, I’m so happy you are here! I must pre-warn you though…. card making is addictive lol. Hope to see you back here real soon!
So elegant! Absolutely stunning!
Thank you Christine!
Loved the simplicity and serene colors on both of these cards. And the advice about which embossing machine worked best for you. Nice to see some easier and fast making cards.
Thank you Deb!
These are so beautiful! I am very new to die cutting, stamping and card making in general. However, I do enjoy watercolor. I am not sure of the paper stock that you referenced for your painted flowers, but you did say that you wouldn’t use too much water because of that type of paper. I have watercolor paper here, both hot and cold press, 140 lb but am not sure if I should use that for stamping and coloring? My card stock seems thin, as alcohol markers bleed through. I appreciate your talent and willingness to share with us. I’ve just discovered Altenew and am thrilled with their sophistication and contemporary designs! I will be a follower, for sure!
A Big Welcome to you! Yes, I agree that cardstock can make a big difference but you can certainly always use what you have too. I have tried many different kinds and will try and use one for ‘most’ otherwise it gets confusing. If you like watercolouring then you can use watercolour cardstock but it does help to have a stamp positioner like the MISTI so that you can restamp to get a better image on the textured surfaces. You do also need a ‘waterproof’ ink like the Obsidian and allow it to try or heat set it first. (you probably know all this but just in case…) Also it is normal for alcohol markers to bleed through the cardstock, I usually just work on a separate piece of card and then attach that panel to the front of my card so it can’t be seen on the inside. I like to use Neenah 80lb for markers at the moment but there are specific ‘Copic’ styles of card that work even better. Once you decide what you like the best stick with it for a while as you do have to change you colouring style a little with the different cardstocks. Hope this makes sense. Crafty hugs Tx
Love these! I really should use embossing folders!
love the debossed look
Thank you so much Amy!
I love how your ideas here are so simple yet elegant. So many times less is more.
I’m so happy you like them Susan!