
Do you plan your sentiment before you start making cards? Or, are you like me and scramble to find one that looks and fits perfectly at the end?
Except, when it comes to large sentiments such as this beautiful Timeless Sentiments Die Set a little forward planning will make life much easier. And today I am sharing 2 modern and fun ways to use this set.
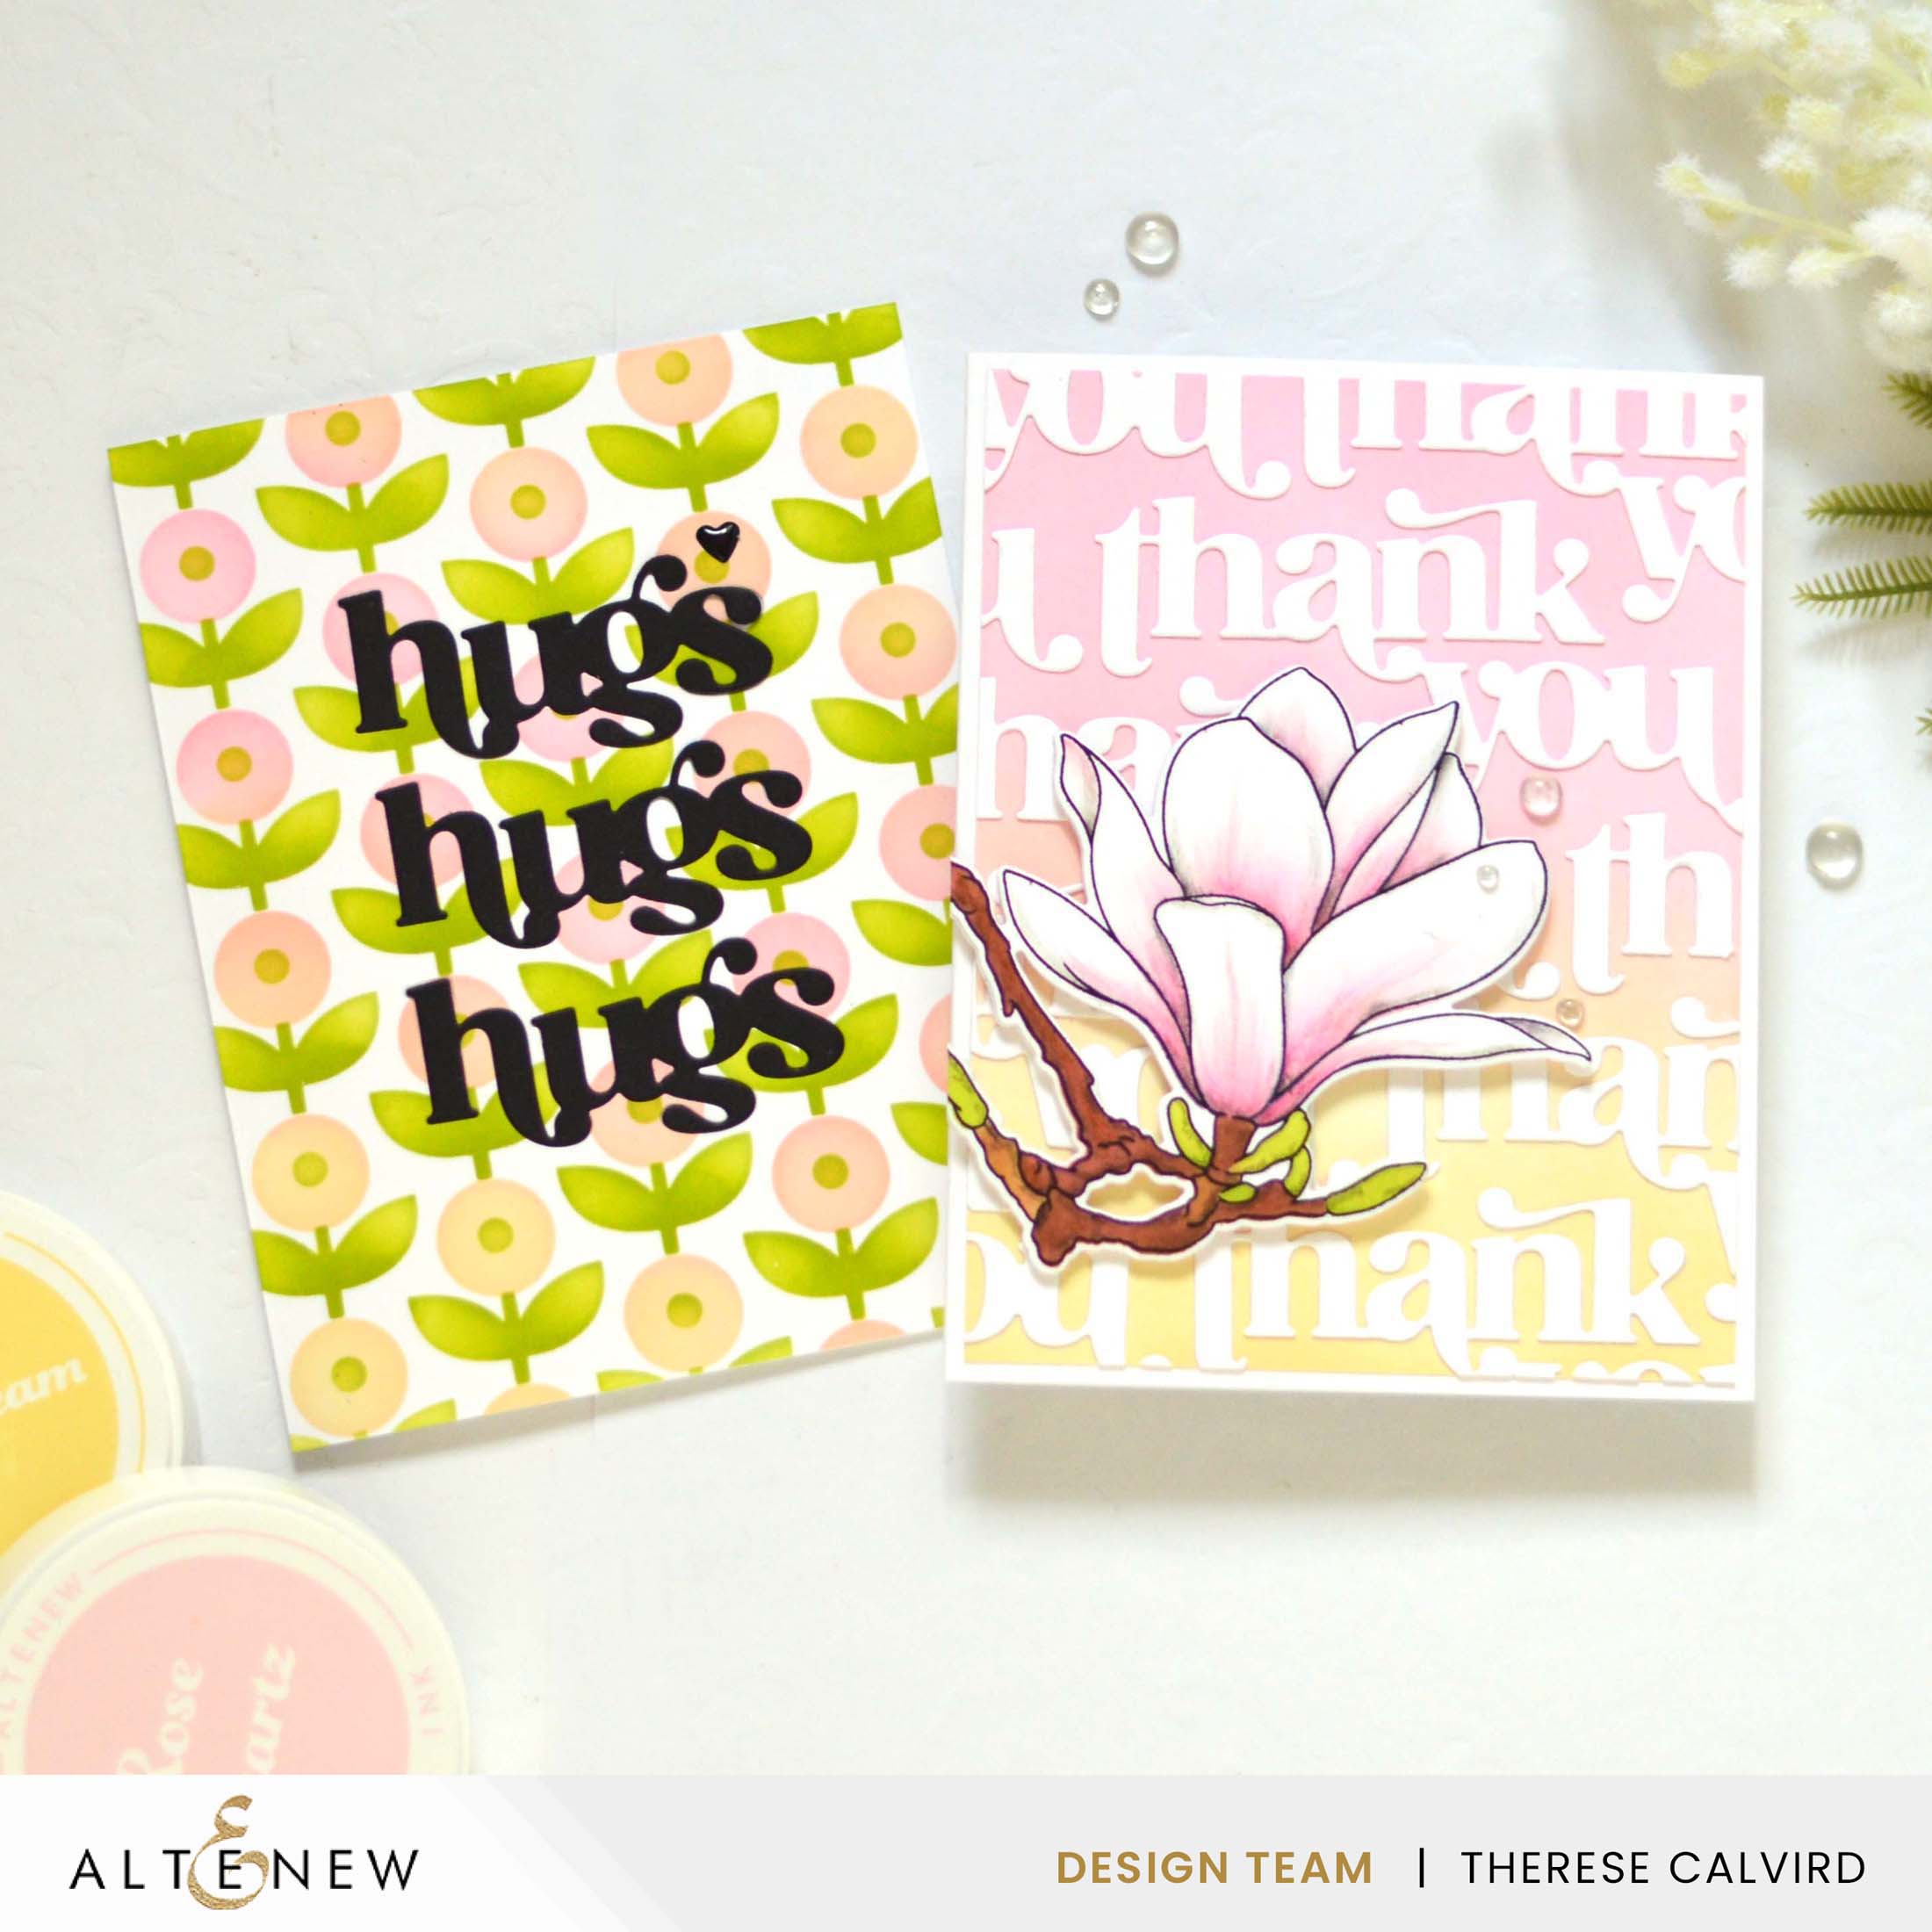
But first, I wanted to let you know that this is part of my Take 2 Series with Altenew and I’m so excited that you are joining me for another video today. Let’s begin with a peek at today’s cards…
You can see my video here or watch it HD at YouTube.
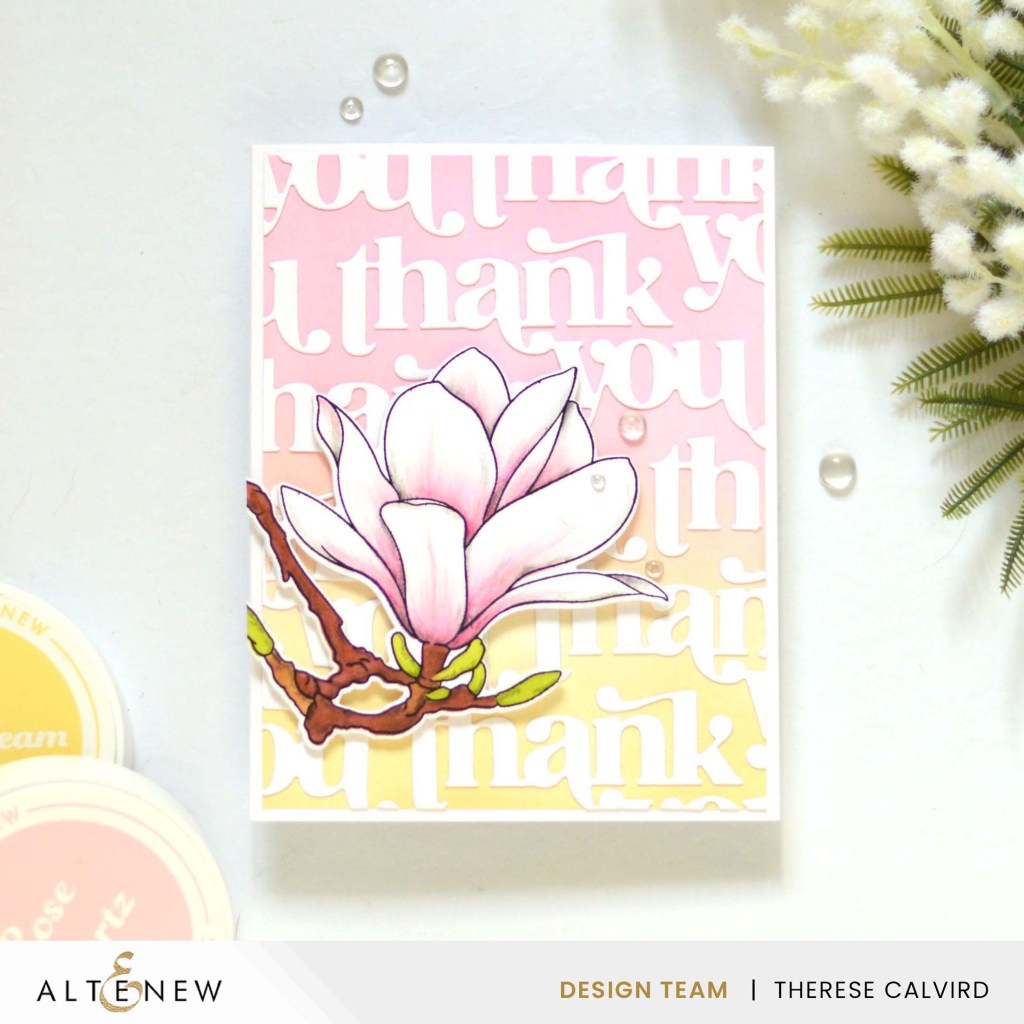
Idea #1 – Sentiment Background!
Die cut sentiments make the most fabulous backgrounds, though they can be a little frustrating when trying to cover the entire front of card. That is where a large sentiment such as this ‘thank you’ is a great choice because the words are joined together and the large size means that not many are need to cover a large area.
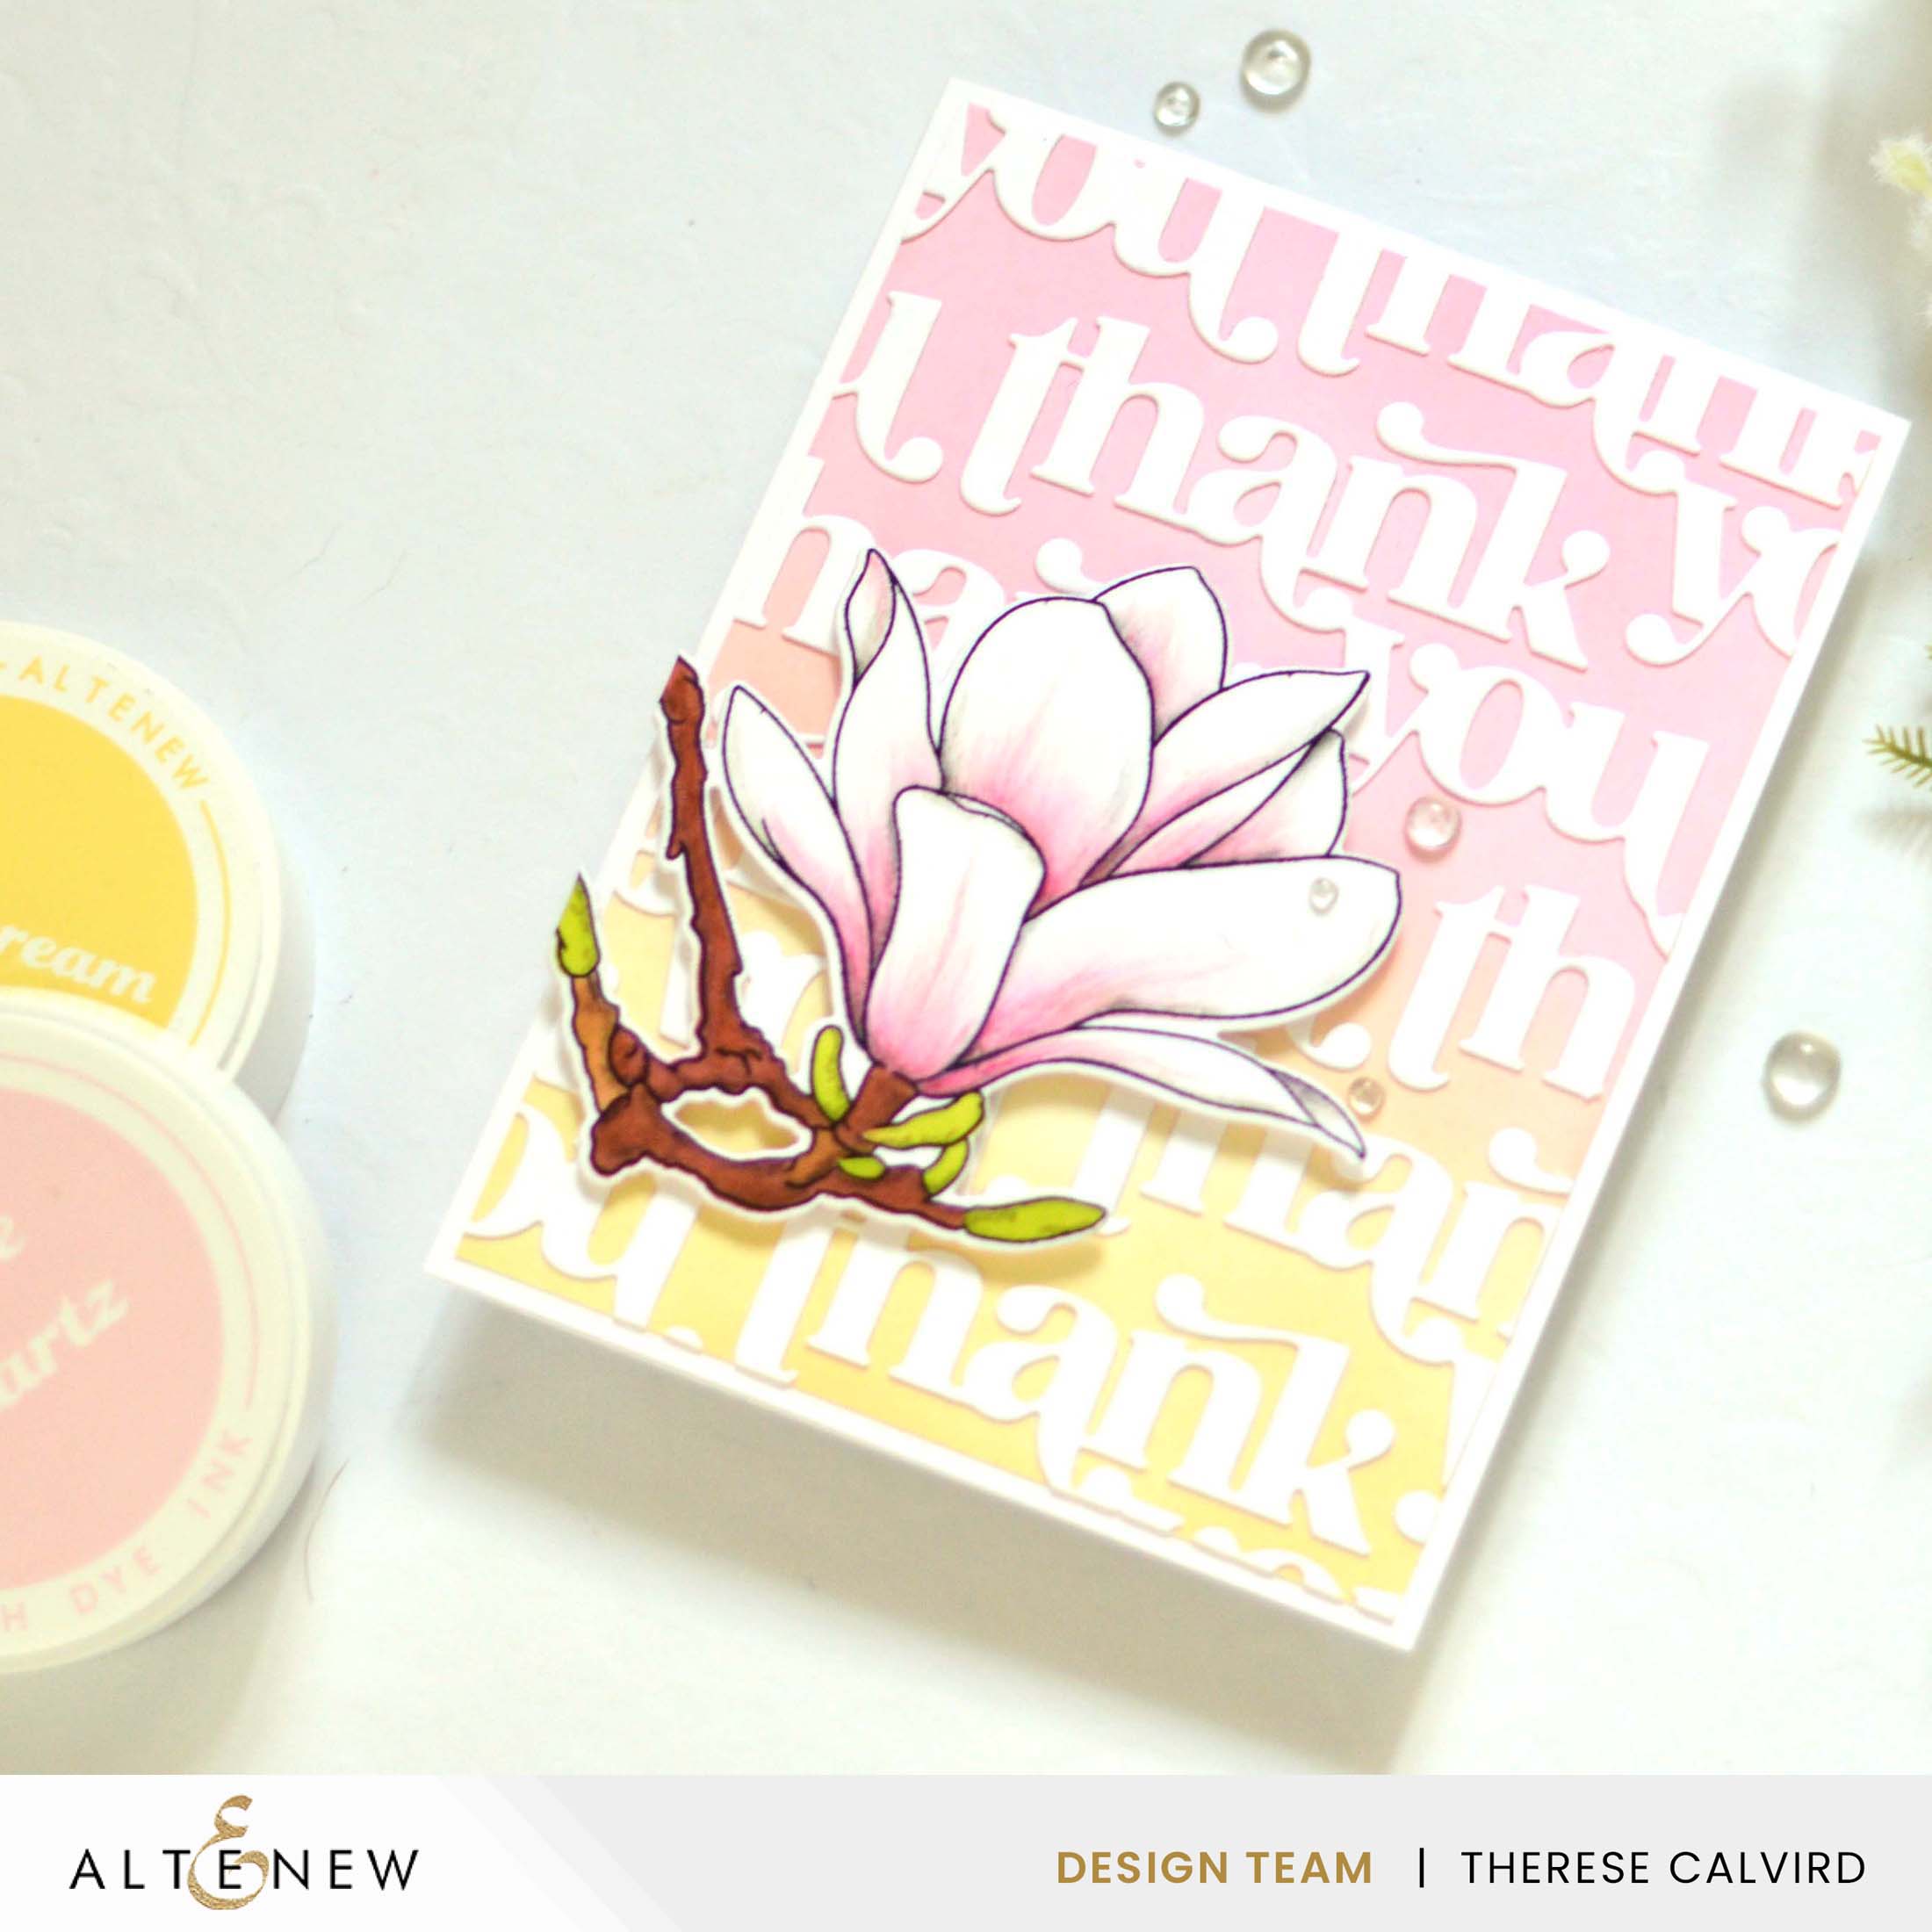
I started with a blended background, but kept the sentiments white. You can easily change up the colors to suit your project or even go more clean and simple and use white on white!
PRO TIP:
If possible, I like to have one version of the ‘full sentiment’ showing in the background. So this is where I typically start adhering the sentiments to the panel. Then I am able to stagger the other die cut sentiment’s to fit around it.

I used the Rose Petal Fresh Dye Inks for this beautiful Magnolia. After blending the inks I added extra details and shading using the Woodless Coloring Pencils.
Idea #2 – Repeat Inlay Die Cut
One fantastic way to make a sentiment take centre stage is to ‘repeat’ it. I would suggest doing this in odd numbers and because of the large size of this particular sentiment I chose a total of three. This technique looks great popped up on the card front, or you can use heat embossed sentiments, cut these into strips and add them in the centre of your card design. Today, I decided to take it a step further and used the inlay die cut technique.
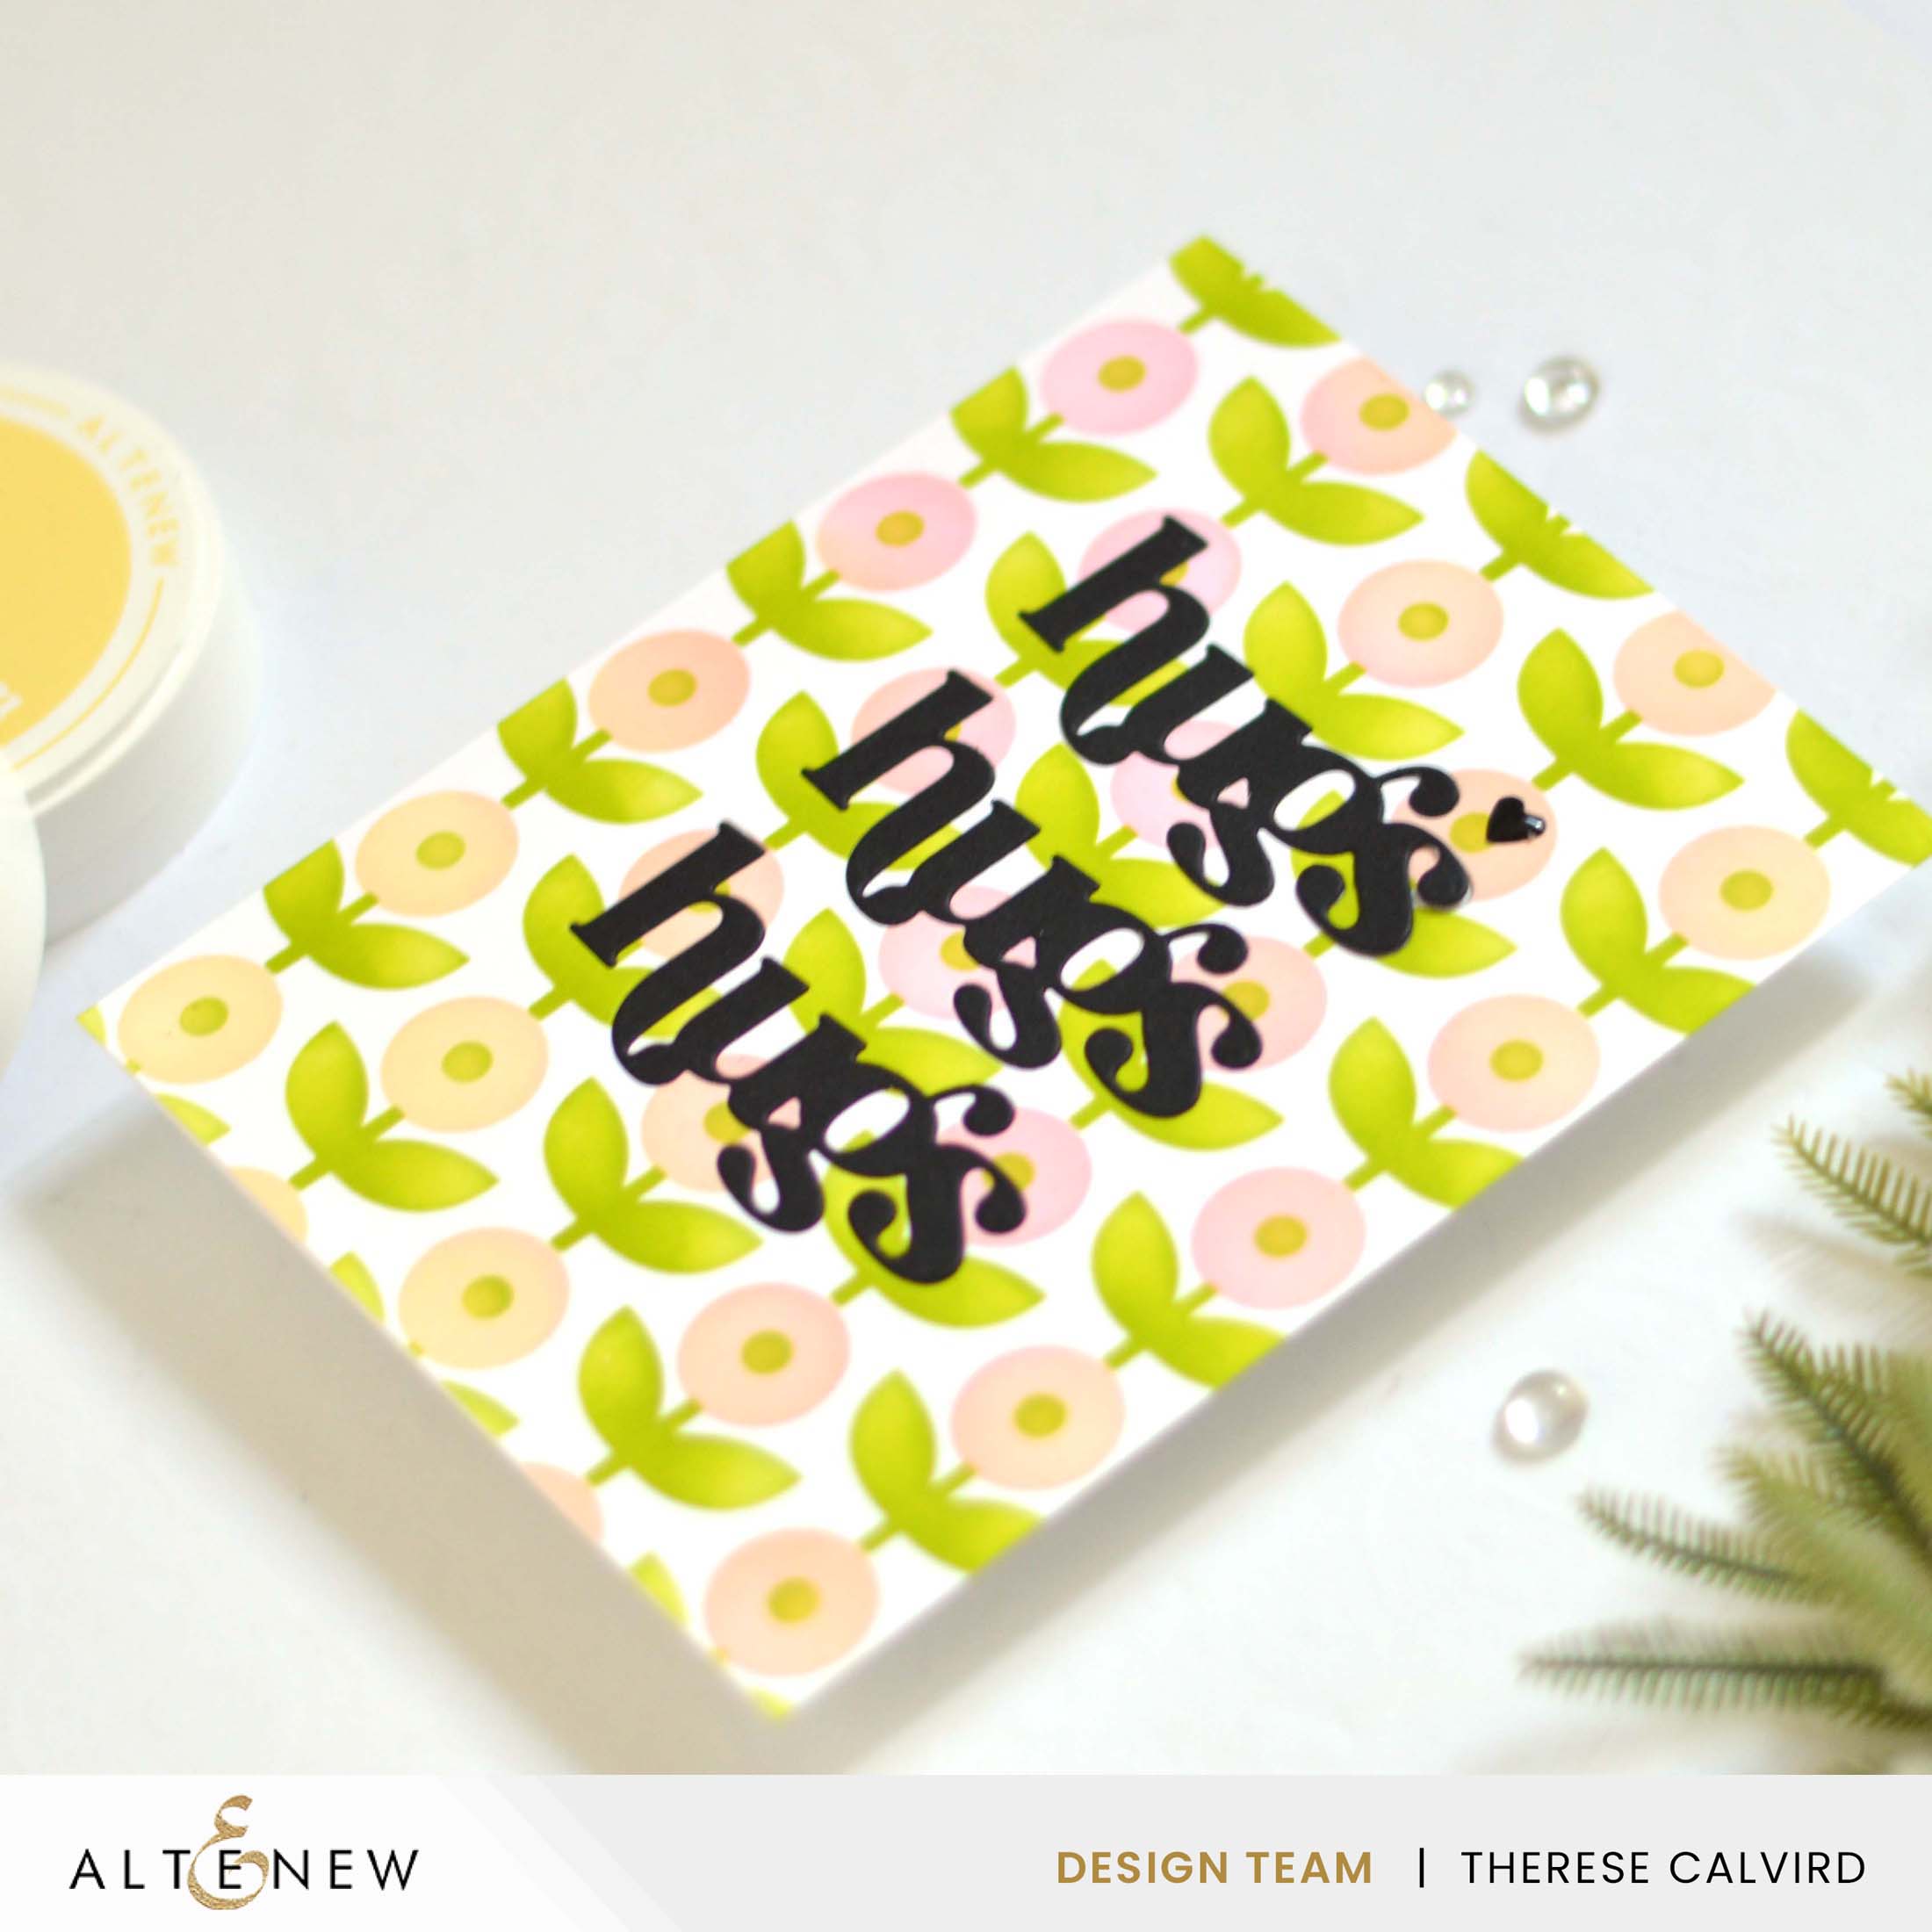
To create the background I used the Polka Dot Buds stencils to create a fun floral pattern background. Then I die cut the word ‘hugs’ three times from the centre of the design making sure to keep the small die cut pieces. I wanted a bold modern look so I decided to add the sentiment in black. But, if you prefer, you could re-inlay the patterned pieces to create an eclipse look.
PRO TIP!
You can easily recreate this design without using the inlay die cut technique. Simply adhere the die cut sentiments directly to the front of the card instead.

My final touch was to add a small black enamel dot heart.

Let me know in the comments below which card is your fave today and if you think you might create a modern sentiment card design? You know you want to lol. Crafty hugs,

Also, just in case you want to do a little shopping I’ve added the links below (some of them are affiliate links which means that I will receive a small portion of the sale at no extra cost to you). I truly appreciate your support of my card adventures!
Other Supplies:
Altenew – Woodless Watercolor Pencils – Jet Black | Rubellite | Crimson | Moon Rock.
 Neenah Solar 110 AMZ | SSS | AUZ |
 Neenah Solar 80 AMZ | SSS | AUZ |
 BAG Blushing Magnolias Bundle ALT | SSS | AUZ |
 Timeless Sentiments Die Set ALT | SSS | AUZ |
 Polka Dot Buds Stencil ALT | SSS |
 Obsidian ALT | SSS | AUZ |
 Rose Petal ALT | SSS | AUZ |
 Green Fields ALT | SSS |
 Rose Quartz ALT | SSS |
 Puffy Heart ALT | SSS |
 Paper Bag ALT | SSS | AUZ |
 Parrot ALT |
 Bamboo ALT |
 Detailed Blending Brush ALT | SSS | AUZ |
 Mini Blending Brush Set ALT | SSS | AUZ |
 Ink Blending Tool ALT | SSS | AUZ |
 Essential Black & White Enamel Dots ALT | SSS | AUZ |
 Woodless Coloring Pencils ALT | SSS | AUZ |
 Dew Drops SSS |
 Tweezers ALT | SSS | AUZ |
 Scissors SSS | AUZ |
 Bone Folder Altenew ALT | SSS | AUZ |
 Stampwheel ALT | SSS | AUZ |
 Score Board ALT | SSS | AUZ |
 Sticky Grid Mat ALT | SSS | AUZ |
 Cutting Mat ALT | SSS |
 Paper Trimmer AMZ | SSS |
 Gemini Junior SSS |
 Gemini Double Cutting Plates AMZ | SSS | AUZ |
 Turntable AMZ |
 Satin Masking Tape ALT | SSS | AUZ |
 Bearly Art Glue SSS | AUZ |
 Glue Tape ALT | SSS | AUZ |
 Foam Tape ALT | SSS | AUZ |
 Adhesive Sheets ALT | SSS | AUZ |
Two darling cards that really make the sentiment the star of the card, Therese!
=]
Thank you my friend x
Perfectly delightful, Therese! I like your color choices, so fresh and lovely!
Your comments both came through, thank you x
Good Morning Therese
I so struggle with sentiments and often forget to incorporate them into planning a design.
Gorgeous cards, love the magnolia one in particular.
Cheers
Lisa
It’s always the thing I think about last lol.
I am always inspired by your clean and graphic cards! I love them both!
Thank you Lisa x
I love the magnolia card Therese! The colours are beautiful and the card just sings. Will have to check my supplies and see if I can adopt this with what I have. Otherwise I guess I’ll need to do some online shopping…
I am sure you will find something to make a similar style card Terri, but I do have to say that I am quite fond of these Magnolias lol.
Incredible cards, the magnolia are so divine, just in awe of your wonderful work. Hugs x
These Magnolia images make beautiful cards so easy to make 😉!
Two fabulous cards I particularly like the first one but both are fab.I’m like you always scrambling for a sentiment when I finish a card. The use of the bold sentiments is a fantastic idea as I have many of them and never use them so thanks for the inspiration.
Marie
It was fun to plan the sentiment before the design… though it feels kinda weird lol.