
Do you have any Alphabet Dies? It’s time to get them out and play as I have a ton of ideas to inspire you today! You know you want to…
I am back with another Same But Different set of cards and today I am sharing 8 Hacks to Use Alphabet Dies on Cards and I have a video walking you through these techniques.
*** But don’t worry if you don’t have any sets of alphabet dies, many of todays techniques can be replicated using alphabet stamps or even word dies (or a Cricut!). ***
Speaking of dies, I have a FUN class using dies and some Basic Shapes to create 2 sweet Snowman cards. And, you probably have everything you need in your stash to make these!
So what are you waiting for sign up for the Card Maker Success Summit it’s FREE!
This post contains affiliate links, which means that if you use my link to buy the VIP pass or any products that may be linked to a shop with an affiliate, then I recieve a commission, at NO extra cost to you. This is a great way to support my channel and the companies I work with!
BONUS CLASS!
And I have a special treat with a free Holiday Foiling class to share if you use my link to buy the pass!
Now let’s get to it… would you like to see today’s cards?

You can watch the video here or in HD on YouTube right HERE.
#ALPHABETDIES
If you like to personalise a card or create unique messages then alphabet dies are a perfect choice. But, they are an investment because typically these sets are larger than a regular die set, which may increase the base cost. So, it makes sense to use them and get a good return for spending our crafty dollars 😉!
PROS:
- Give you the ability to personalise a card
- A versatile product that can be used in many different ways (ie. today’s video)
- MANY different fonts and sizes to choose from
CONS:
- Higher price point
- Each set includes only one style of font
- Can be a bit a finiky to use, especially if the dies are small
#BUYINGTIPS
Choose a set that will stand the test of time. For me, I would choose a block style font, not too big and not too small (like Goldilocks). I like my sentiments to be a statement, but I still want to be able to fit at least 5 letters across an A2 card front. And, capitol letters feel more versatile to me!
But, my ideal set would also include co-ordinating capitol and lowercase letters, numbers as well as punctuation marks… it would be huge. Usually companies who have these, break them up into separate sets (capitol, lowercase, numbers etc) to keep costs down and to give us options.
So, let’s stop talking, it’s time to inspire YOU to create!!
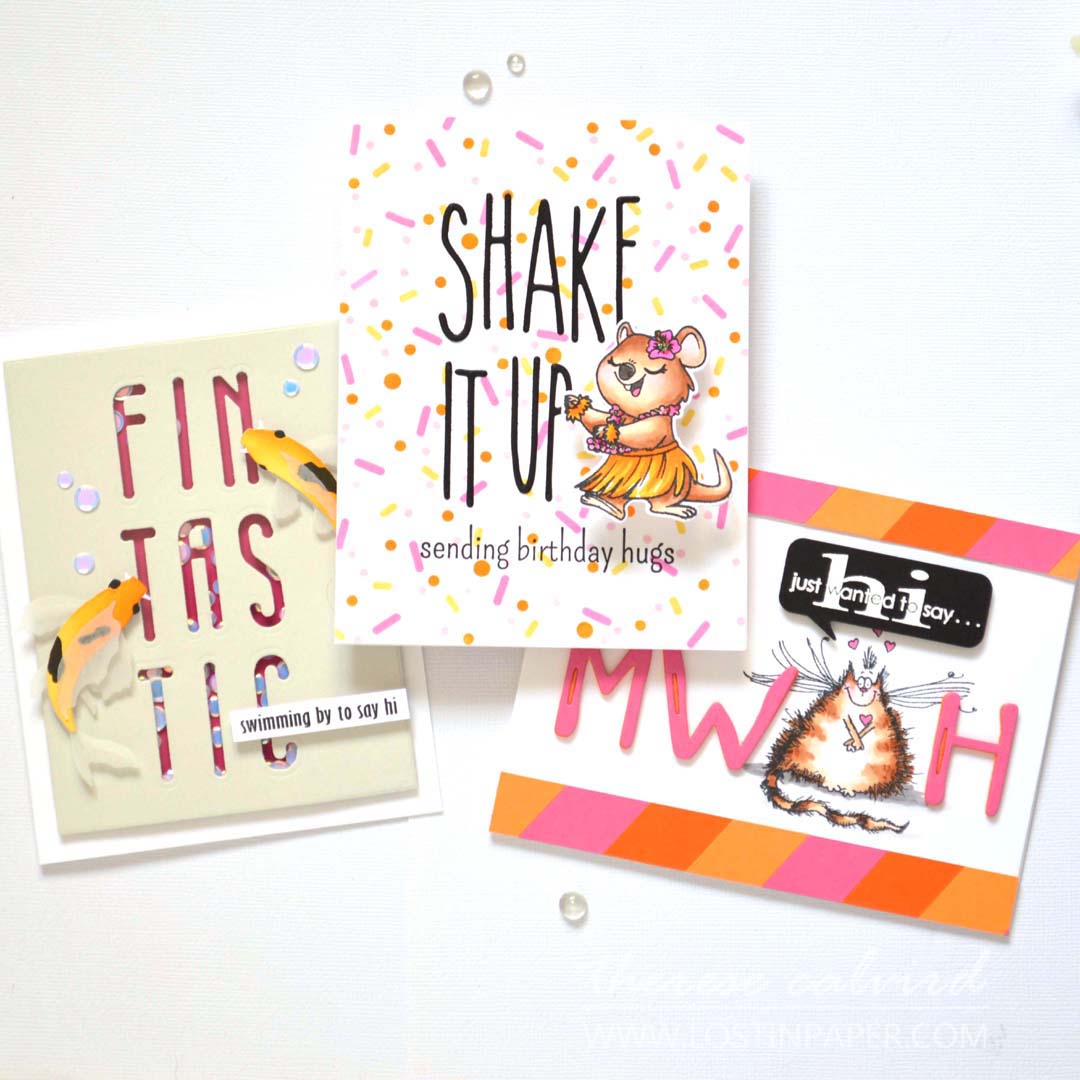
Tip #1 – Personalise
This is probably one of the best ways to use alphabet dies and create a VERY personal card. You can showcase the name of the birthday girl or boy, new baby, or perhaps the bride and groom. And, you can use any style or size of font.
PRO TIP: Not enough space for their name? Then why not try using a ‘nickname’ or perhaps something more generic like ‘Mum’ or ‘Dad’.
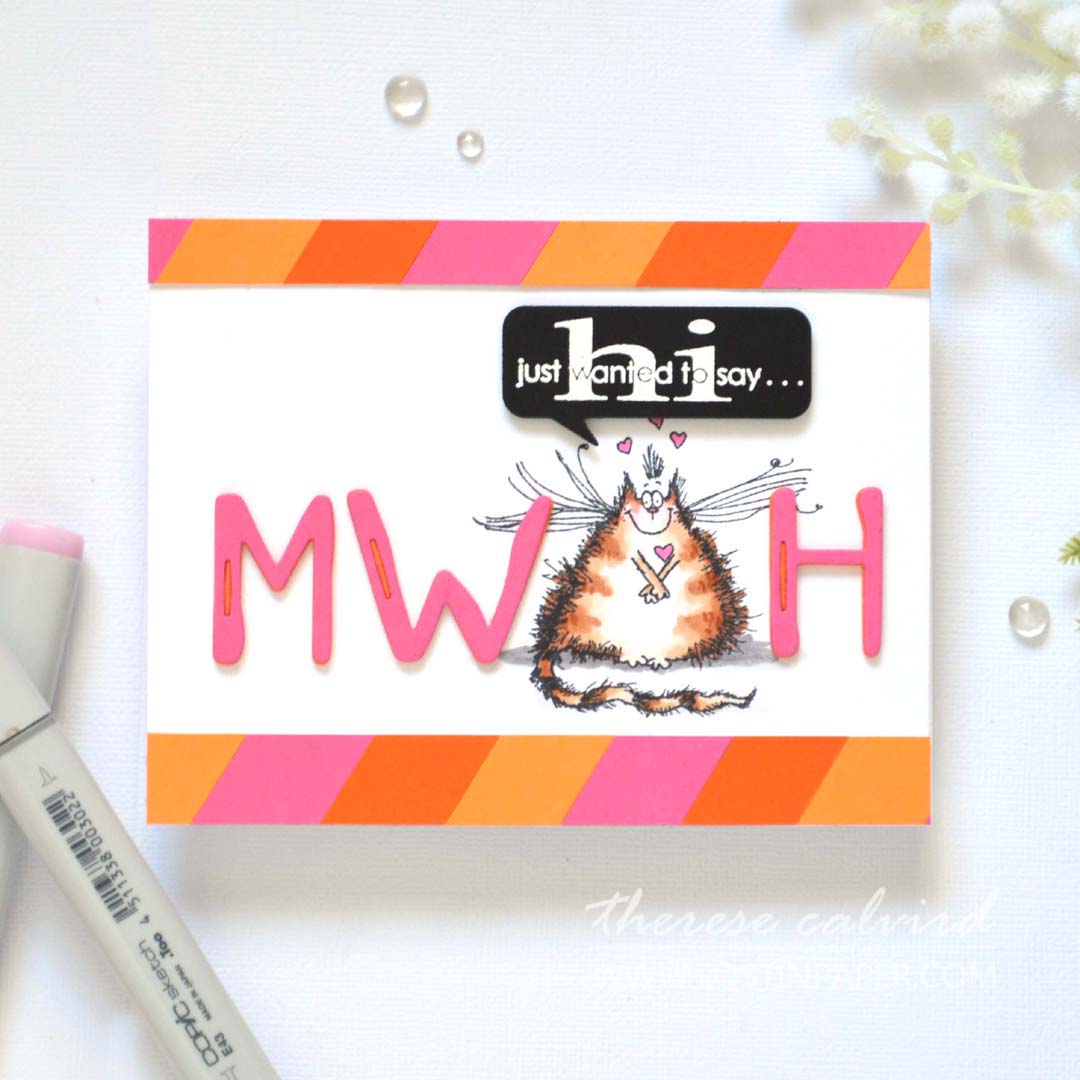
Tip #2 – Substitute
Have you ever thought to ‘replace’ a letter with an image? I stamped my image directly on the card front, but you could also stamp and die cut an image to pop it up with the sentiment.
This works so well for many images, a Christmas tree makes a great ‘A’ and a bauble or balloon are perfect for an ‘O’! Why not see what you have in your stash, this is a FUN one to try.
My TIPS? Ensure the image and fonts are a similar size and check that there is enough ‘space’ on the card by laying out the letters and image prior to die cutting. You may have to change card orientation to landscape as I did here today.
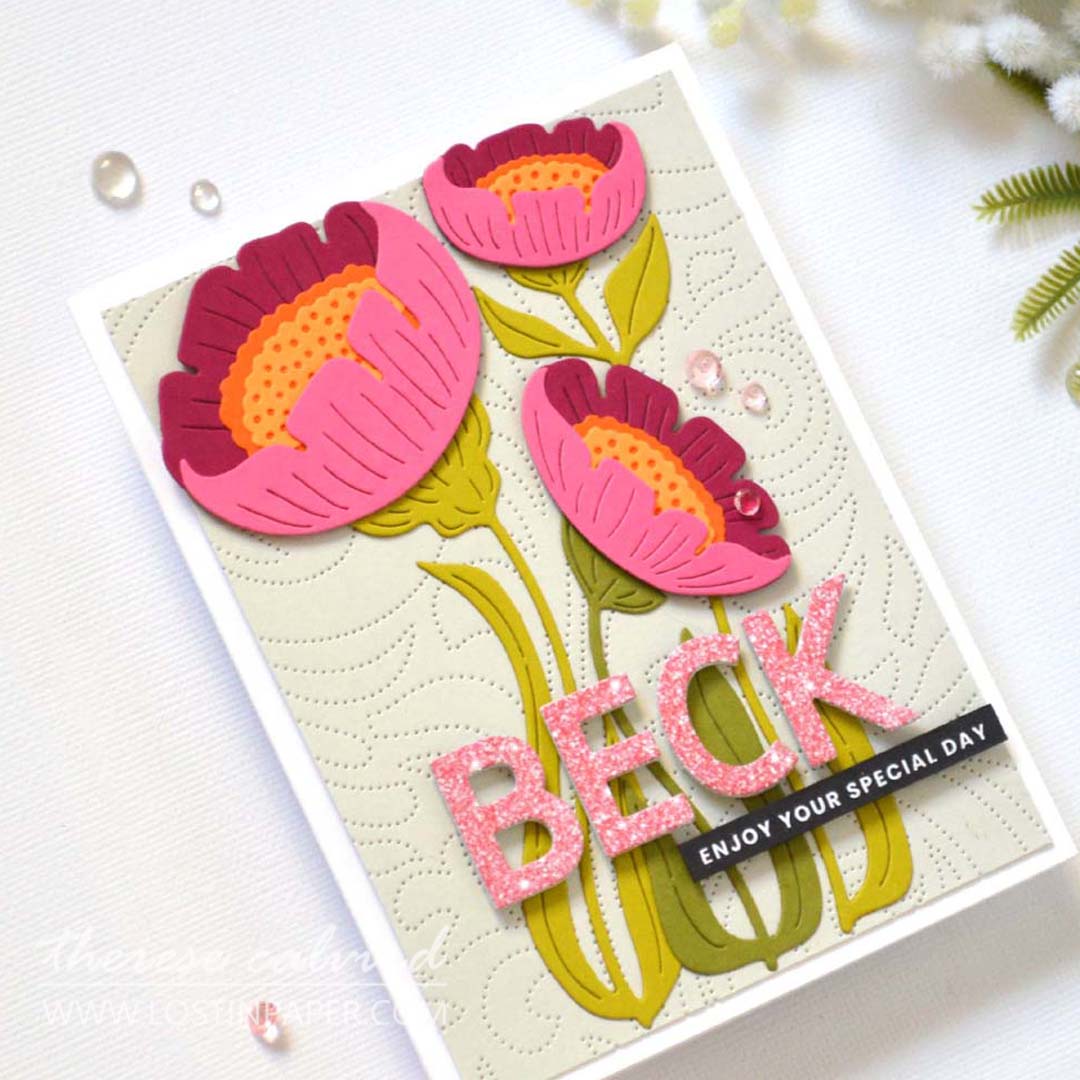
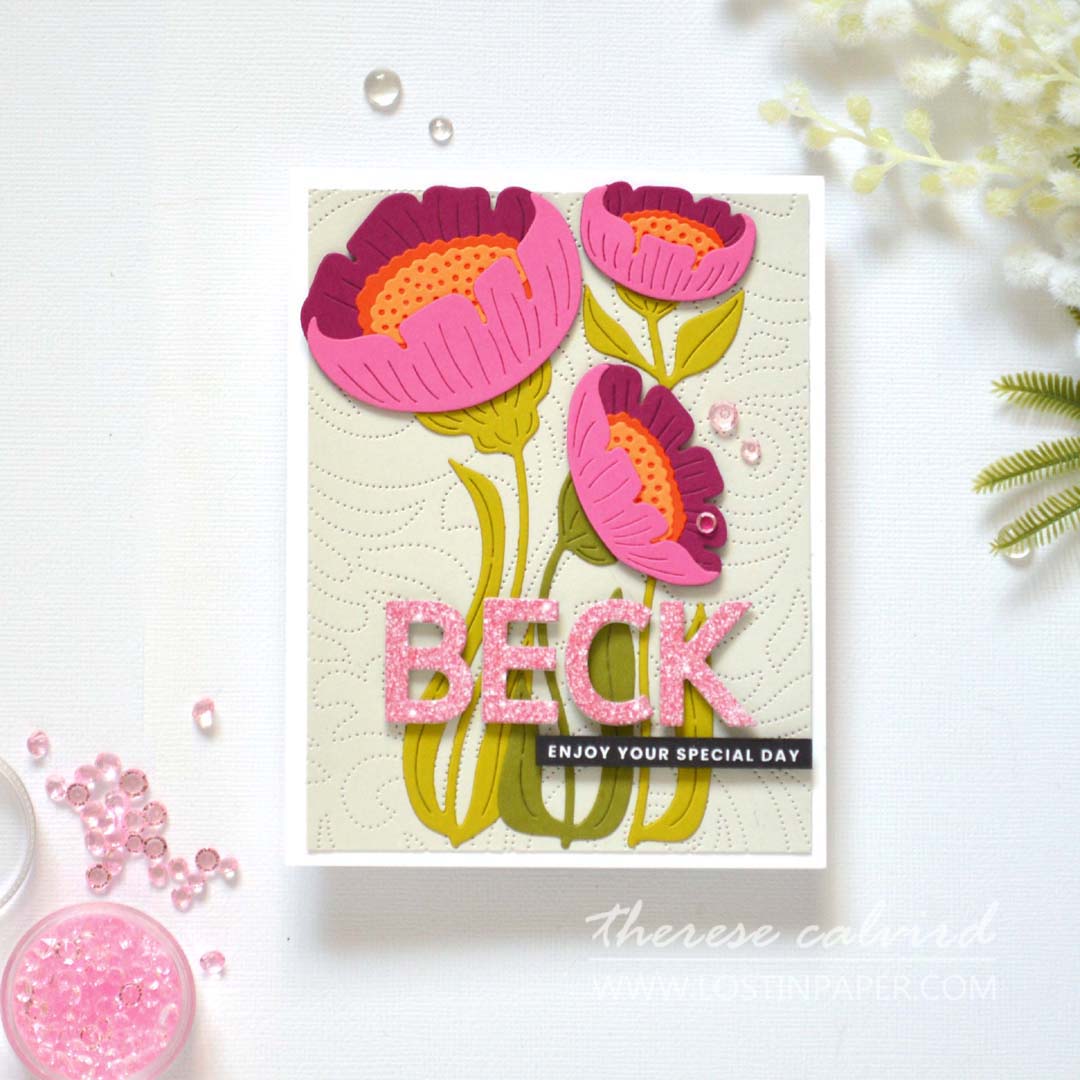
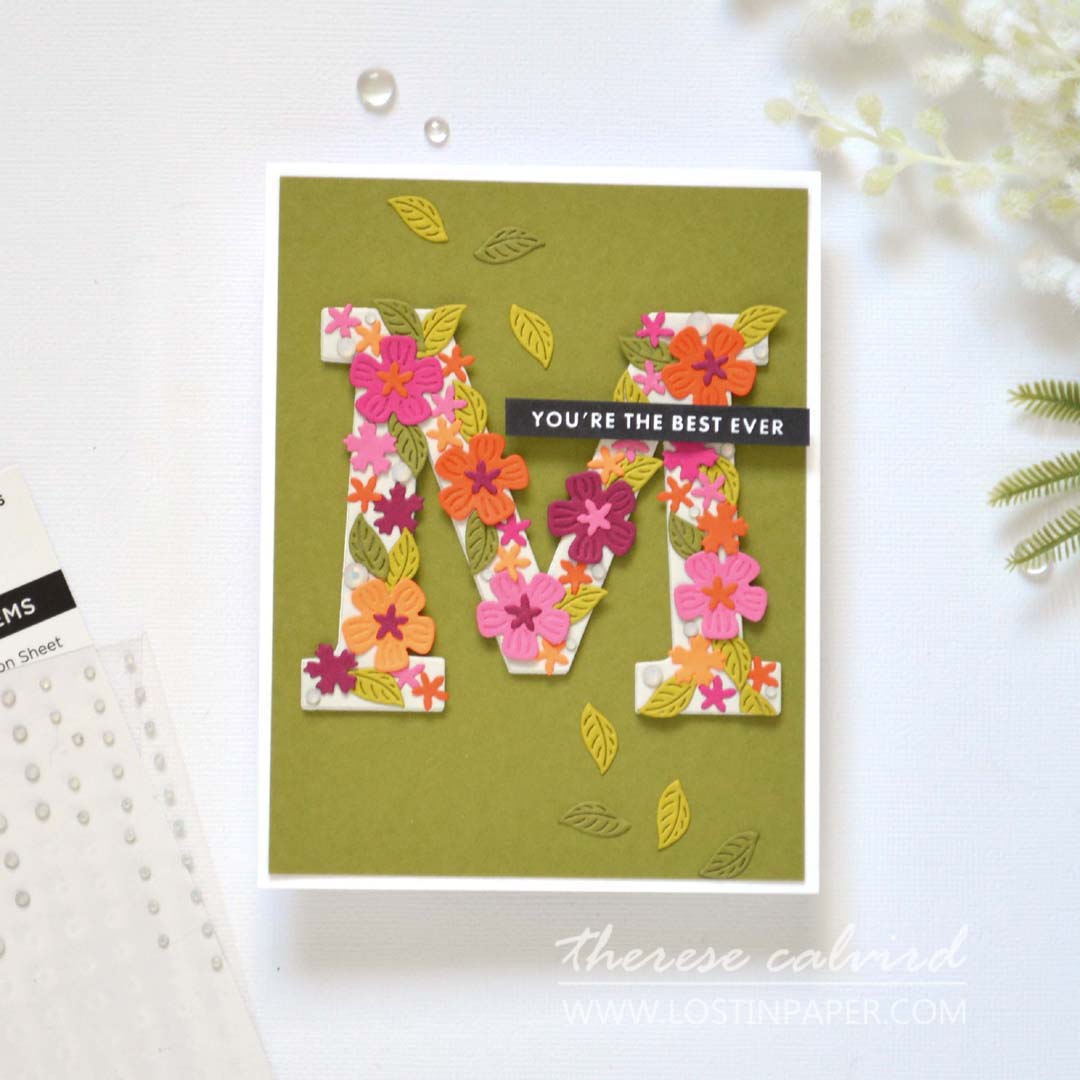
Tip #3 – Monogram
A quick and easy way to create a personalised card! You can use a person’s initial of either their first or last name. It can be a focal point such as I have created here, or you can be subtle and add a smaller letter among a bouquet of flowers, or being held by a critter!
Another fun option is to create personalised monogram stationery for either yourself or as a gift card set.
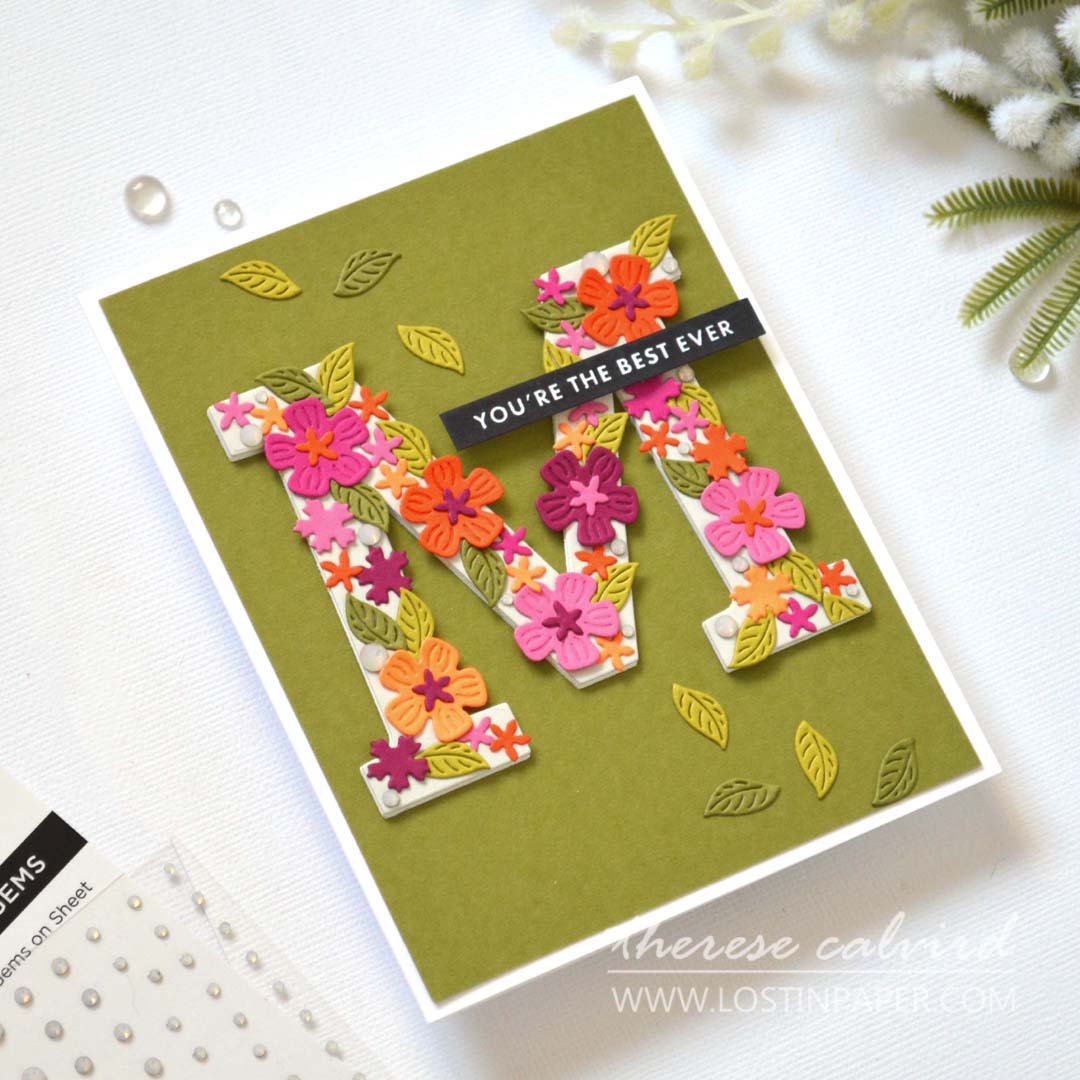
Tip #4 – Add Details
Step up a larger monogram by adding fun images such as flowers as I did here, but you could also ‘bling’ it instead with rhinestones or even enamel dots. Find smaller filler flowers from die sets or even ‘stamp’ flowers and die cut them or stamp flowers directly onto cardstock before die cutting instead.
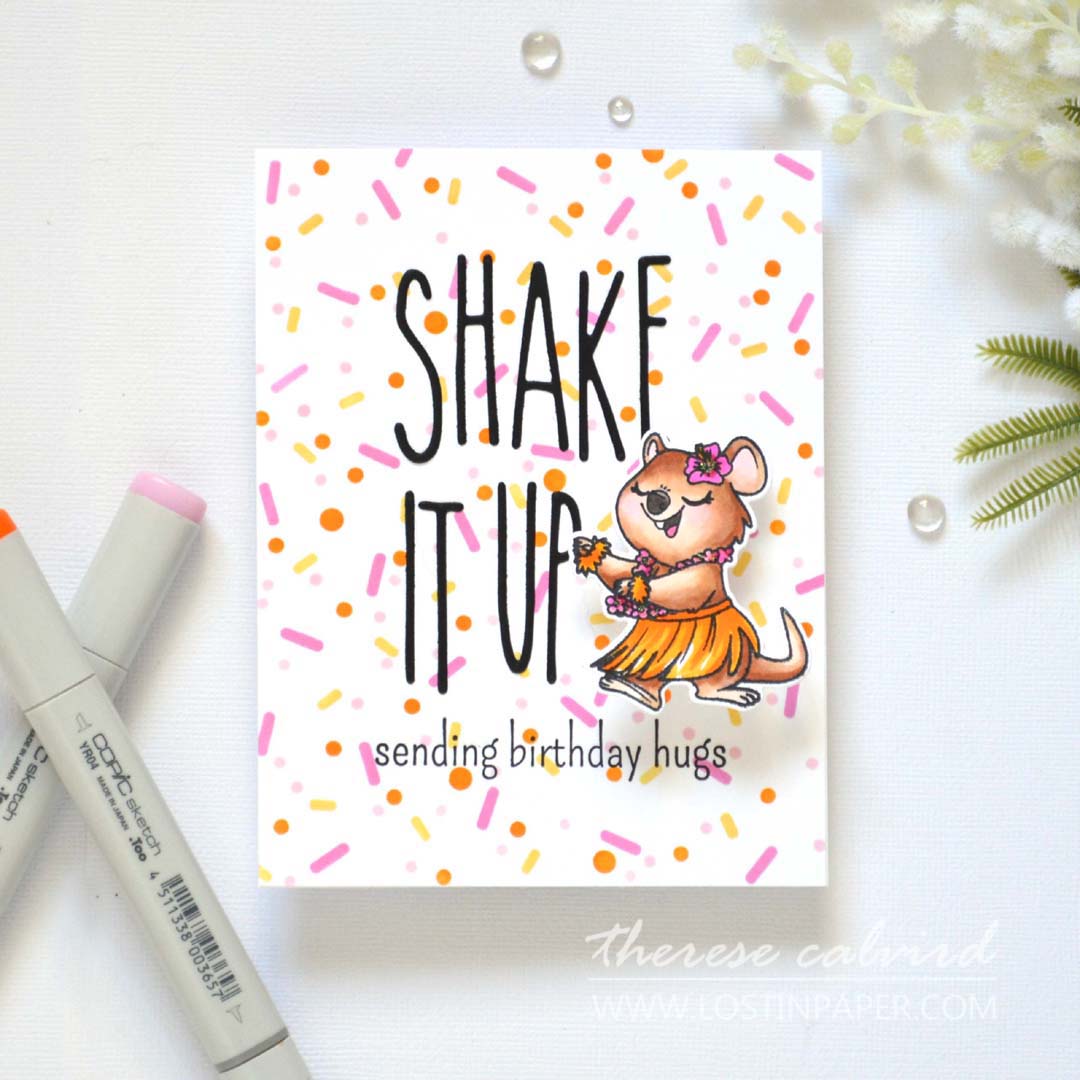
Tip #5 – Sentiment
Want to create that perfect sentiment for a special friend, or to co-ordinate with a specific stamp, then alphabet dies are ideal. You can create a bespoke sentiment easily, just make sure that the size of the sentiment will fit the card. I do this by laying the dies directly onto a piece of A2 cardstock prior to cutting.
OR you can simply add a portion of the sentiment using die-cuts and stamp the remaining sentiment such as I did here.
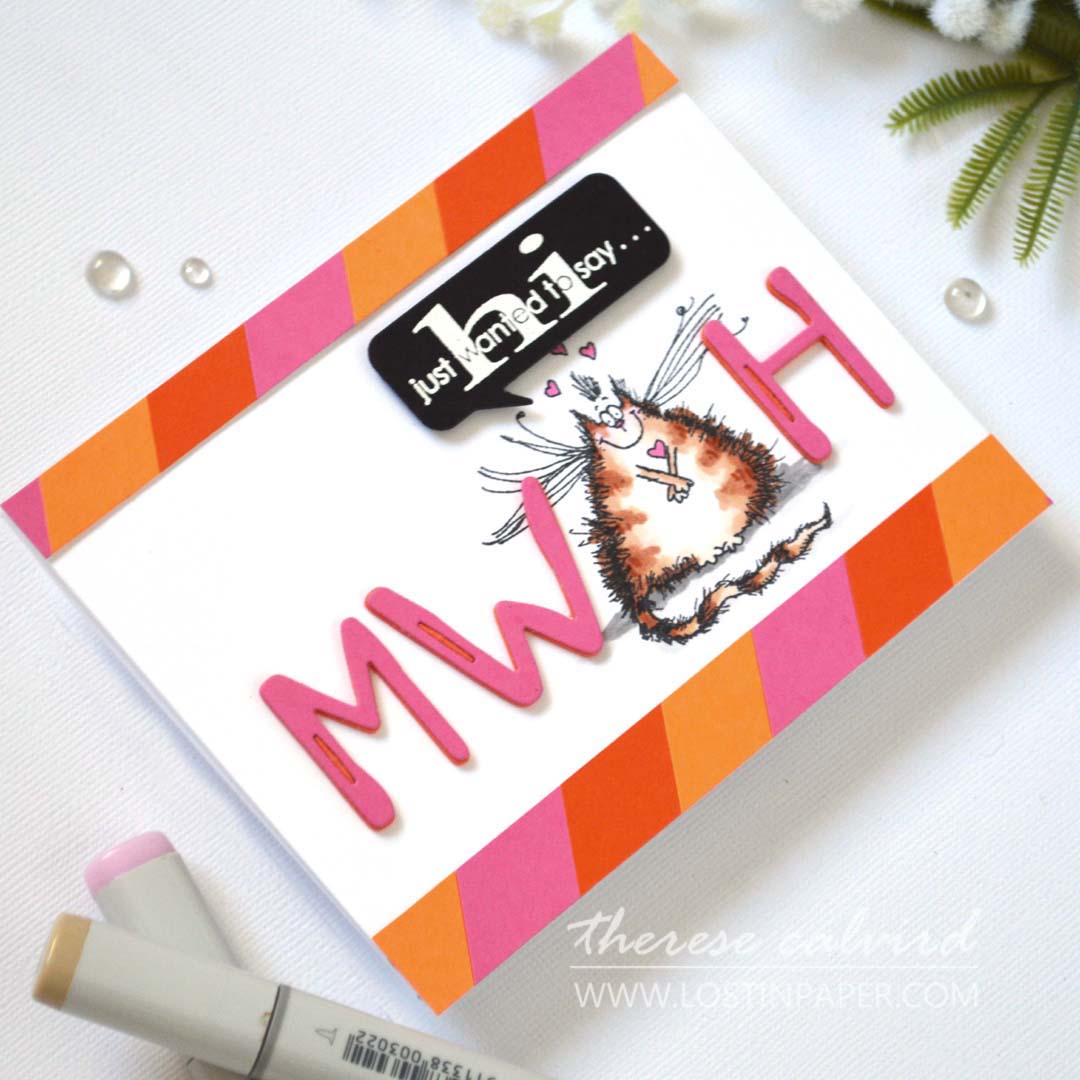
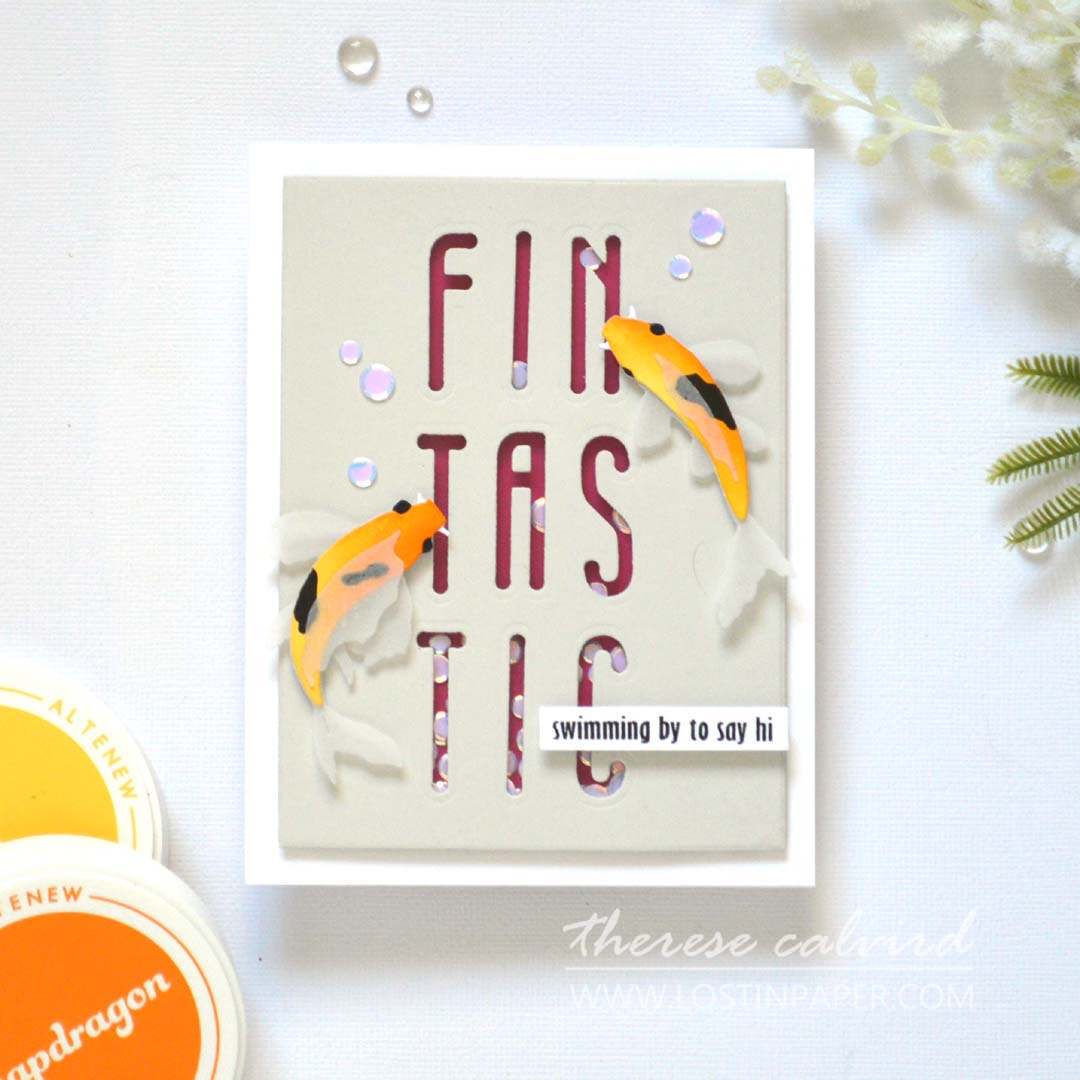
Tip #6 – Negative Space
What’s not to love! Add that special something to a card by using die cut letters to create a negative space sentiment. And for a funky look, leave the ‘counters’ or the centre of the letters out, it’s up to you.

Tip #7 – Shaker
Which of course gives us the opportunity to create an interactive card… and this one just had to be a ‘shaker’. this also gives us an easy way to add the counters back into place as they can be adhered to the acetate (check out the perfect placement TIP in my video)!
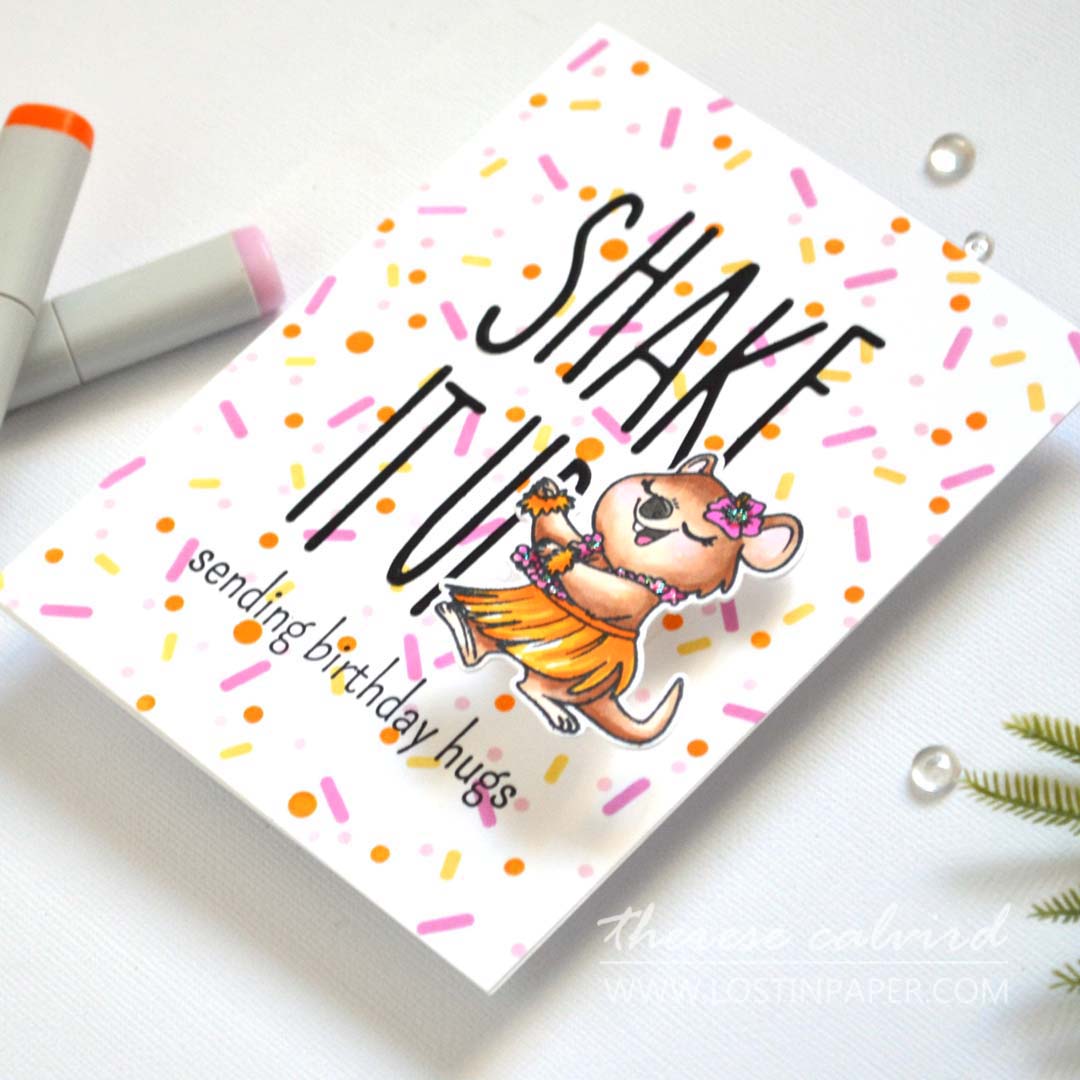
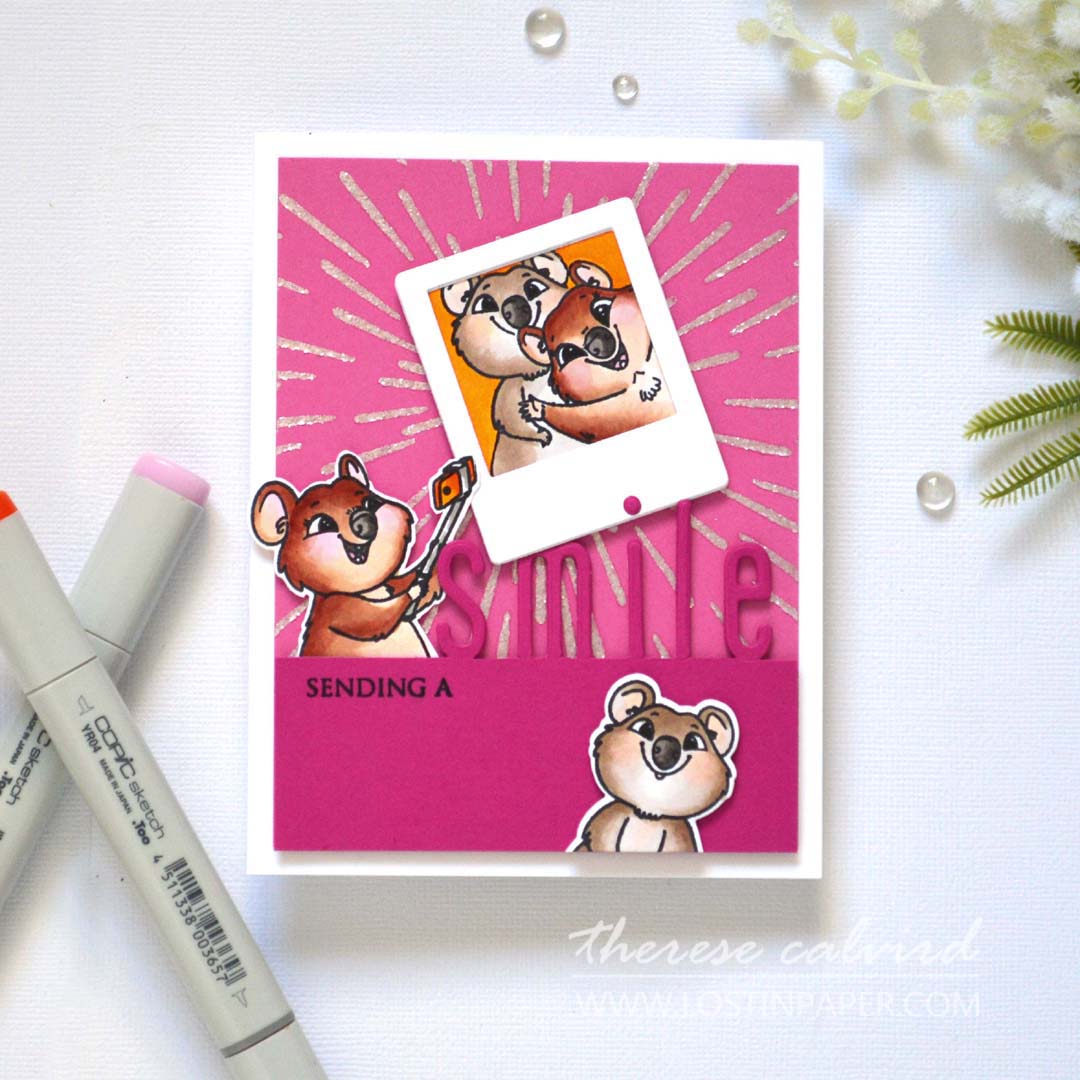
Tip #8 – Partial Die Cutting
It’s time to go a little ‘off the edge’ and this time the sentiment is paritally die cut leaving just the base of it touching the edge of the lower panel. You can purchase specialised dies that are made to do this, but it’s nice to have the option to create your own sentiments using whatever fonts you have in your die stash.
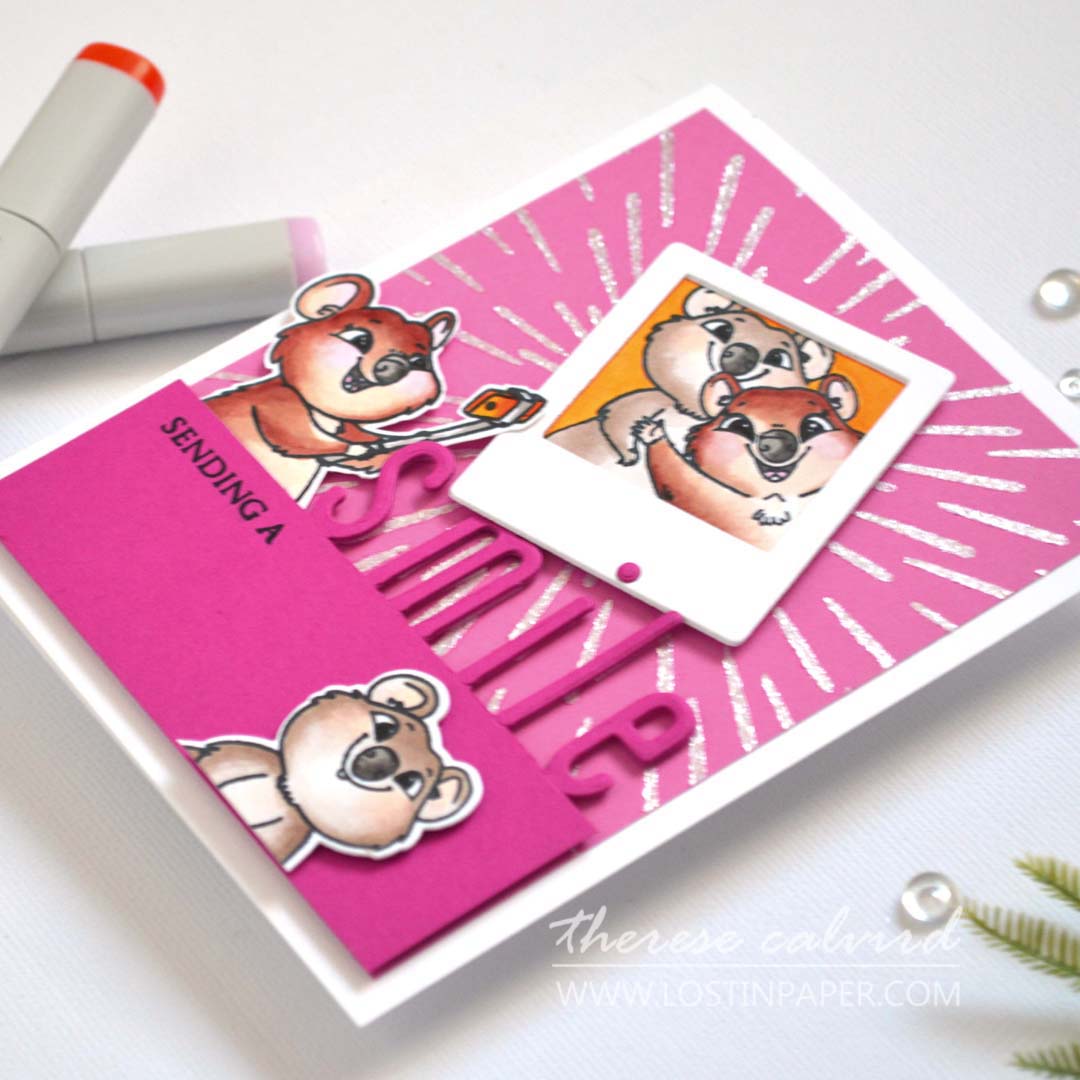
PRO TIP: If you are using a lower case alphabet I would suggest not to use letters which are descenders… that is, they ‘hang’ down beneath the line. These are g, j, p,q,and y!
Did you enjoy these ideas and techniques and would you like MORE die cut inspiration? Check out my video here sharing 8 Wonderful Ways to Use Die Cut Words on Cards!
I’d LOVE to know if you are inspired to try any of these techniques and if YOU have a favourite card today? Let me know in the comments below and share with me on Social Media, it would be fantastic to see what you create!
Thank you for spending your time with me today, sending crafty hugs your way!

I use affiliate links which means that I will receive a small portion of the sale at no extra cost to you).
I truly appreciate your support of my card adventures!
Other Supplies:
Dies: Altenew – Brush Alpha Die Set | Mega Alphabet M | Tall Alpha Lowercase Die Set | Tall Alpha Die Set | Tall N Skinny Alpha (retired) | Spellbinders – Christmas Tree Topiary
Stencils: Altenew – Warp Speed Stencil | Ellen Hutson – Sprinkles
Stamps: Penny Black Inc – Kool Kats | Huggable
Embellies: Kat Scrappiness – White AB Solid Confetti Mix | Cosmic Shimmer Luna Paste – Moonlight Pearl
Cardstock: Concord & 9th – Sweet Pea | Dragonfruit | Wildberry | Marmalade | Lemongrass | Avocado | Black
Copics: 0 | E31,33,40,43,50 | Y17 | YR04 | RV00,04 | BV20 | W4,7 | T0,4.
Artist Markers: Altenew – R504 | C003 | Y911
Ink: Altenew – Sunray | Snap Dragon | Pink Diamond | Pinkalicious
Ellen Hutson: Tall N Skinny Alpha | Sprinkles (stencil)
 Neenah Solar 110 AMZ | SSS | Neenah Solar 80 AMZ | SSS |  Concord & 9th – Cardstock SSS |  Glitter Galore Paper Pad KAT |
 Pale Gray ALT | Foam Sheets AMZ | SSS |  Acetate SSS |  Vellum SSS |
 Linear Pathway Alpha Solid ALT |  Fresh Picked Anemones SSS | OTH | SB |  Dotted Swirls ALT | SSS |  Sweet Bouquet ALT |
 Chat Bubbles OTH |  Lovely Floral Hat ALT | SSS |  Stylish Oval Hello You Floral SSS | SB |  Bold Sentiments ALT | SSS |
 Summer Quokka KAT |  Birthday Greetings ALT |  Calming Koi ALT |  A2 Layers Die SSS |
 Quokka’n Up KAT |  Tuxedo Black SSS |  Nocturne SSS |  Versamark Ink SSS | KAT |
 Mini Blending Brush Set ALT | SSS |  Crystal Mix Gems SSS | SB |  Fine Liner Pen Set ALT | SSS |  Palette Knife Set ALT |
 Artist Markers ALT | SSS |  Copic Markers SSS |  WOW Heat Tool SSS |  Opaque Bright White SSS |
 Powder Tool SSS |  Crystal Mix SSS |  Mini Action Wobble SSS |  Triangle Tray KAT |
 Pick Up Tool KAT |  Scissors SSS |  Bone Folder Altenew ALT |  Score Board ALT | SSS |
 Sticky Grid Mat Ultra ALT | SSS | SB |  Mini MISTI SSS | 9″ Fiskars Paper Trimmer AMZ | SSS |  Bigshot SSS |
 Foam Squares – Black mix SSS |  Satin Masking Tape ALT | SSS |  Bearly Art Glue SSS |  Glue Tape ALT | SSS |
 Foam Tape ALT | SSS |  Adhesive Sheets ALT | SSS |
SO many great ideas for adding alphas, Therese! [you know my favorite, right? btw I’ll take flowers over bling any day of the year!]
Off to watch your magic happen… and find my own alphas!
=] M
Yippee! Can’t wait to see what you create!
Some really good tips here and I love your creations.
Thank you so much, I’m glad you enjoyed these ideas!
What a fun video Therese! You always make your projects look so doable! Can’t wait to try some of them!
Yay! Hope you have fun creating Debby!
Wowza, thanks for all of the tips and FUN ideas! These are all fantastic, Therese!
Yay! Thank you so very much!
Such incredible makes, informative post too and you are full of so many ideas too. The colours you have used are stunning. xx
Thank you Angellica, I had such fun making these!
Fab ideas.
I need to dust off my dies too!
hahaha, so many techniques so little time lol.
Life is a little crazier than normal around here. My 2 middle kiddos each bought their own homes within a day of each other and are now in the process of minor fixing and moving out! 2 at once is very busy. As Miss 19 keeps reminding me short term pain for long term gain! Soon there will be only one! That with the little baby boom in the kiddos friends has kept me away from paper but not creating! Loads of quilts, knits and toys being created.
Sounds wonderful! Keep enjoying life and enjoy the ‘quieter’ house too lol.