Have you embraced the simplicity of ink blending & Stencils? It has certainly made us look at our products differently and today I have some tips to take them a step further!
I use affiliate links, this means that if you choose to click on a product that is linked to an affiliate shop then I will get a small commission at no extra cost to you).
This is a great way to support my channel as well as the shops that I love 🥰!
Some QUICK News!!
Did you see that there is a Card Maker Success Camp – Beginner Edition! And it’s FREE, check out all the details and sign up for it here!
Would you like to see today’s cards?

#STENCILFUN
I have to say that the cardmaking world made life easy for us when they introduced colouring and layering stencils. How fast and easy is it to add colour to, a simple, or even a complicated image and get the WoW factor, even if you can’t colour!
But, did you know that these stencils don’t always have to be used as intended? Today I thought I would put a couple of ideas to the test and see how the same stencil can look, when used differently.
Idea #1 – No shading
Okay, this idea was inspired by a jumper (sweater), yes, it has a cool coloured pattern and I adored the look of teal and orange together. But there wasn’t any shading, which is normally what I would do with stencils such as this.
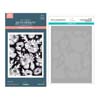
I started by pressing the floral plate using a teal coloured ink, my thought was that this will give me more of a graphic style look.

I then came in with the stencils and added the bold orange and green colours, without any further shading. It was very easy to do, because I didn’t even have to think about which colours to mix for shading… I just made sure to get some good bold colour onto the cardstock.

I kept the sentiment very clean & simple, but a die cut sentiment would look fabulous here too!

Idea #2 – Forget the Plate!
Have you ever used colouring stencils without a press plate or even the stamp set? For this design, I used similar colours to the first card, and they couldn’t look any different. There are multiple stencils in this set and I simply ink blended them as intended, starting at number 1 through to 6.

And again, I did not shade these petals, but instead changed up the ink tones that I used on each stencil layer. This gave the flower some depth by having different coloured petals in each bloom. It was very quick and easy to do!

Not all stencils will be suitable for this technique, but it’s worth taking a look at your stash to see if you have something that will work.

Are you going to try using your stencils in a unique or different way? If you do, I’d love you to share your creations with me at Social Media, don’t forget to link me @lostinpaper.
I hope you find some crafty time today,

Other Supplies:
Inks: Altenew – Aqualicious | Chamomile | Bamboo | Bamboo | Peachy Glow | Golden Honeycomb | Amber Blaze | Misty Sage | Mossy Meadow | Paper Bag
Cardstock: Black
 Poppy Background + Stencil SSS | SB |  Everlasting Circles SSS | SB |  Yana’s Special Sentiments SSS | SB |  Wonderful Script Sentiments SSS | SB |
 All the Sentiments SSS | SB |  Porcelain Cotton Card Panels 118lb SSS | SB |  Black & White Foil SSS | SB |  Brushed Gold ALT | SSS |
 Neenah Solar 110 AMZ | SSS |  Neenah Solar 80 AMZ | SSS |  Sweet Dreams Bundle ALT | SSS |  Sun-Kissed Delights ALT | SSS |
 Chamomile ALT | SSS |  Paper Bag ALT | SSS |  Jade Dreams ALT | SSS |  Tropical Forest ALT | SSS |
 Nocturne SSS |  Ink Blending Tool ALT | SSS |  Mini Blending Brush Set ALT | SSS |  Fashion Gold SB |
 Scissors SSS |  Sticky Grid Mat Ultra ALT | SSS | SB |  9″ Fiskars Paper Trimmer AMZ | SSS |  Mini MISTI SSS |
 BetterPress SB ALT | SSS | SB |  Media Grip Mat SSS |  Bearly Art Glue SSS |  Glue Tape ALT | SSS |
 Foam Tape ALT | SSS |  Satin Masking Tape ALT | SSS |

You took the words right out of my mouth, Therese: wonderful, friend!
=]
Mwah!
You’ve inspired me with your wonderful ideas,Therese! Pretty cards!
Thank you so very much!
I love these stunning makes, Clean and crisp and so embracing too xx
Thank you Angellica!