Do you have any Cover Dies? They are perfect to make a quick backgrounds but, sometimes you just never know where they will lead, today, things got a little hot and melted…
But first, I wanted to let you know that this is part of my Take 2 Series with Altenew and I’m so excited that you are joining me for another video today.
Would you like to see today’s cards?

And you can see the video below or watch it HD at YouTube.
I use affiliate links, this means that if you click on a product that is linked to an affiliate shop then I will receive a small portion of the sale at no extra cost to you).
This is a great way to support my channel as well as the shops that we love 🥰!
Do you need some ideas to create die cut background’s real QUICK? Both of these techniques will have your cards ready to go in just minutes! You can use the backgrounds as the focus or decorate them however you like.
Technique #1: Embossing
Did you know that you can emboss cardstock with a ‘cutting die‘. It’s very easy to do and you may have everything you already need for this technique. Many die cutting machines include a ‘silicon’ mat, but they can also be purchased separately if needed (these were often called ‘tan’ mats, because the original versions were tan in color).

Each machine will have it’s own specific ‘sandwich’ to emboss with a cutting die, so check your manufacturers recommendations. But, basically what happens is the the silicon mat prevents the die from cutting into the cardstock and instead, it leaves an embossed impression of the cutting die.
PRO TIP: To ‘erase’ the numbers embossed into the cardstock, flip it over and use a bone folder to rub over them by pressing into the silicon mat (or you could use a mouse pad here instead).

I wanted to step this very clean and simple card up a notch so decided to add a wax seal. Another option could be to add a small bow with ribbon or twine.

Technique #2 – Create a Pattern
Using multiple die cut images, such as these berries and leaves, makes it easy to create a patterned background and add just a little bit of dimension. The best thing is that using a die that cuts multiples images in one pass makes this process even quicker.

I however, chose to use multiple colors for this background, but you could just as easily add these images in just one color or even tone on tone to create an embossed look. Think ‘white on white’, or what about starting with a colored background panel!
BONUS IDEA: You can also recreate this style by using the original die as the negative background panel die-cut in white cardstock, and then inlay the colored images instead.

To keep the background the main focus I added a simple bold die cut sentiment, which was framed using a Circle Die.

I hope you are inspired to create using Die-Cut Images using one of these techniques on your next project! If you do, don’t forget to share them on social media with me, I’d love to see what you make!
Crafty hugs,

Also, just in case you want to do a little shopping I’ve added the links below (some of them are affiliate links which means that I will receive a small portion of the sale at no extra cost to you). This is a great way to support me and the shops that we love 🥰!
Other Supplies:
Altenew Cardstock: Jet Black | Orange Cream | Puffy Heart | Frosty Pink.
*Certain content that appears on this site comes from Amazon, this content is provided ‘as is’ and is subject to change or removal at any time.
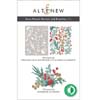 Zero Waste Berries and Branches ALT | SSS | 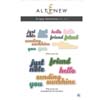 Scripty Sentiments Dies ALT | SSS | OTH |  Halftone Circles ALT |  Sweet Sentiments Die ALT | SSS |
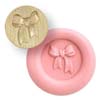 Mini Bow Wax Stamp ALT | SSS |  Wax Stamp Handle ALT | SSS |  Wax Burner ALT | 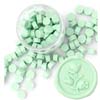 Mint Choc Wax Beads ALT | SSS |
 Wax Beads Bundle ALT | SSS |  Altenew Cardstock ALT | SSS |  Neenah Solar 110 AMZ | SSS |  Neenah Solar 80 AMZ | SSS |
 Fine Blade Scissors ALT | SSS |  Tweezers ALT | SSS |  Bone Folder Altenew ALT |  Stamping Mat ALT | SSS |
 Perfect Picker ALT | SSS |  Score Board ALT | SSS |  Platinum 6 ALT | SSS |  9″ Fiskars Paper Trimmer AMZ | SSS |
 Glue Tape ALT | SSS |  Foam Tape NEW sizes! ALT | SSS |  Bearly Art Glue AMZ | SSS |  Satin Masking Tape ALT |

Love these examples! The cards are so pretty!
Thank you so very much Cathy!
I love that bright color combination, Therese.
Thank you so very much Bobby!
You KNOW I love OUR FAVORITE color combination of all – and I adore what you’ve done with those lovely pinks and oranges today, Therese! The all-over pattern is something I would definitely try!
=]
Yippee! So glad you like them, bring on the PINK and ORANGE!
I love these colours. I was hoping someone had answered the wax seal problem.
Me too, I’ll let you know lol.
Such a pretty color combo! These are wonderful, Therese!
So glad you liked them!
I am going to try this color combo also, it is beautiful! Thank you for sharing!
So glad you like it Cheryl, it’s one of my faves in card making, it makes me happy!
Some of my wax stamps came with large adhesive dots and those hold the wax seals on cards very well.
Sounds like that may be the best option, thank you Margaret!