
Do you like dimension but don’t like to pay for extra postage? If so, then this post may be helpful for you…
I’m totally addicted to interactive cards, but I wanted a way to add dimension without the bulk. That’s when I came across this Pop-Up Die set, and I couldn’t help but wonder… is this something I really needed, or could I easily make my own pop-up mechanism? So today, I decided to do both!
Would you like to see today’s card?
For those who joined me live, we had a blast road-testing these dies and crafting together. We learned how to make a pop-up card with a roller skate theme, and everyone’s ideas really added to the fun! If you missed it, don’t worry – you can still catch the replay on YouTube HERE (Scroll down for more pics and details).
I use affiliate links, which means if you click on a product linked to an affiliate shop, I’ll receive a small portion of the sale at no extra cost to you. It’s a great way to support me and the shops we love 🥰!
#DIEORDIY?
On my recent holiday shopping spree, I came across these Simple Pop-Up Dies, and let me tell you – they do exactly what they say! They’re super simple to use and perfect for adding dimension to your cards without the bulk.
These dies create dimension with less bulk than foam tape, which is ideal for protecting your project during postage and potentially saving you money on postage costs!
If you love adding dimension to your cards or are a fan of pop-up designs, these dies are a great option. You can use the pop-up mechanisms both on the front and inside of your cards, and even add multiple mechanisms to a larger image or use them to add multiple images on one project.
Here’s how you can make the most of them:
- Size it right: You can cut the mechanisms thinner to suit the size of the image you’re popping up.
- Paper choice: Go for a lighter weight cardstock like 80lb Neenah. It’s light enough to move easily but still sturdy enough to hold die-cut images.
- Strong adhesive: These are moving parts, so use a strong adhesive to make sure the mechanism stays in place and securely attaches to both the card and the image.
- Crisp folds: To get sharp folds on the mechanism, use a bone folder to burnish the embossed lines.
- Placement: Make sure the mechanism is hidden behind your image. Before adhering everything, place your image on the card front and do a “practice fold” to ensure it won’t show. If needed, trim off any corners that might peek through.
DIY fan? No problem! I show you how to create your own pop-up mechanism in today’s live video.
TOP TIP: Make a set of templates to keep in the die packet so you always know the exact size of each mechanism for future projects.
Ready to take a peek inside?
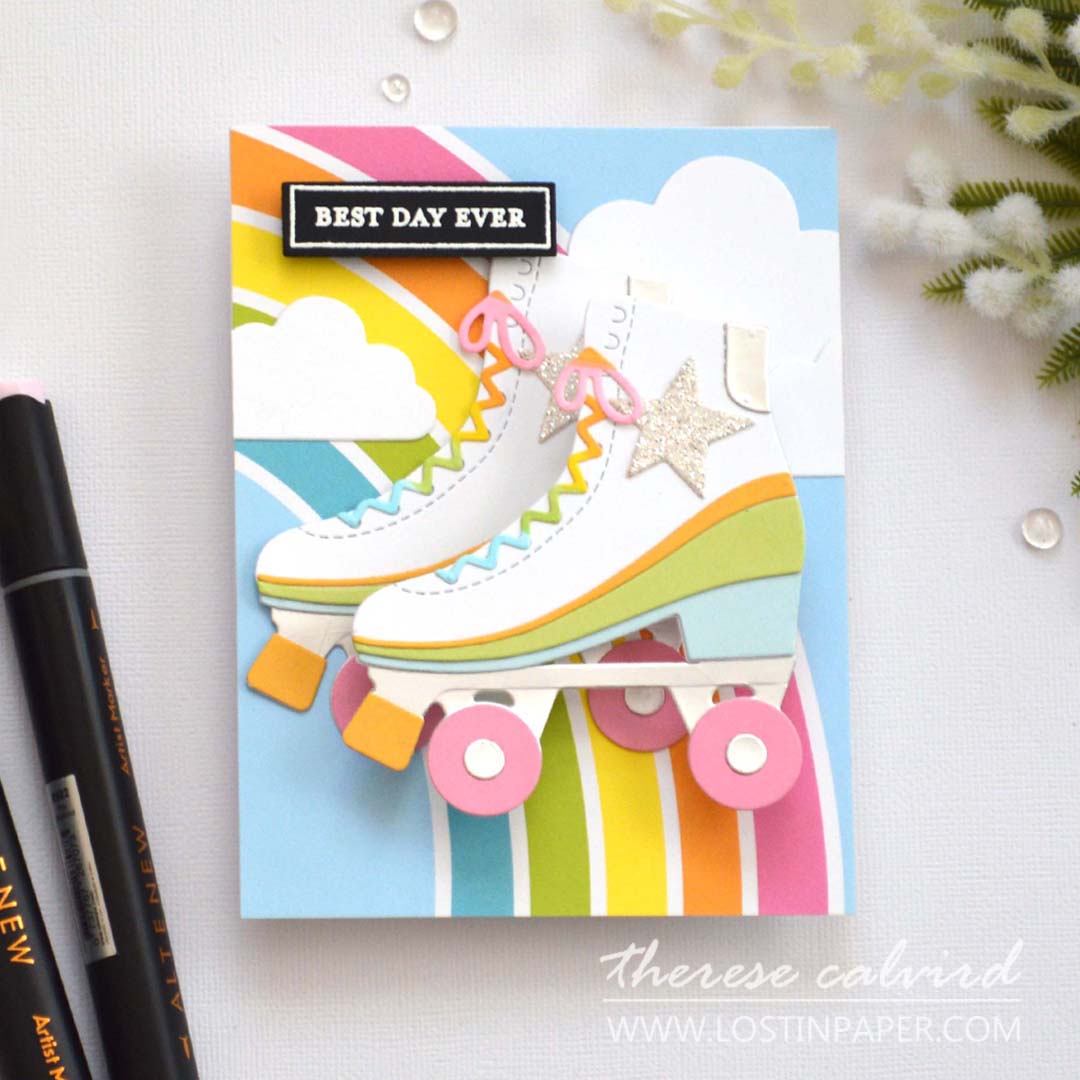
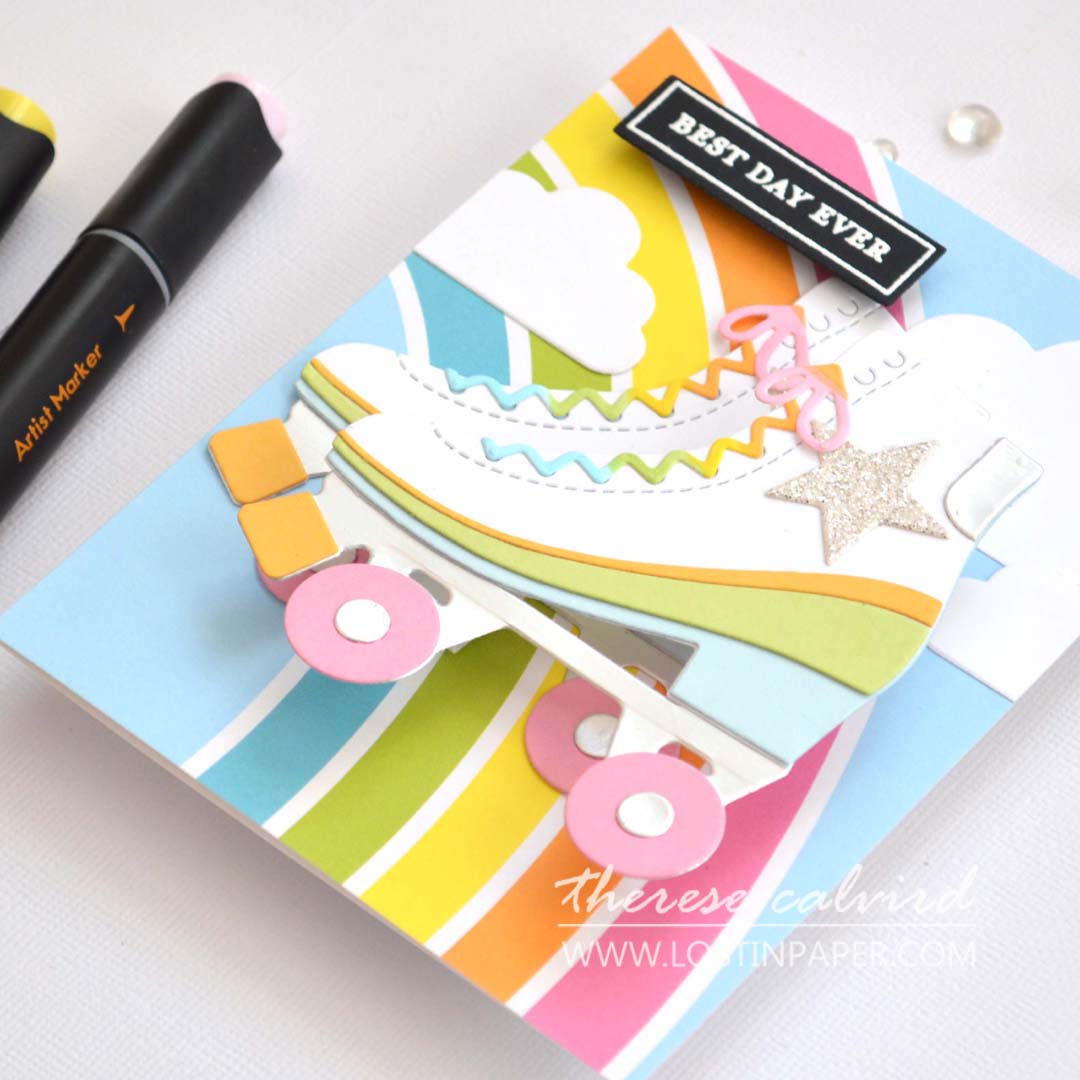
Pop-Up Birthday Roller Skate Card Up Close:
Here’s a closer look at my skate-themed birthday card! I was definitely in a ‘rainbow’ mood today, and that vibe carried all the way through to the shoelaces. You’ll see exactly how I created these colorful rainbow laces in the video!
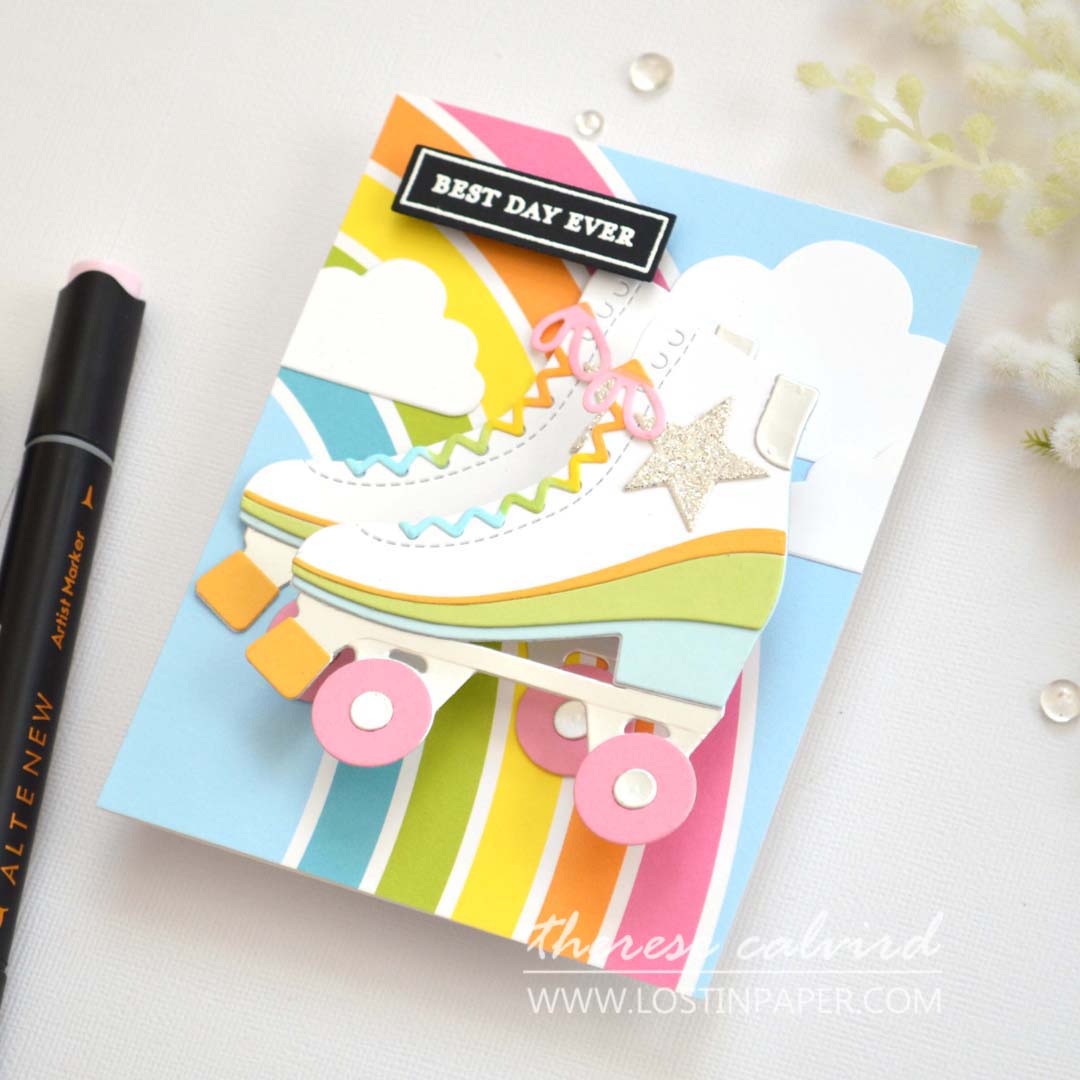
During the live session, we (actually… it was you) decided to pop up just one of the roller skates. I used one pop-up die from the set and then created my very own smaller version to perfectly fit the toe of the shoe.
And, since the skate die is quite large, I thought it would be sturdier with two mechanisms, which I felt was a great example to share in the video.
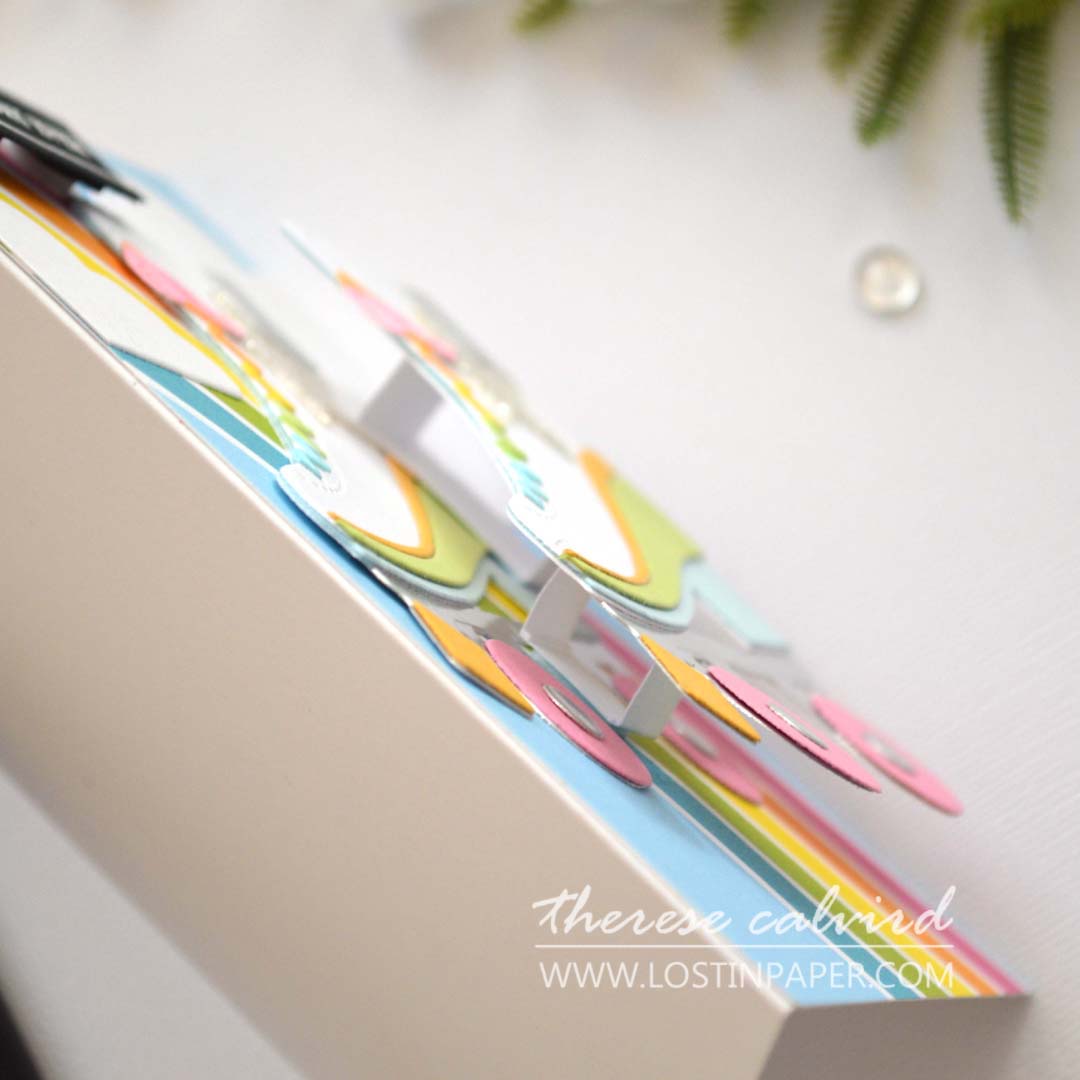
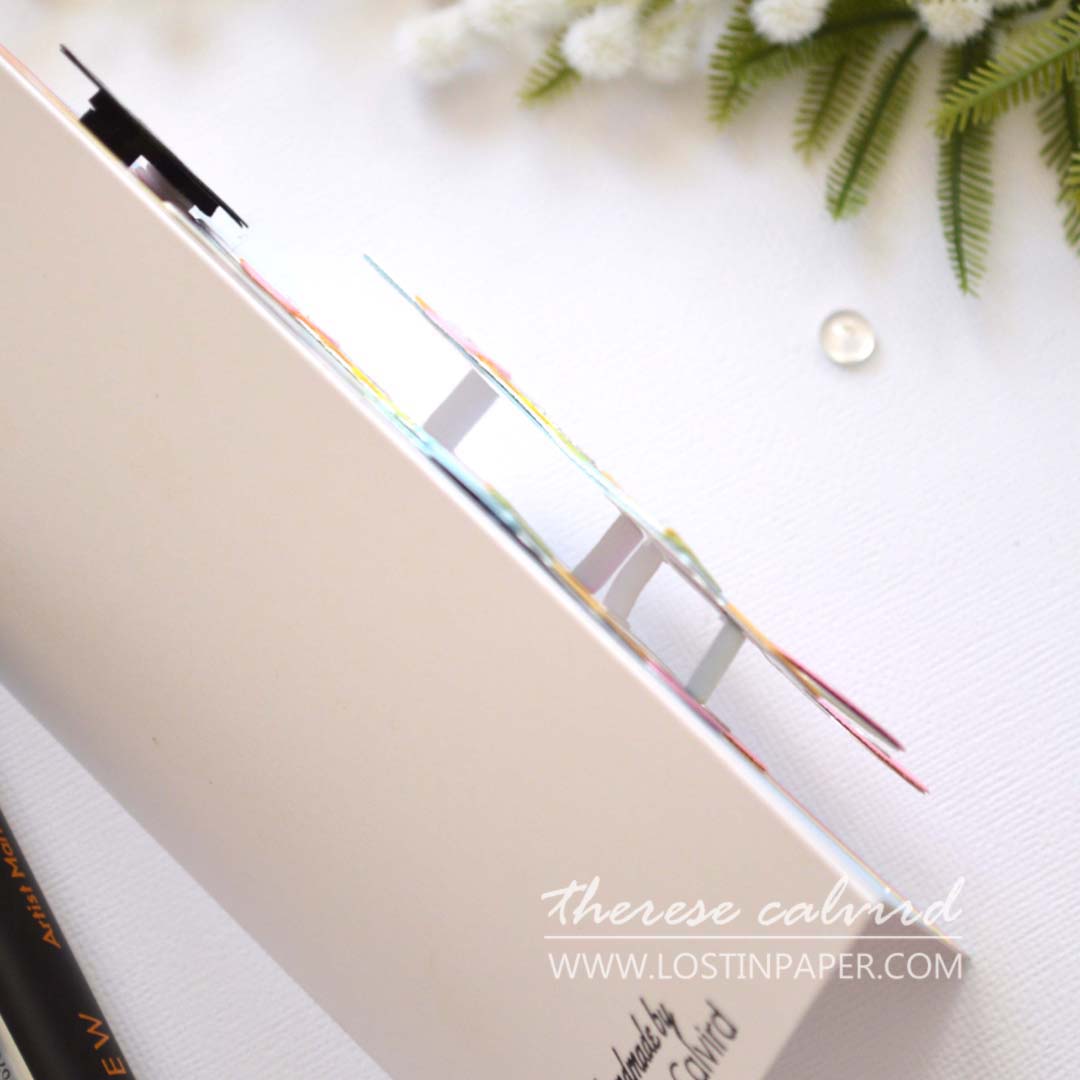
Here’s a side on close-up, showing the serious dimension happening! But when the mechanism is folded down, it lies nearly flat, making it perfect for easy mailing.
And, a bold sentiment eventually made its way onto the card! I’m not sure why I struggle so much with sentiment placement… probably because I always forget to plan it into my card design! 😅
Would you like a pair of my Rainbow Skates? I had so much fun making them with you, and I hope you’ll give one of these ‘Pop-Up’ mechanisms or a DIY version a try! You can use any kind of images you have in your stash. And if you do, don’t forget to tag me on social media – I’d love to see your amazing creations!
Sending crafty hugs your way!

Special thanks to my crafty assistant, Chad (aka ChatGPT), for helping me stay on track with my Gemini brain, grammar, and spelling… well, all the things! 😄
SUPPLIES:
Alcohol Markers: Copics – B01 | Y38 | YG03 – Altenew Artist Markers – R502 | Y106
Cardstock: Waffle Flower – JJ’s Rainbows – Altenew – Dazzling Diamond | Brushed Silver | Warm Sunshine | Pink Diamond – Concord & 9th – Sprout | Powder.
Dies: Ellen Hutson – Essential Clouds
*Certain content that appears on this site comes from Amazon, this content is provided ‘as is’ and is subject to change or removal at any time. As an Amazon Associate I earn from qualifying purchases.
 Roll With it Dies SSS |  Roll With it SSS |  Simple Pop-Up Die Set SSS |  So Many Sayings SSS |
 So Many Sayings Dies SSS |  Neenah Solar 110 AMZ | SSS | Neenah Solar 80 AMZ | SSS |  Concord & 9th – Cardstock SSS |
 Altenew Cardstock ALT | SSS |  Nocturne SSS |  Versamark Ink SSS | OTH |  Pure White ALT |
 Powder Tool SSS |  WOW Heat Tool SSS |  Perfect Picker ALT | SSS |  Tweezers ALT | SSS |
 Reverse Tweezers AMZ | SSS |  Bone Folder ALT |  Score Board ALT | SSS |  Mini MISTI SSS |
 Platinum 6 ALT | SSS | OTH | SB US |  Gemini SSS | 9″ Fiskars Paper Trimmer AMZ |  Foam Squares – Black mix SSS |
 Glue Tape ALT | SSS |  Foam Tape NEW sizes! ALT | SSS | Precision Glue Press AMZ | SSS | Bearly Art Glue AMZ | SSS |
 Satin Masking Tape ALT |
“Ohhhh, I’ve got a brand-new pair of roller skates, you’ve got a brand-new key!”: Melanie 1971
Therese, I really had a good time watching this one come together! Such a fun roll down memory lane with your LIVE audience! Thanks for keeping the fun coming – I’ll be watching for those pom-poms!
=]
Oh my, if I had known about the pom poms…. we would need a whole nother Live lol. And now I can’t stop singing… although for some reason I always thought it was a brand-new ‘car’ hahaha
So very cute! These remind me of white roller skates with purple wheels!!!
Oh, that would be amazing, our ‘hire’ skates used to have red wheels… maybe that’s cause they go faster lol.
Therese, what a great LIVE! I love how everyone participated in the chat, all good fun and how can you not love your roller skates! everything was perfect, the unique rainbow and laces rainbow….
It was soooo much fun Judy, and such a happy card to make! Thanks for letting me know that you enjoyed it too!
This is just as cute and clever as it can be! Love the colors too!
It was such a fun and happy card to make, I’m glad you like it Lisa!
So much FUN! The rainbow laces, rainbow background, and the glitter star were the perfect touches! I could tell you were having a blast reminiscing while making this card. Pure JOY!
Thank you June, it was so much fun to hang out with everyone and a pop-up card to boot (pardon the pun)!
Awesome concept and ever so clever, need to try this for myself lol…The pop up I mean…I hopeless on roller skates. Well done on fabulous make! Hugs xx
How wonderful Angellica, I’m so happy you like this one!