
Do you like a bit of shimmer and shine? I do, and I’m here to help you get your SHINE on!
Did you ever have ‘one of those days‘…. tell me, what is wrong with this picture??? AND, do you reckon anyone will notice?
And a quick note, I wanted to let you know that this post contains affiliate links (which means that if you choose to click on my links and buy something nice then I receive a small commission at no extra cost to you – this is a great way to support me and the shops that we love 🥰).
#SHIMMERPASTE
I have a love/hate relationship with pastes, I ADORE them, but my problem is that I forget that I have them… and when I go to use them again, they have dried up.
PRO TIP: I have a cunning plan, I have used some of that fancy sticky clear wrap and ‘sealed’ all of the jars (I’ve done this before and it works well). AND I am going to leave them out instead of in a drawer. If I don’t see it I don’t use it.
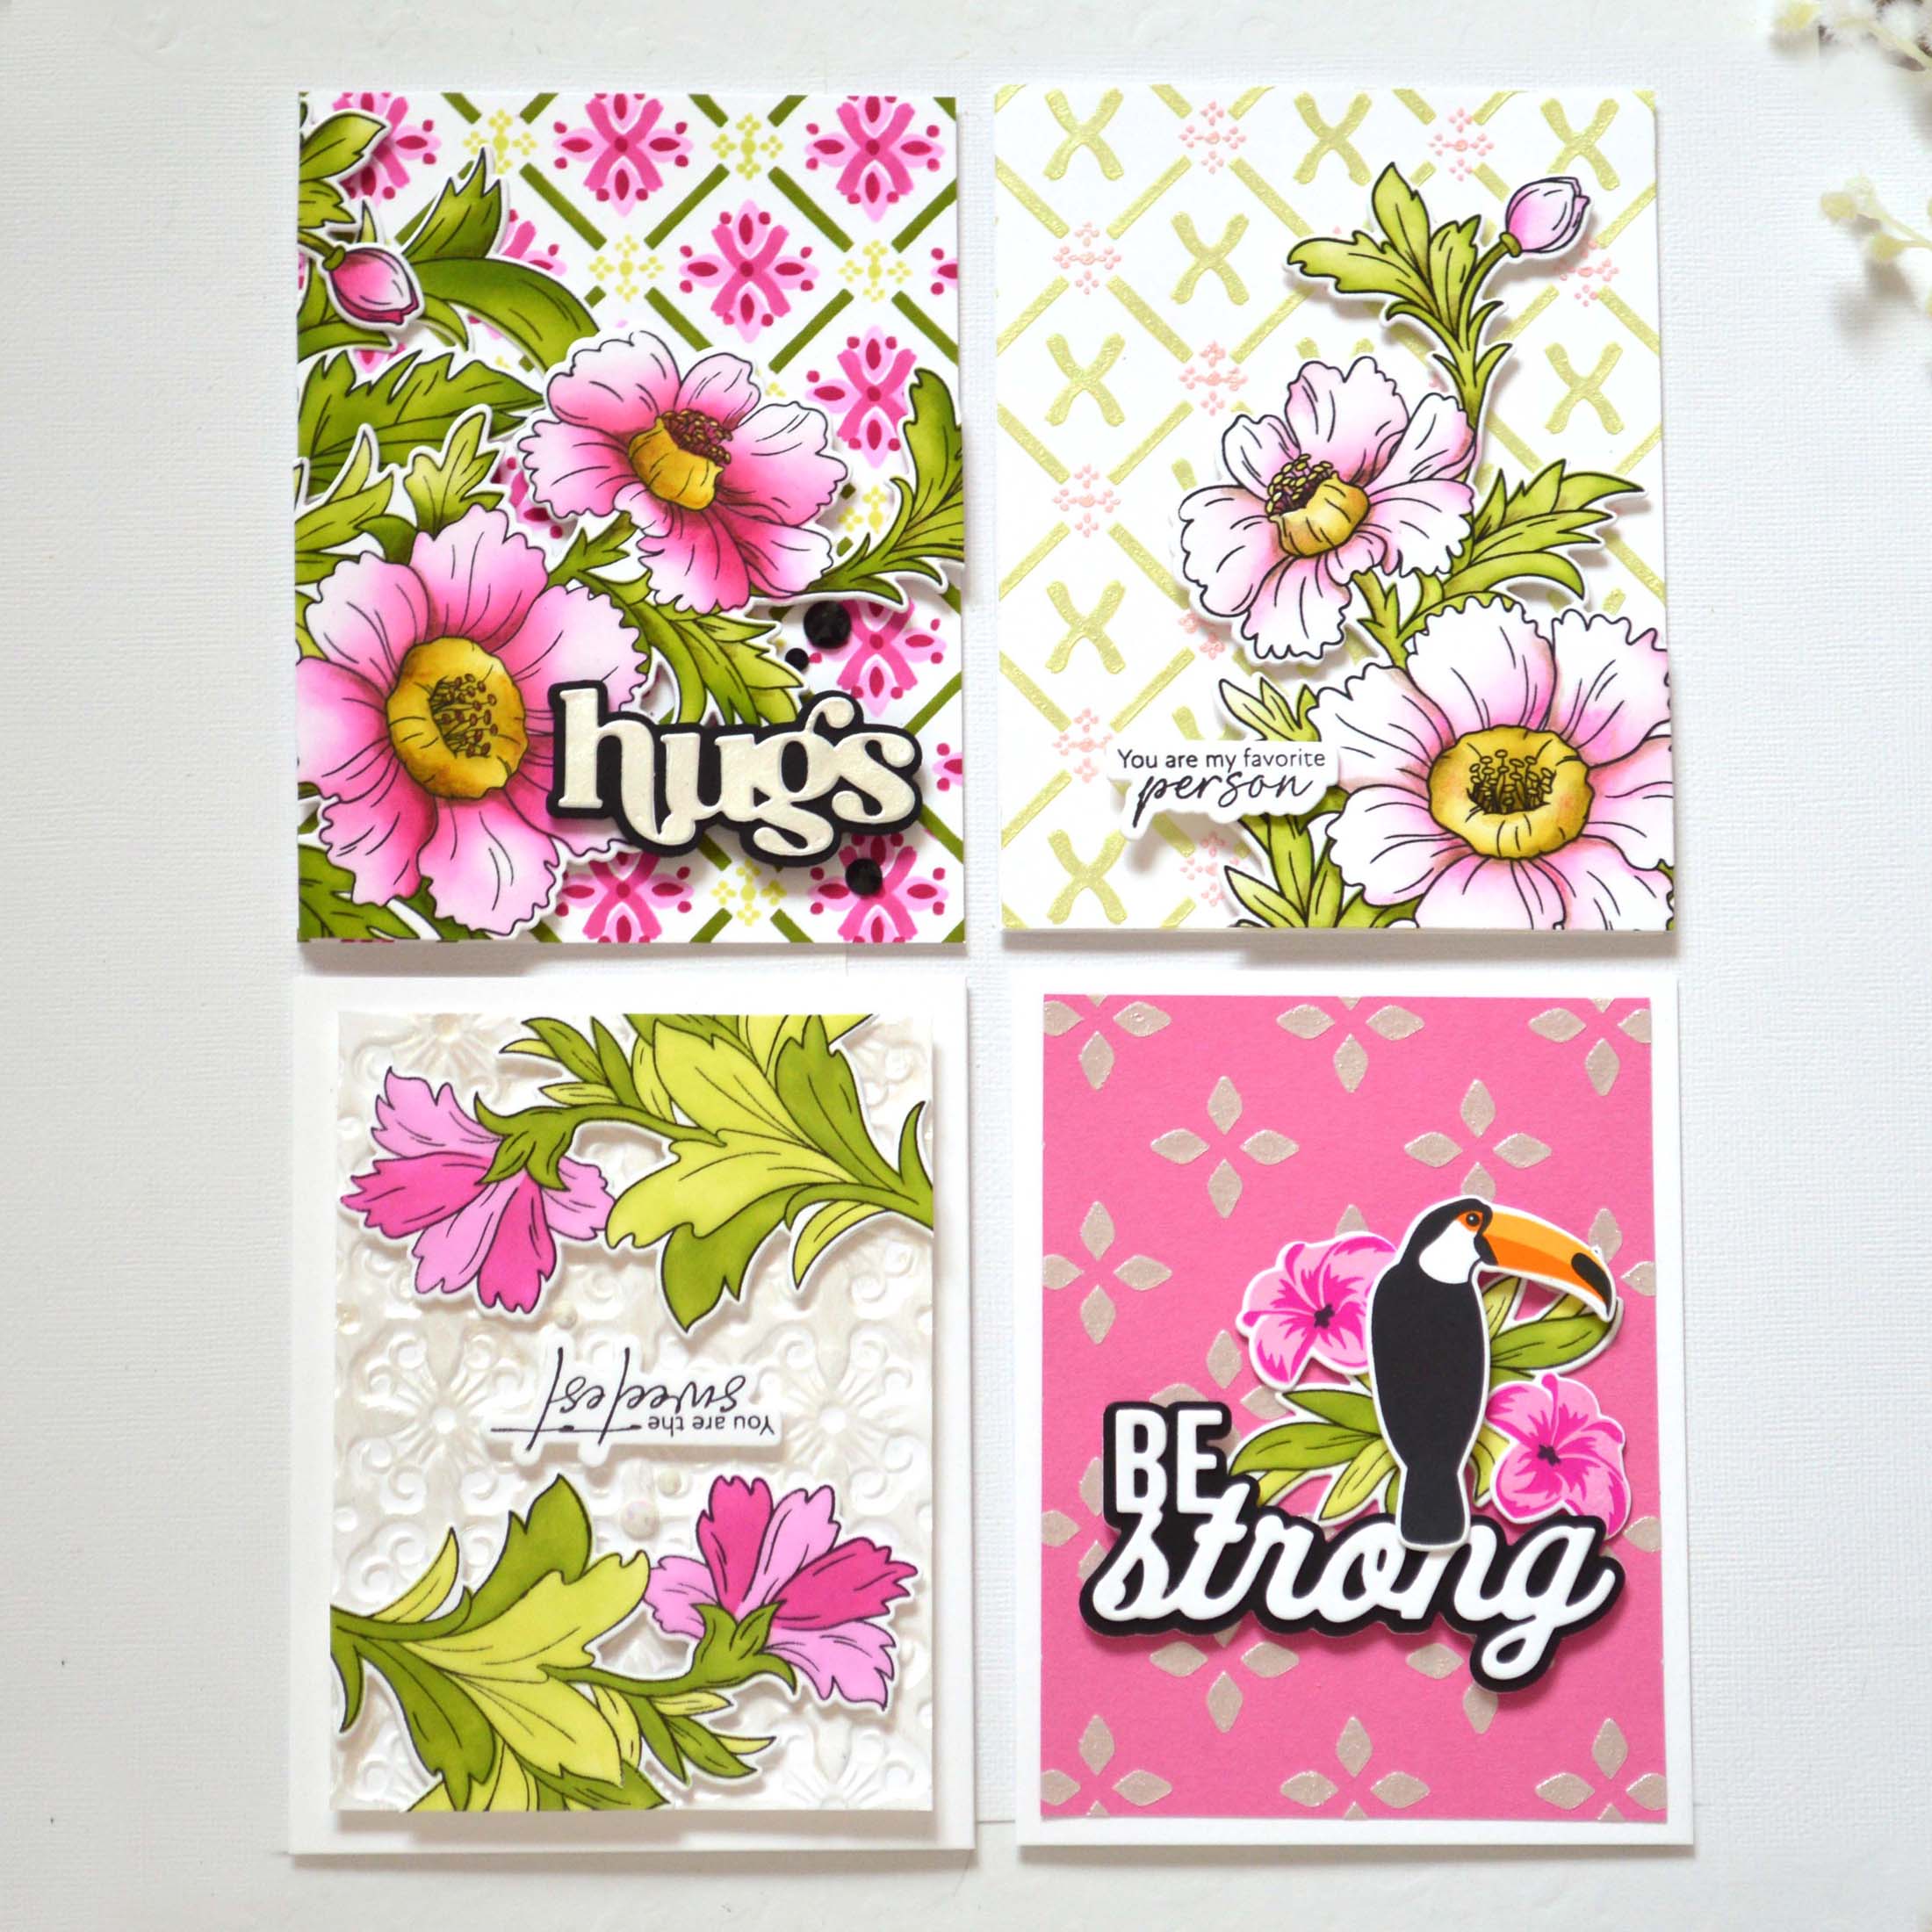
Because, I had such a blast making today’s cards and ALL with just one colour of the Shimmer Relief Paste. Yes, I have 4 ideas to share how to use this fun product, so grab a cuppa and enjoy. Also, don’t forget to comment and hop along for a chance to WIN!
TIPS!
- Start simple. Stencils and embossing paste are a match made in heaven. Make an easy, beautiful background with a swipe of paste.
- Secure your cardstock and stencil on a sticky grid mat (a metal or glass mat using magnets if you prefer).
- Use a palette knife to spread the paste. I like to use a larger knife and then scrape off the excess at the end. You can always put this back into the jar if it’s not contaminated.
- Ensure you leave plenty of time for the paste to dry. I like to place it on a shelf well away from the general desk area. Out of sight means, that I won’t be tempted to touch it too early 😉.
- Wash the paste from stencils, mats, glass and palette knife as soon as possible (it’s easier this way). If you don’t have sink nearby or plan on doing a ton of designs, fill a large bowl full of water to drop the items into.
- Try not to move the stencil or overwork the paste as it may seep beneath the stencil (espeically if it’s an intricate design).
- But, stencils are not the only way to use embossing paste. Today I am sharing 4 ideas to stretch your embossing paste, ALL of them are using the Pearl Shimmer Relief Paste but the results may look a little different…
Are you ready?
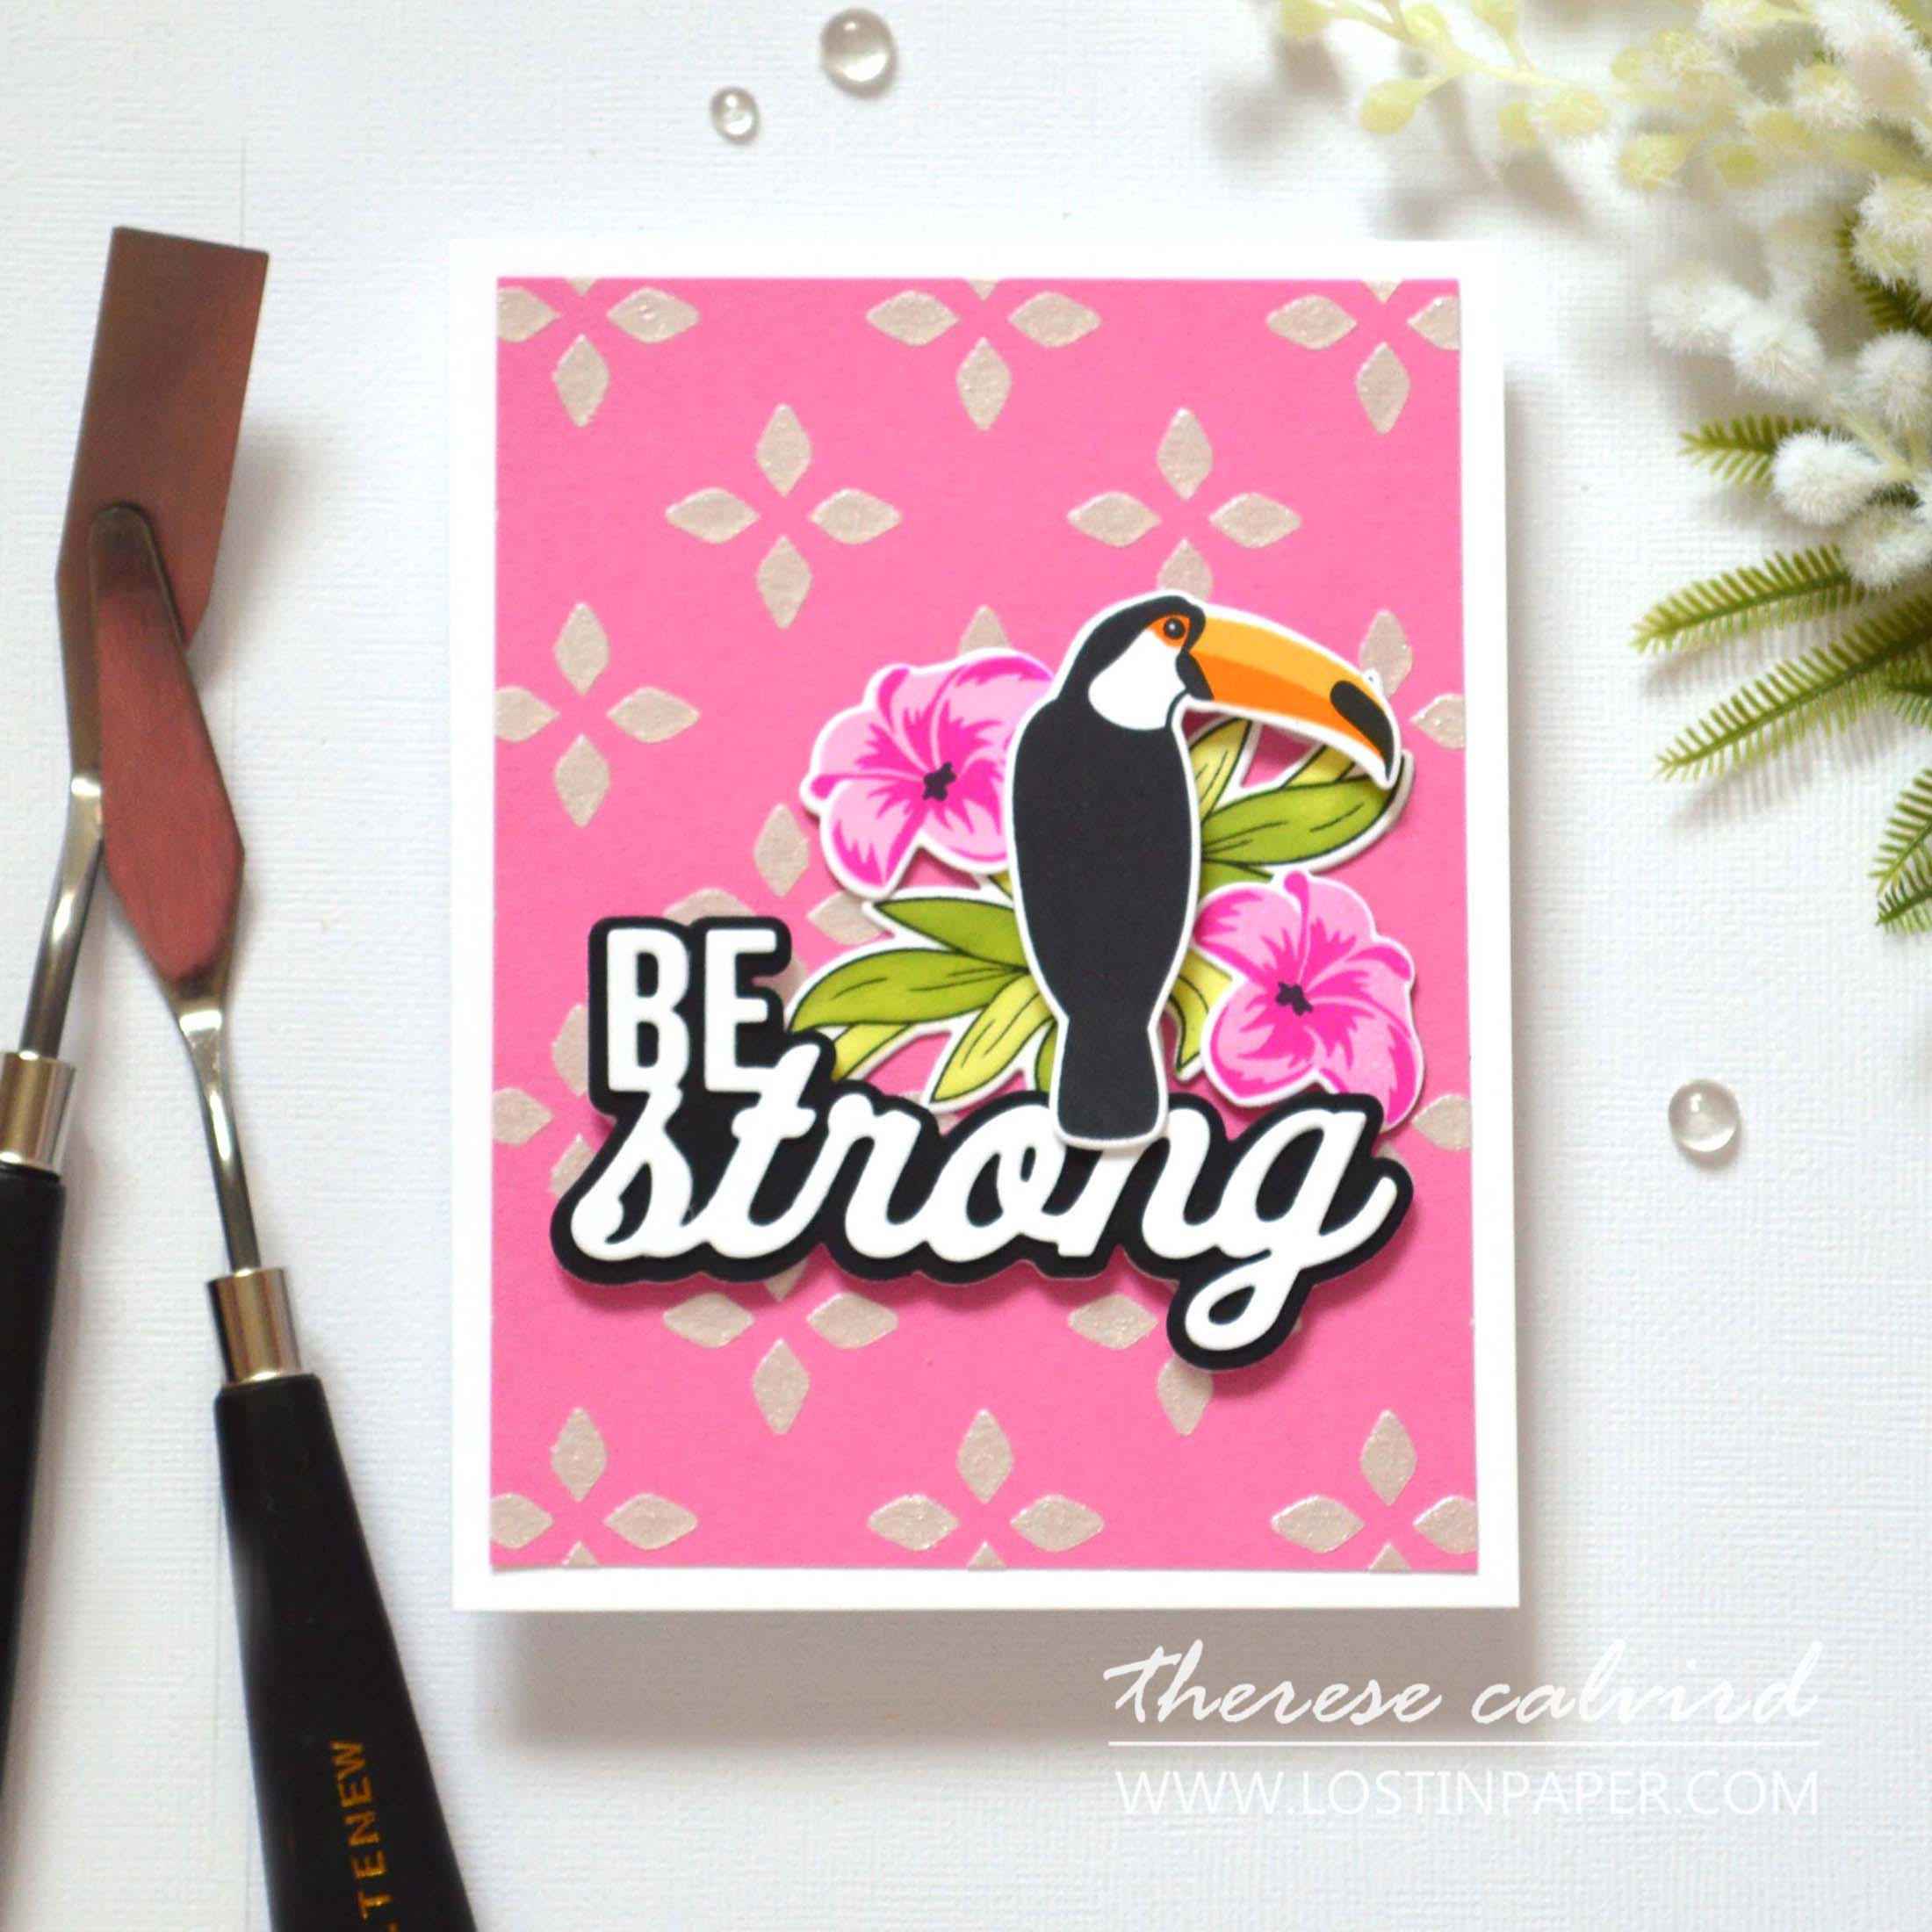
Idea #1 – Basic Stencil Background
If you have never used embossing pastes before, a simple stencil background is a great place to start. This one is part of a layering stencil set, but I wanted a simple design so used only one layer of the set. Take a peek at your layering stencils and see if you think any would look great on their own!
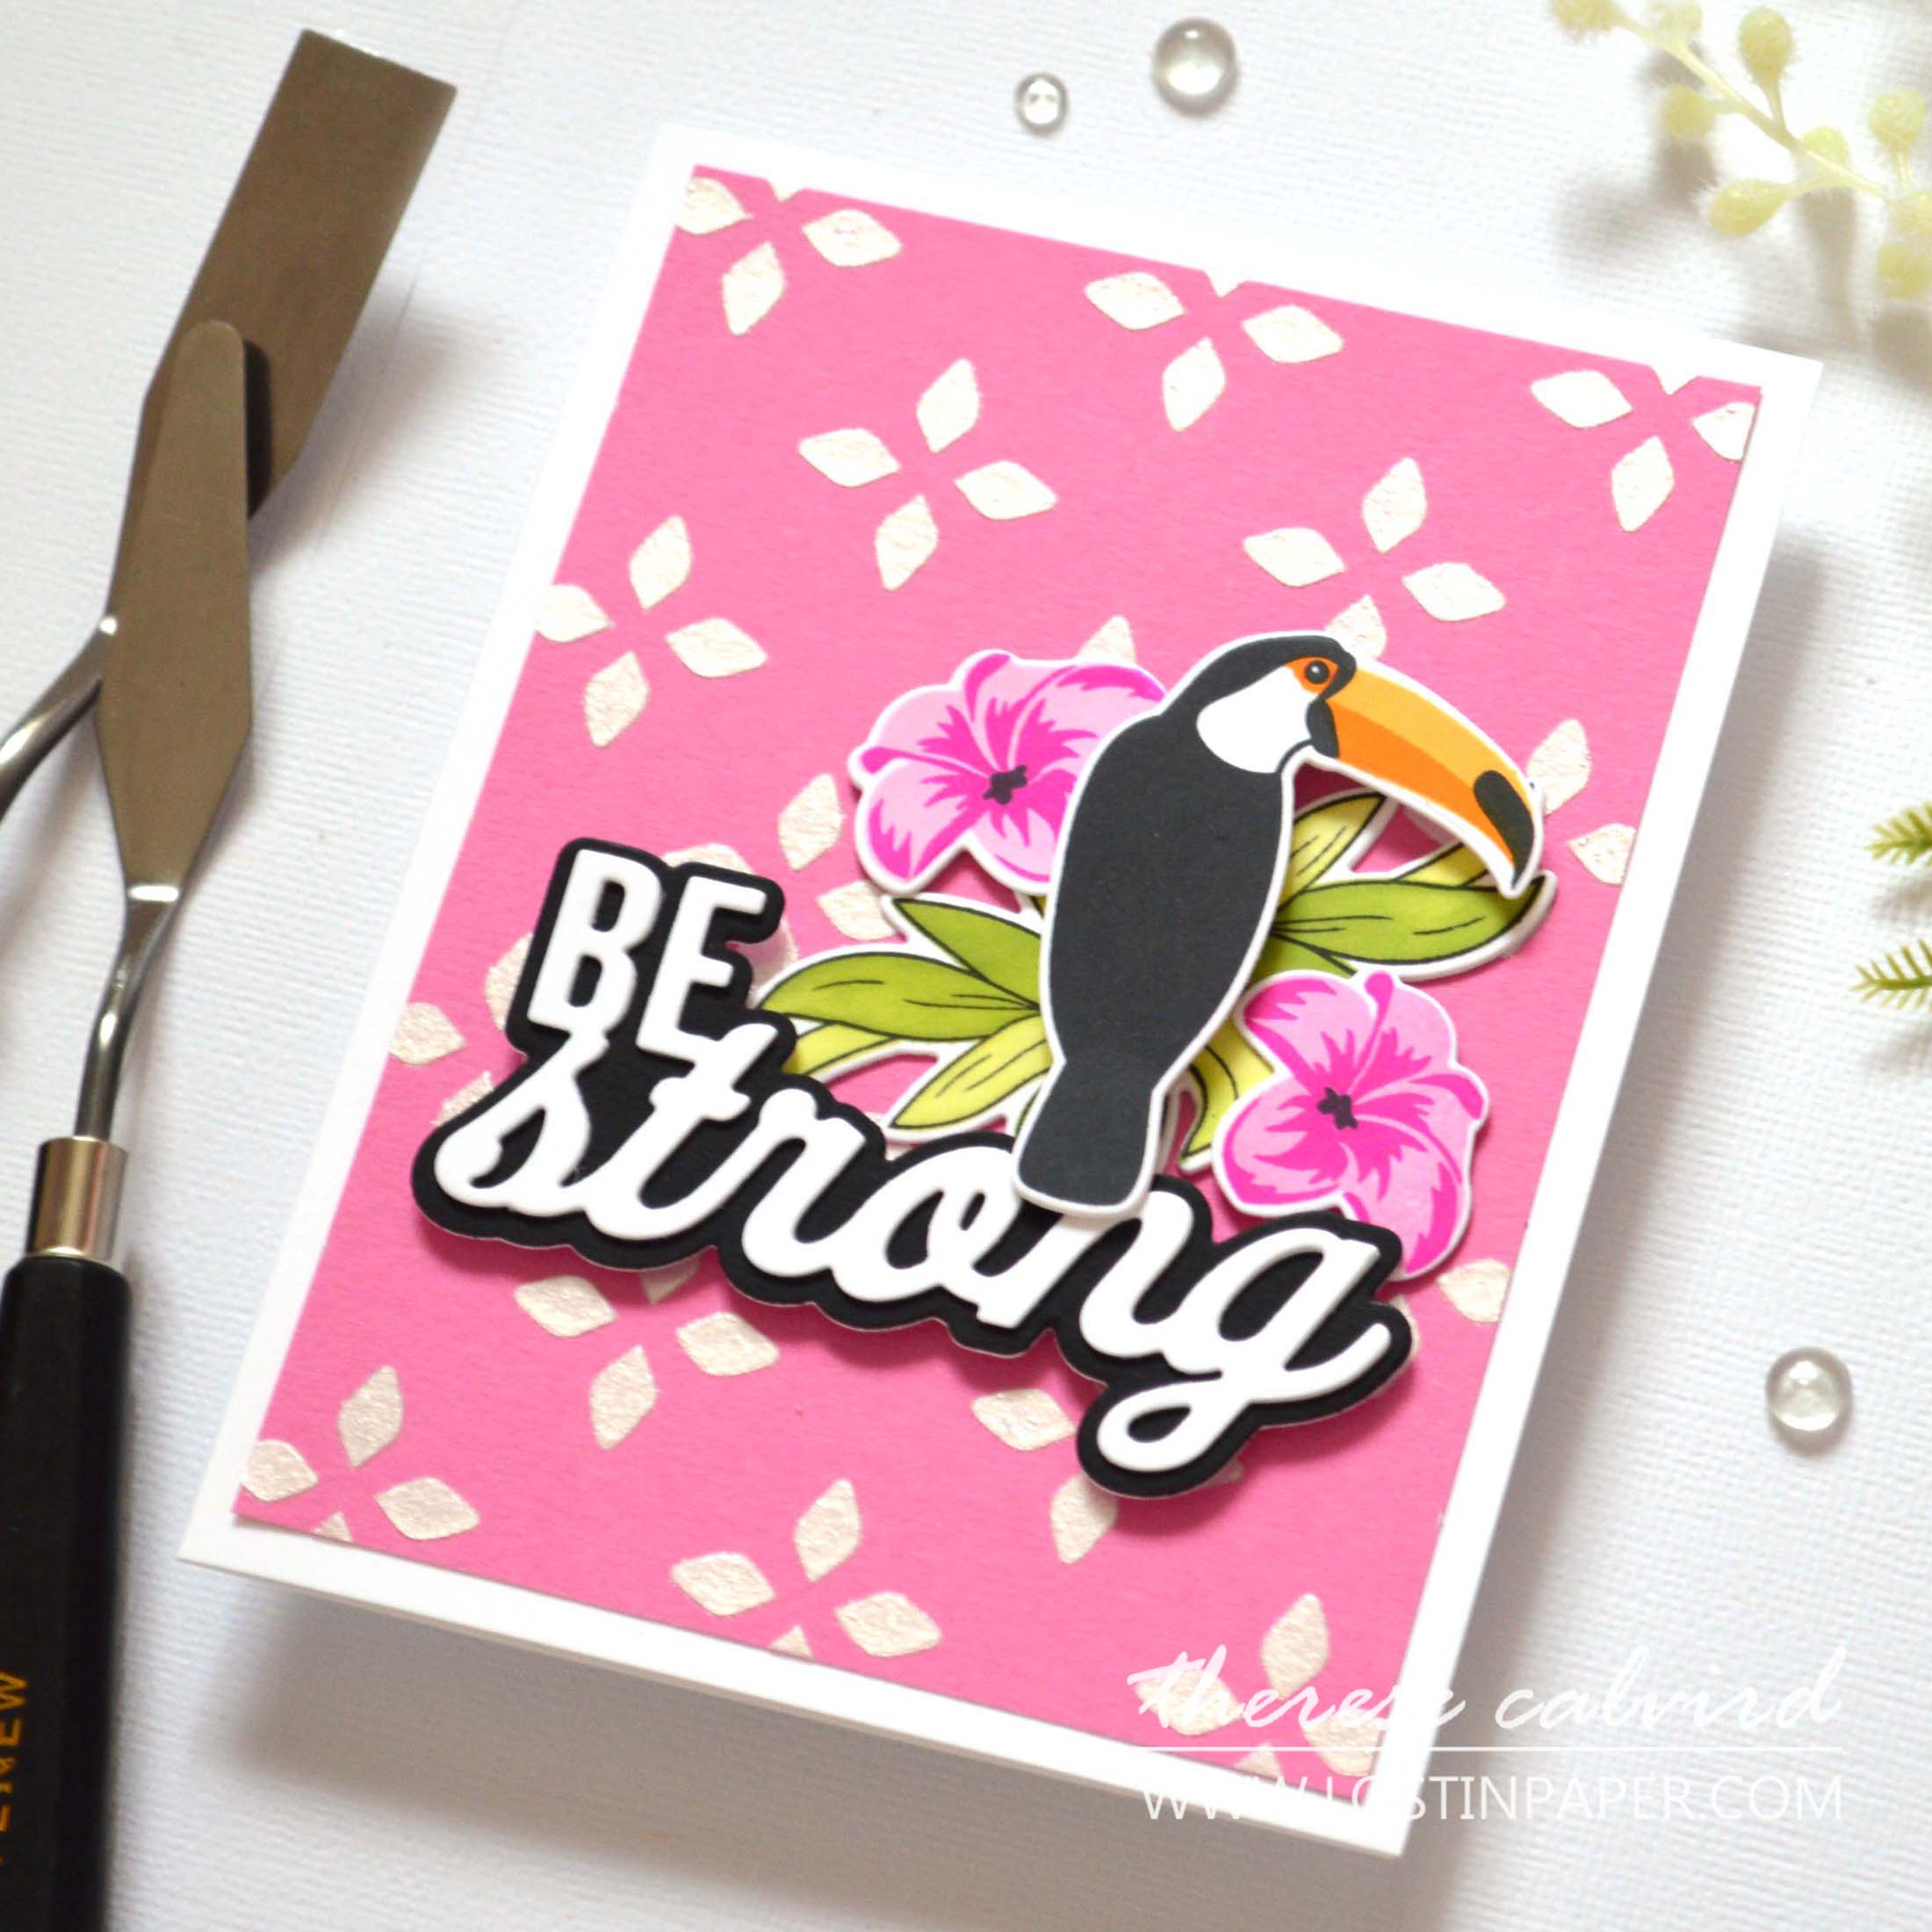
BONUS IDEA: To add some punch, why not start with a coloured cardstock background. You could also blend your own cardstock, or even ink blend an ombre or multicoloured panel!
Idea # 2 – Embossing Folder
Did you know that you can add shimmer paste to a embossed panel? I used my finger (in a glove of course 🤣) to add a beautiful pearl shine to this panel. I did change it up a little and used the debossed side, but of course you could do either.
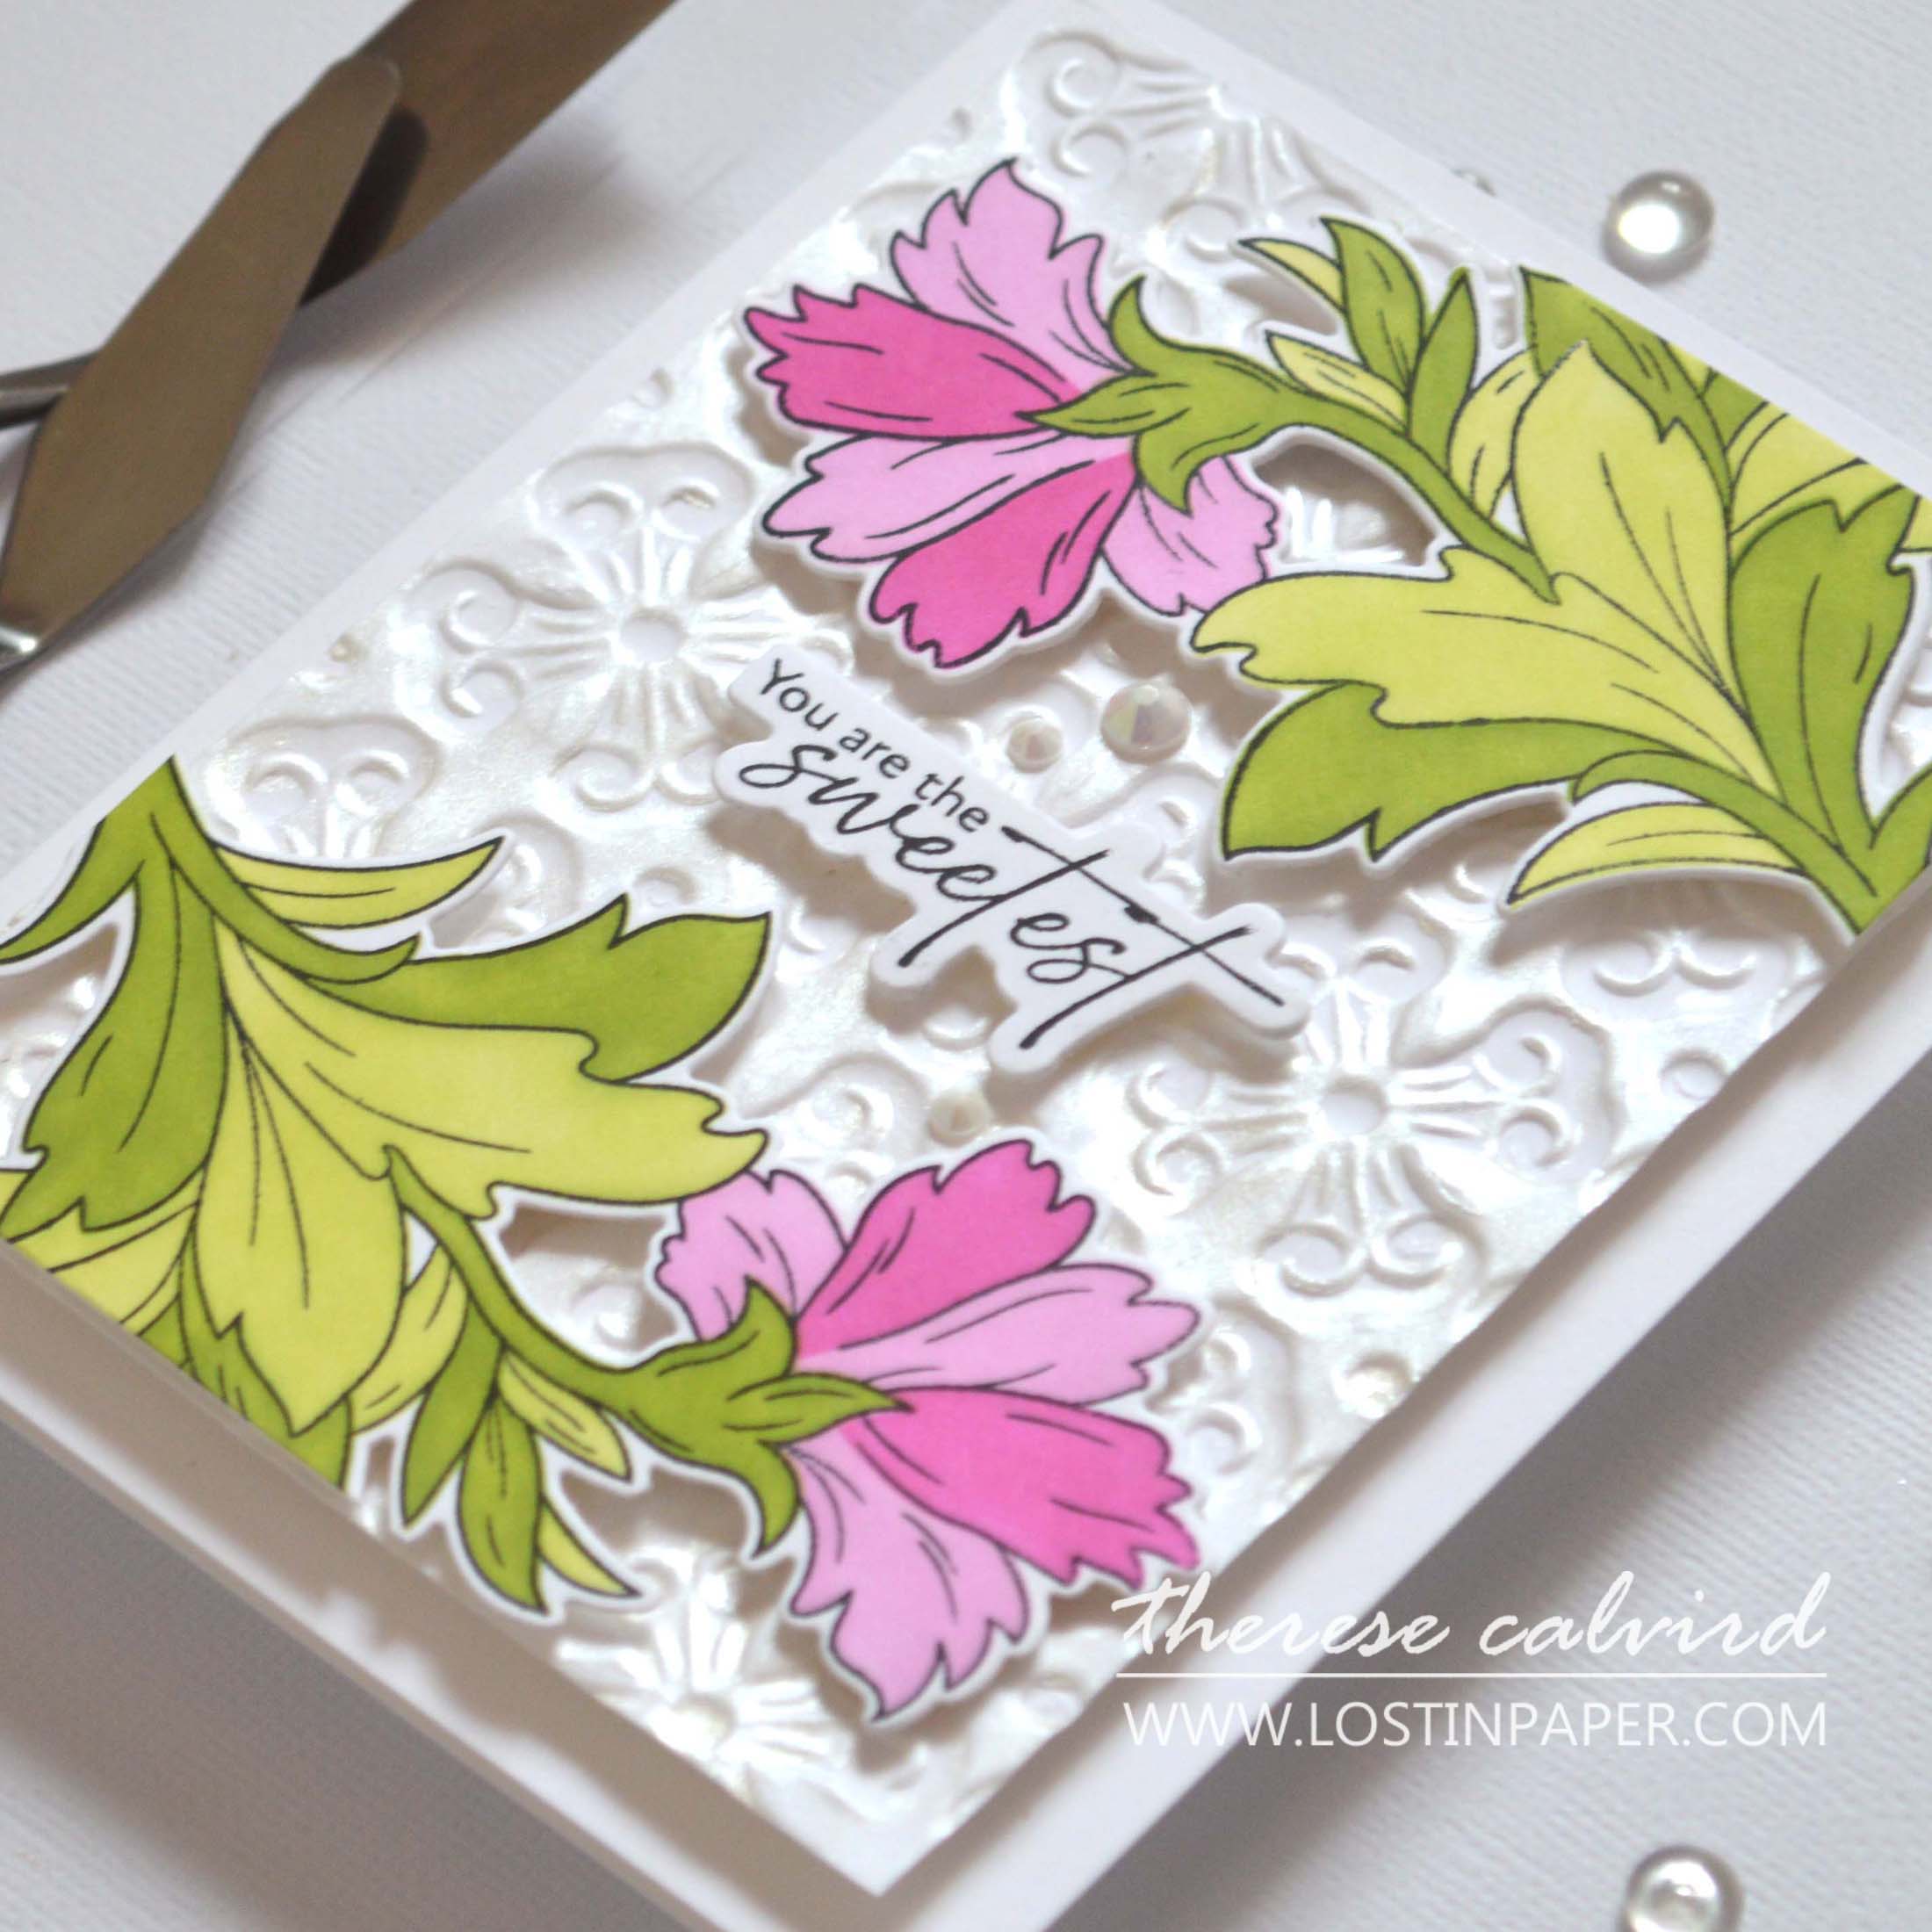
This technique is very fast drying as there is minimal paste on the cardstock, and it works great on coloured cardstock too… mmmm gold on black, can you see it?
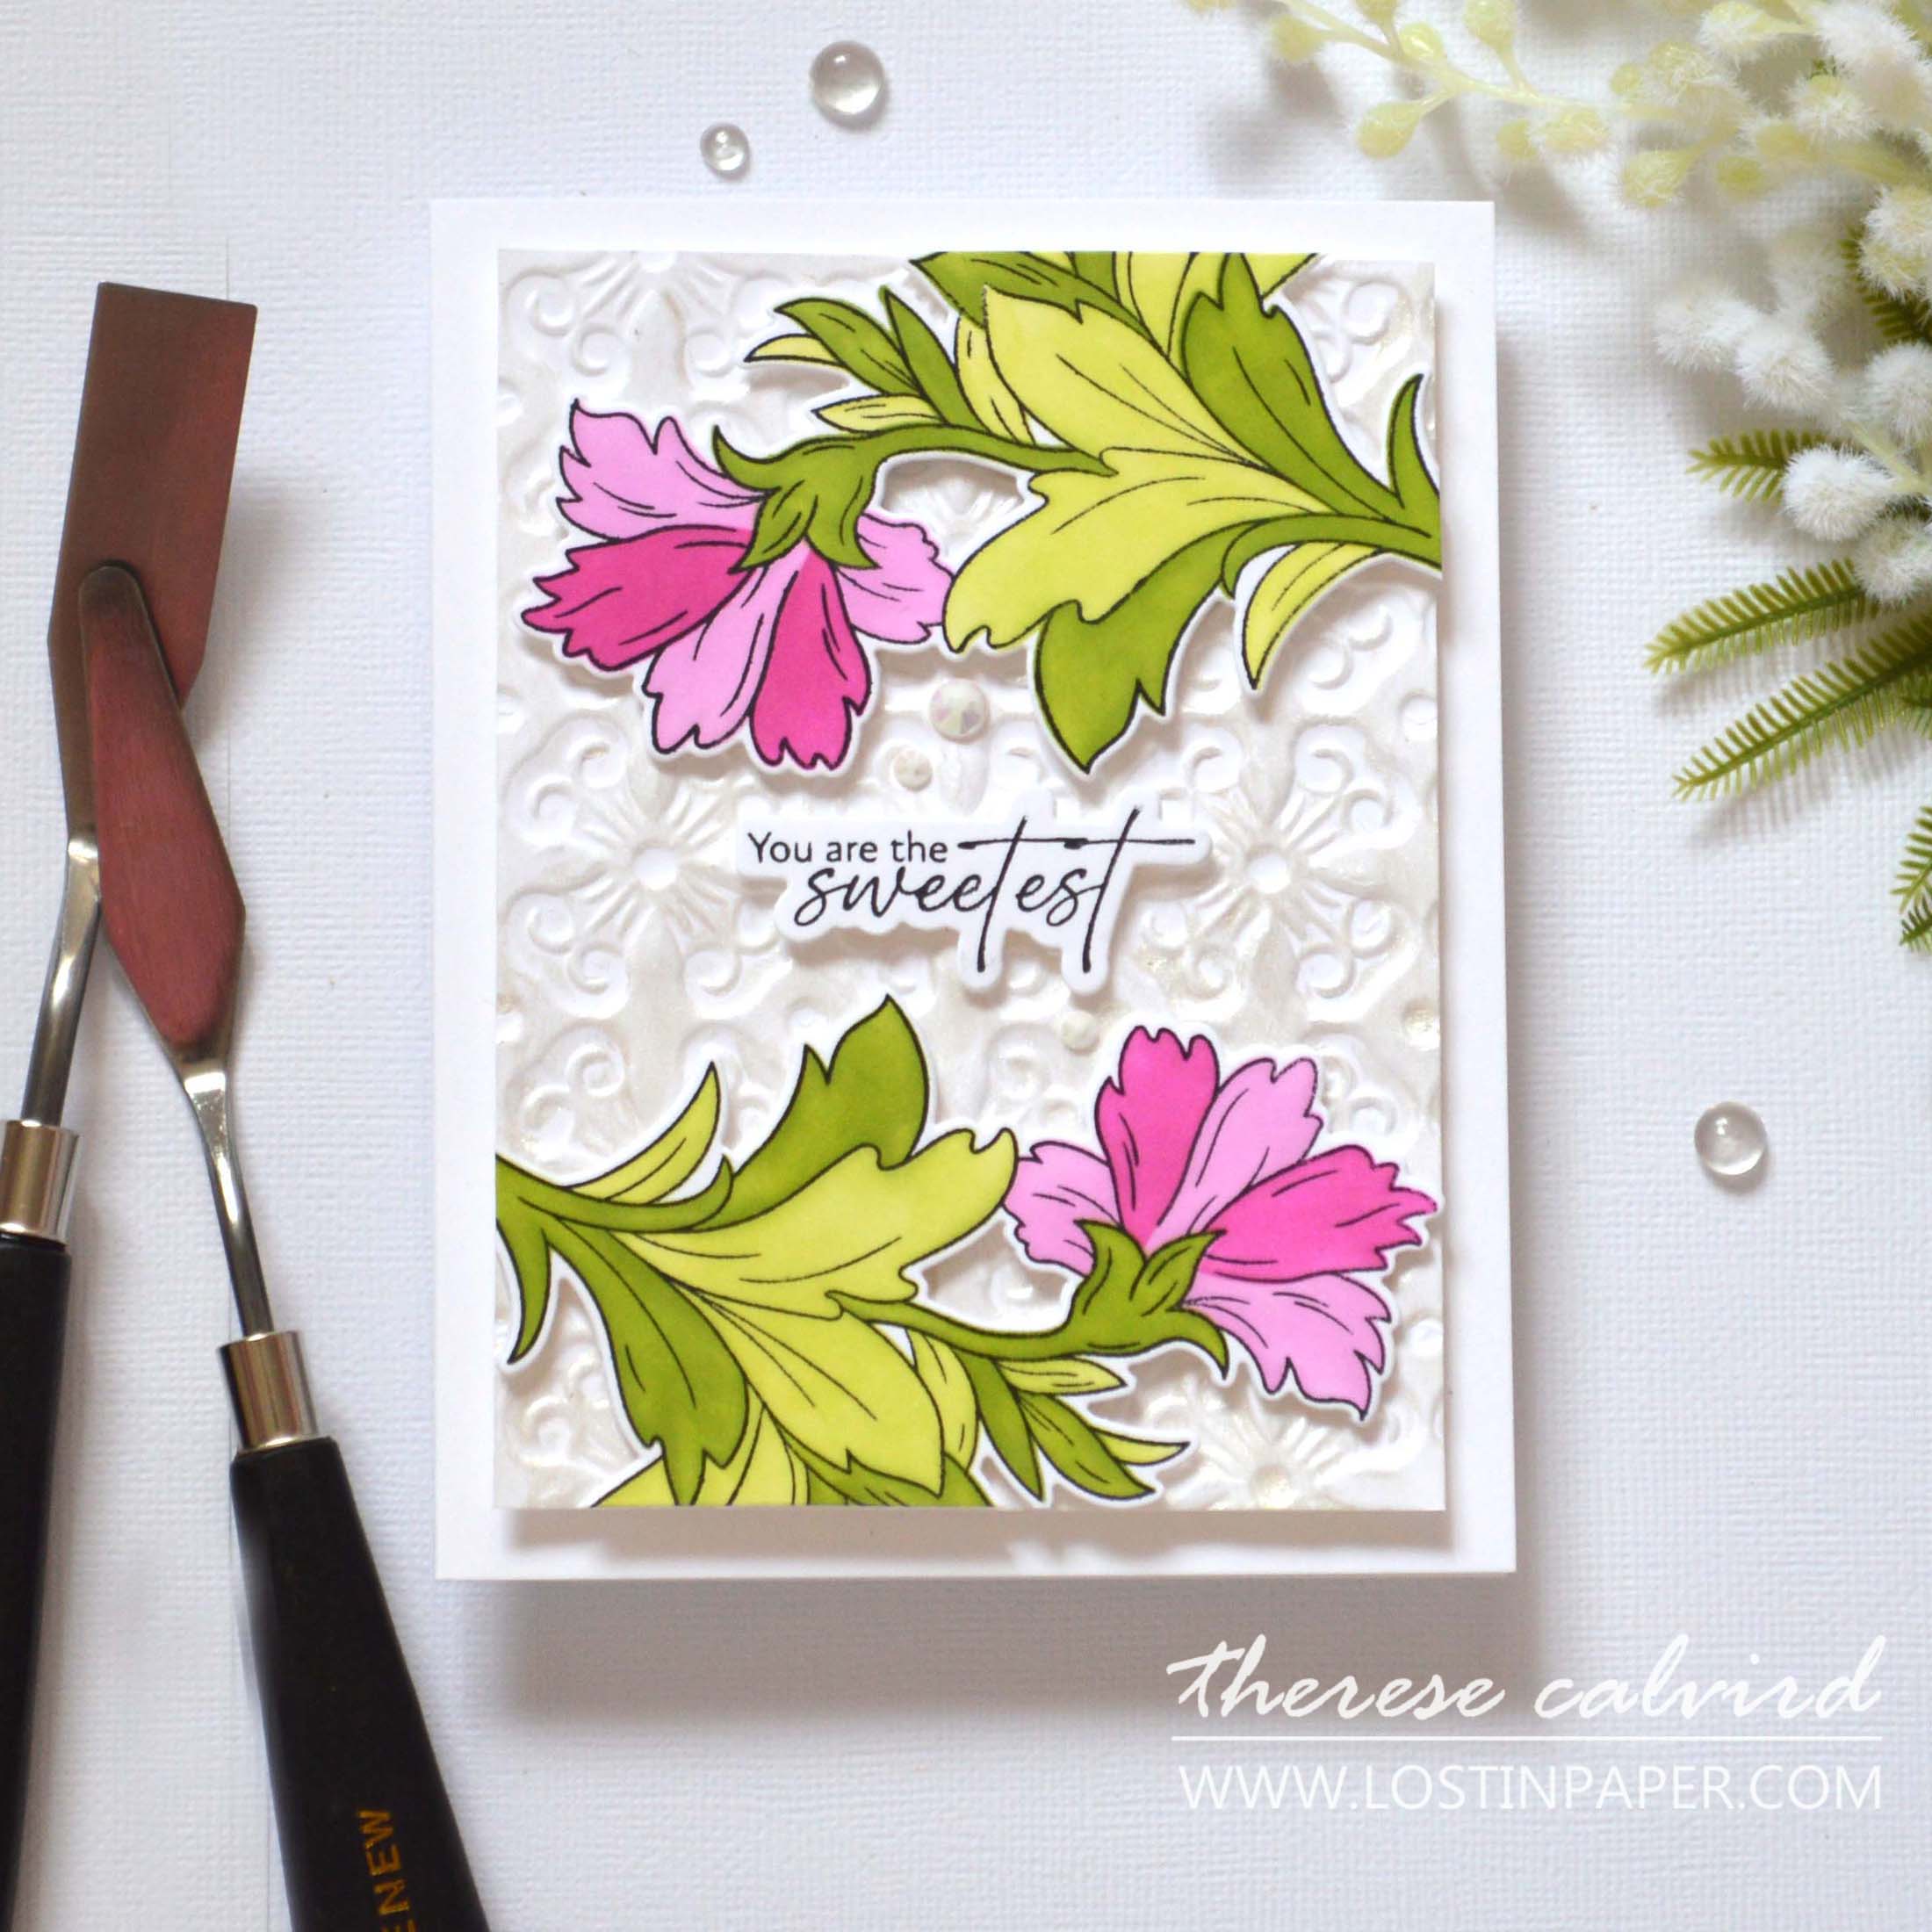
Idea #3 – Coloured Paste
Another way to step up this Pearl paste is to ‘colour’ it to suit your project. I added some of the fresh dye ink colours to a palette and mixed enough paste (with the palette knife) to cover the entire stencilled panel (you don’t want to run out half way).
NOTE: you will not be able to add this back to the jar after as it will contaminate the original colour.

Did you see that I have 2 different colours? This is the same layering stencil set and this time I used 2 of the layers.
PRO TIP: Make sure that the first layer is completely dry before adding the second, it really doesn’t take as long as you think… mine was dry by the time I had coloured these flowers.

Idea #4 – Shimmer Cardstock
Yes, you can make your own embossing paste cardstock! I used the palette knife to swipe a thin layer of the Pearl paste onto some white cardstock. And, when it is dry you can die cut it out. I used mine to make a sentiment, but imagine this as a die cut background design…. how divine!

And yes, you finally got to see ALL the layers of the stencil together ‘as intended’. What a versatile set, I would happily use all these layers independantly or in a variety of combinations like I have done here today.

Are you ready to add a little SHIMMER to your next card design? I’d love to see what you are making and what inspires you! Let me know which card or technique is your favourite today in the comments below!
Crafty Hugs,

Other Supplies:
Altenew Inks: Obsidian | Baby Pink | Fuchsia | Limeade | Fresh Leaf | Lime | Rose Quartz | Oolong Tea | Citronella.
Altenew Cardstock: Jet Black | Puffy Heart.
*Certain content that appears on this site comes from Amazon, this content is provided ‘as is’ and is subject to change or removal at any time.
 Garden Whispers ALT | SSS |  Patterned Petals ALT | SSS |  Ornate Emblems ALT | SSS |  Be Strong ALT |
 Timeless Sentiments ALT | SSS |  Tropical Vibes ALT |  Shimmer Relief Paste – Pearl ALT | SSS | Shimmer Relief Paste ALT | SSS |
 Foam Tape NEW sizes! ALT | SSS |  Altenew Cardstock ALT | SSS |  Jet Black ALT | SSS |  Neenah Solar 110 AMZ | SSS |
Neenah Solar 80 AMZ | SSS |  Bubblegum Dreams ALT | SSS |  Whispering Woodland ALT | SSS |  Wood Warbler Ink Set ALT | SSS |
 Mini Blending Brush Set ALT | SSS |  Mother of Pearl ALT | SSS |  Black Onyx ALT | SSS |  Palette Knife Set ALT |
 Tweezers ALT | SSS |  Perfect Picker ALT | SSS |  Fine Blade Scissors ALT | SSS |  Bone Folder Altenew ALT |
 Stampwheel 2.0 ALT | SSS |  Stamping Mat SSS |  Score Board ALT | SSS |  Sticky Grid Mat Ultra ALT | SSS | SB |
 Platinum 6 ALT | SSS | 9″ Fiskars Paper Trimmer AMZ | SSS | Bearly Art Glue AMZ | SSS |  Glue Tape ALT | SSS |
 Foam Tape ALT | SSS |  Satin Masking Tape ALT |
They sure do SHINE! Love them all.
So glad you liked them Lisa!
They are all absolutely amazing!
Thank you so very much Laura!
Gorgeous cards!
Thank you so much Laurie!
Love your colors and pretty creations! That paste is so shimmery! Beautiful Release!
Thank you so very much Donna!
Therese, all the ways you’ve used your pastes today are gorgeous. Would you be surprised that my fave is the one you did the ‘finger painting’ with? *happy sigh* so very pretty!
=]
You know you are my fave!
Hi Therese, they are all beautiful but I like the last one, so bright and colourful.
Rene x
Thank you so very much Rene!
Dear Therese –
These are all truly gorgeous and your tips are helpful. I love this sort of product. I’m just trying to behave so that my budget recovers from the end of 2024. You’re making it tough!
Lori S in PA
I totally hear you, I have been setting up a new recording system and there have been a LOT of deliveries lol.
Hi Therese, such gorgeous cards you made again! And how tempting it is to get that layering stencil after seeing the layers separately. (I already got the scattered tiles.)
Thanks and many blessings to you!
You can definitely do any of these techniques with the stencils that you already have, including the scattered tiles. Glad to hear you liked them!
Oh goodness, they’re all so pretty! Hard to pick a favorite, Therese!
Thank you so very much!
Gorgeous cards and great tips, Therese! I haven’t tried tinting the Pearl paste yet, but I’d like to do that soon! And I also want to try adding some to an embossed panel for some lovely shine! Thanks for the inspiration!
So glad you liked them!
Gorgeous cards! I love the list of tips! Thank you!
Thank you so very much!
Beautiful cards, as always, Therese! And some great tips, as well. I love the simple one about making your own shiny cardstock!!
Thank you so much Daria!
Beautiful and fantastic tips!!!
So glad you liked them Cynthia!
Beautiful cards and great tips on different ways to use the pastes. I’ve actually never smeared some on paper to die cut a sentiment or use my finger to cover a whole embossed panel. Both great ideas and also making your on paste color is another great one!
So glad you liked them!
Great tips, gorgeous work!
Thank you so very much Joni!
Love the shimmer, the colors and all your ideas!!
Thank you so much!
Wonderful ideas…thank you very much.
Thank you so very much!
Oh too funny with the upside down card! It’s beautiful, though, as are all your cards! I love the shimmery pastes, but not in my budget.
So glad you liked them Greta!
Gorgeous cards, love these tips too, Cathy x
Thank you so very much Cathy
Gorgeous cards Therese, love the look of the paste. Great tips too!
Thank you so much Cathy!
You have recreated a beautiful set of cards with the touches of glimmer paste. Handy hint about wrapping them in cling wrap to prevent them drying out.
So glad you liked them!
Beautiful cards with these awesome designs! I love the backgrounds and images! Excited to try the Shimmer Relief Pastes and I appreciate the tips!
Thank you so much Denise!
Your backgrounds are STUNNING!!!! I LOVE the pastes!
Thank you so very much Meghan!
Gorgeous cards, Therese. A feast for the eyes! ðŸ˜
Yippee! Glad you like them!
Gorgeous. Thanks for all the tips and tricks. Love the idea of swiping the paste across card stock to create shimmery card stock.
It works a treat Judy!
They are all so gorgeous. Thank you for all of the great design tips.
So glad you liked them Deborah!
Great ideas and cards! The messy finger painting sounds fun. Photographing these must have been hard with the shine.
It’s right up your alley Christine lol!
Beautiful cards with beautiful products! Love the shimmer relief paste!
Thank you so much Shannon!
Love the pink with shimmer paste!
Thank you so very much!
Gorgeous cards!!
Thanks so much Nandini!
I really love your cards and the use of shimmer paste. I plan to keep my pastes on my desk like you so they are not forgotten. Please disregard this comment if my previous one posted. Sorry for the confusion.
Thanks so much Mary-Anne, your first comment showed but it was anonymous, so lucky you left this one. Good luck with the Giveaway!
The reveal of the entire finished card at the end is a WOW!
Isn’t it a fabulous layering stencil set, it makes my heart happy too Pam!
Beautiful cards and great tips and ideas for using pastes! thanks for the inspiration.
Thank you so very much!
sometimes we just have an “upside down” day.
Yes, apparently that was me that day lol.
Four great ways to use the pastes! I love the Basic Stencil Background card – that toucan is so cute on that background!
So glad you liked them!
I love the different looks from one color of paste and thanks so much for the tips.
Thank you so much Tina!
Your designs are wonderful! Great tips on pastes, as I run into those same issues! Maybe, I’ll be less intimidated now!
Thank you so very much!
Like you, I tend to forget about my pastes. After seeing your creations, I feel as if I need to revisit this side of crafting cards. Your cards have turned out beautiful! I especially like the embossing folder shimmered with your fingers!
Yes, but I am a lightweight, I wore gloves lol.
Lovely cards! Fantastic dimension and fun variations.
Thank you so very much!
Beautiful cards Therese. I can’t wait to get my hands on the pastes so I can experiment with them.
Thank you so much!
Gosh, completely mind blowing, really sophisticated and I love them all. Keep up the incredible work my friend. Hugs xx
You are the sweetest!
I love how the pearl looks on the debossed side of the paper- it is so elegant.
So glad you liked that!
Stunning collection of cards, thanks for the inspiration!
Thank you so much!
lovely inspiration, great tips.
Thank you so much!
I’m a huge fan of this kind of pastes, so I’ve pretty much played with them every way I can think of, lol. I really like the fingerpainting to create your own spin on cardstock. It’s just so fun to play with, lol. Love all of the techniques!!
Thank you so very much Donna!
I enjoyed reading all your tips and I look forward to trying all these tips out. Thanks!
Thank you so very much!
The paste in embossing folder has me blown away!
I applied the paste with my fingers after embossing the paper… it would be interesting to do it before, but I don’t think I would like to clean the folder after that lol.
Beautiful designs as always! The shimmer paste looks like a lots of fun to play with. TFS Therese!
It is a LOT of fun Liz, though I will wear gloves when it gets messy lol.
Thanks for sharing these inspiring projects! My wish list just got longer because of your post.
Yay! So happy you liked them Cindy!
Beautiful cards! 🙂
Thank you so much!
Love your cards, as always! Thanks for the shimmer paste tips too!
So glad you liked them!
Lovely variety of cards with these sets, the pastes are so pretty.
Thank you so very much Andre!
Beautiful design shares, just amazing! Love the layout ideas!
Thank you!
Love the pink and green!
Thank you so much!
WOW, your backgrounds are incredible. I tend to notice backgrounds anyway, but you pointing them out makes me really appreciate them more. The flowers are really pretty, too. The soft pinks are especially gorgeous
Thank you so very much Sharon!
These shimmer paste look great
Thanks so much!