
Ink Blending is such an easy way to ‘colour’ to an image, but did you know that you can step it up to make it even better?
You can see the LIVE video replay right HERE.
This post contains affiliate links (which means that I will receive a small portion of the sale at no extra cost to you). I truly appreciate your support of these card adventures!
#WHYINKBLEND?
Ink Blending is a quick and easy way to add colour to your project or images. AND a great technique if you are not a confident colourist. It is also a great way to create your own cardstock which will perfectly match the inks used in your project.
My Quick Tips!
- Choose 2 or more colours, either from the same family or different colour families (this will create a third colour inbetween the blends so make sure to choose colours which blend nicely together).
- Use a colour wheel to choose colours that will mix well, or simply test them first on a piece of scrap paper.
- Use a smooth cardstock, this is always the first thing I change out if I am not getting good results.
- Try out different tools to see which suit your style best. Personally, I have had the BEST results with Altenew’s blending tools (No bias, I promise, I have tried a LOT other brands lol).
- Purchase a few different sizes, but you don’t need many of each, and then you can allocate a ‘colour family’ to one tool.
- Blend on a smooth surface, a piece of simple copy paper will do, or amp it up and use a glass or magnetic mat.
- When using stencils I like to use a sticky grid mat, this holds both the stencils and the inks in place while I am colouring. Media Grip mats work a treat to hold inks in place too (very afforable and you can cut them up to the exact size that you need).
Let’s Step it Up!
- When using layering stencils have you ever tried to mix colours from different families? Such as my card today where I combined yellows and pinks…
- Use colours for images that are not intended, try monochromatic, or what about using blue or grey for leaves.
- If you are using a simple colouring stencil (not layering) then it’s easy to add extra dimension and shading by using more than one colour on each flower and leaf. TIP: Use detailed blending brushes as they are easier to control in small areas.
- You can also add shading with pencils, and details with black pens.
- Try tone on tone for a background. If you choose a dark colour cardstock consider using black or even white ink for a totally different look.
- You can also repeat images in the background, such as the flower or focal point the you have stenciled.
- Why not try fussy cutting (or die cutting) some of the stencilled flowers or leaves to build a bigger bouquet. BIGGER is better right?
- And don’t forget if you are using stencils that you can step these up by using, splatter, texture or glitter paste, or you can even heat emboss one of the stencil layers… the possiblities are endless!
Today I have a beautiful card to kick off your inspiration, starting with…
#MYCARD
I just had to play with this Stencil Art Charming Delight from Altenew, but you can try these techniques with any stencils that you already have in your stash. I have previously coloured this in bright pinks which you can see HERE. But this time I wanted to step it up!
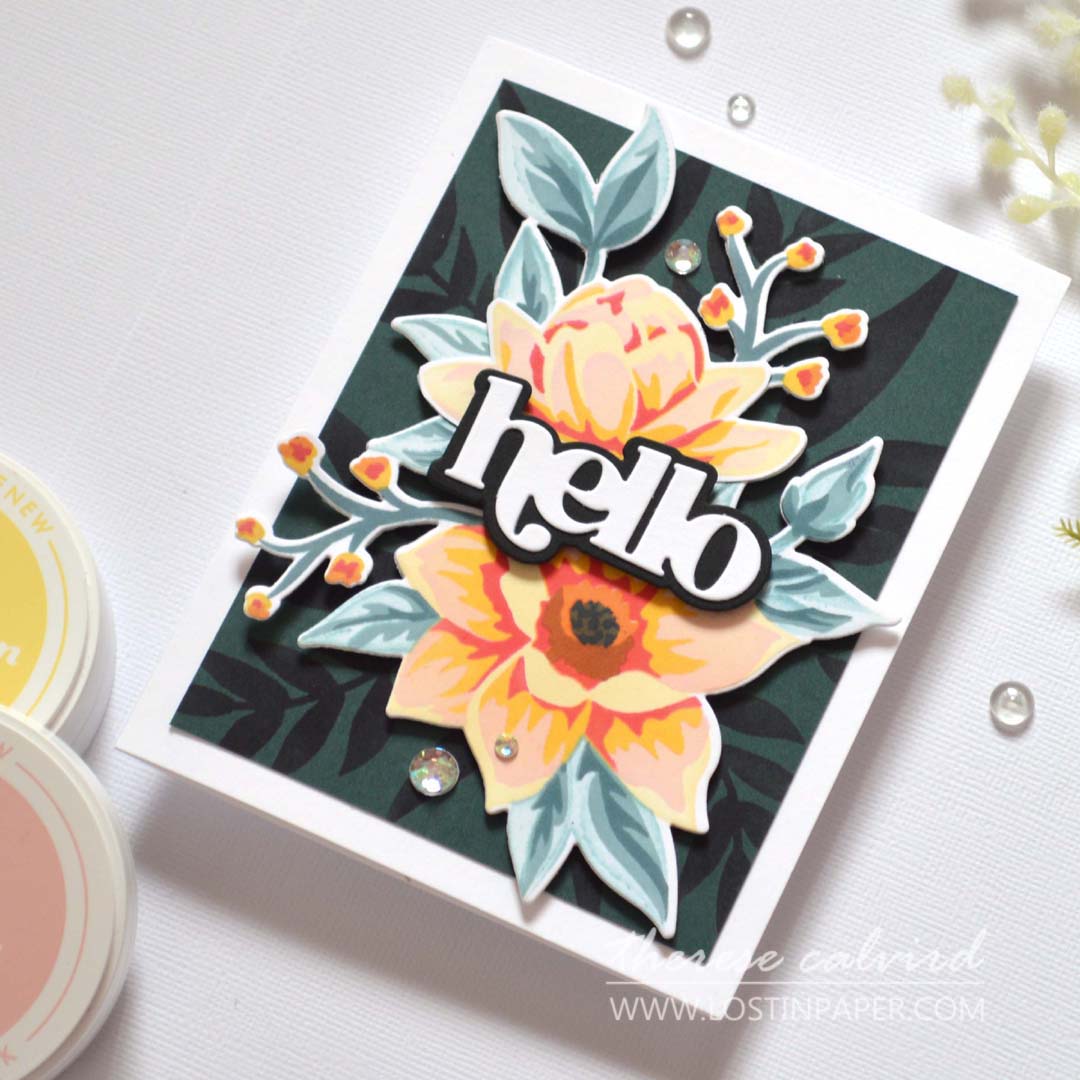
I used inks from different colour families, and you may also notice that the leaves are not a true green.
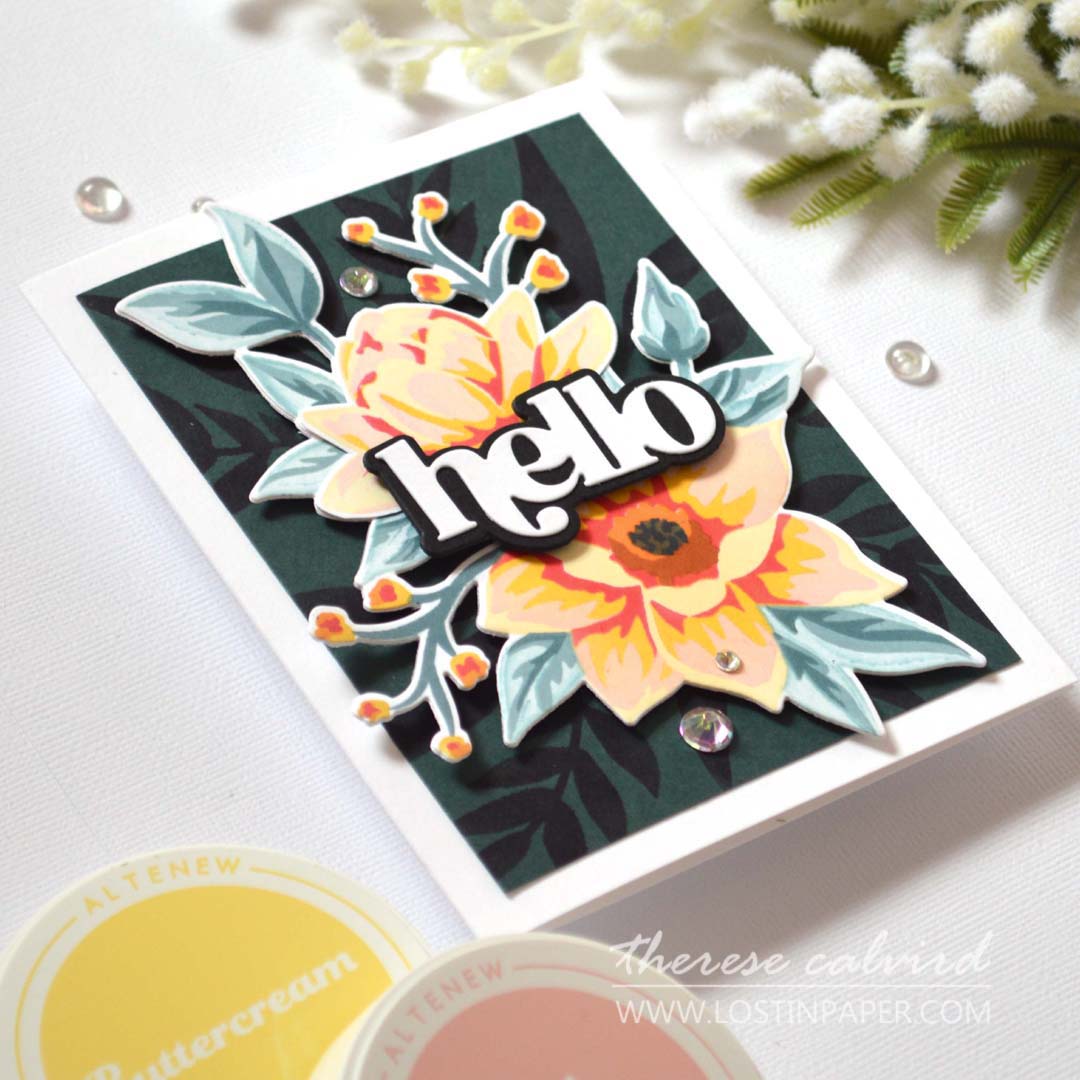
I also ink blended a quick tone on tone background panel using leaves from a different stencil.
PRO TIP: If you don’t have leaf stencils, you can either die cut some from masking paper or freehand draw and cut some to suit your project.

Are you ready to create some Ink Blended cards? If you are inspired by today’s ideas I’d love you to share them on Social Media with me! Thank you for stopping by today, sending crafty hugs your way!

I use affiliate links which means that I will receive a small portion of the sale at no extra cost to you).
I truly appreciate your support of my card adventures!
Other Supplies:
Cardstock: Concord & 9th – Rainforest
Stencil: Altenew – Rose Bouquet Stencil
 Neenah Solar 110 SSS |  Neenah Solar 80 SSS |  Concord & 9th – Cardstock SSS |  Charming Delights Bundle ALT | SSS |
 Charming Delights ALT | SSS |  Timeless Sentiments Die Set ALT | SSS |  Red Cosmos ALT | SSS |  Buttercream ALT | SSS |
 Paper Bag ALT | SSS |  Misty Morning ALT |  Cloudy Sky ALT |  Nimbus ALT |
 Dark Night ALT |  Ink Blending Tool ALT | SSS |  Micro Blending Brush Set ALT | SSS |  Mini Blending Brush Set ALT | SSS |
 Iridescent Crystals ALT | SSS |  Tweezers ALT | SSS |  Fine Blade Scissors ALT | SSS |  Bone Folder Altenew ALT | SSS |
 Sticky Grid Mat Ultra ALT | SSS |  Score Board ALT | SSS |  Paper Trimmer SSS |  Bigshot SSS |
 Color Wheel SSS |  Media Grip Mat SSS |  Gemini Junior SSS |  Gemini Double Cutting Plates SSS |
 Turntable AMZ |  Satin Masking Tape ALT | SSS |  Bearly Art Glue SSS |  Glue Tape ALT | SSS |
 Foam Tape ALT | SSS |
Absolutely stunning!
Thank you Lisa x