
Would you like to create a unique shaped card front? I have a huge bouquet that I made into the card front and I am going to show you how you can do make something similar!
Let’s bring the card Inside to the Outside, building on these 2 easy ideas which I shared in this video right HERE, with more tips and details HERE. Today I am stretching this technique and I will share how you can add a ‘whole bouquet’ to create a shaped card front.
I use affiliate links, this means that if you click on a product that is linked to an affiliate shop then I will receive a small portion of the sale at no extra cost to you). This is a great way to support me and the stores that I love 🥰!
Would you like to see today’s card?
You can see the video below or watch it HD at YouTube.
#SHAPEDCARDFRONT
One of the best techniques to create a shaped card front, so that we can bring the ‘inside to the outside’, is partial die cutting. This can be a little difficult when trying to use larger images or bouquets, so today, I thought I would share some tips to help. **But don’t worry if you aren’t a fan of partial die cutting, read further for 2 other options.
#MYTIPS
- Use a heavy weight cardstock (such as Neenah 110lb) if you are working directly on the card base.
- I used a prescored sidefold A2 card base 11″ X 5 1/2″ (scored at 4 1/4″).
- You can always stamp before scoring, as this will give you a better stamped impression.
- Also, if you prefer not to have the image visible on the back of the card you can mask this section before stamping.
- Choose an image or bouquet that will cover the majority of the card front
- Stamp the image using a positioning tool (typically large images are difficult to obtain good impressions when using a block)
- Note: Choose a die that will fit in your die cutting machine. A common size is a 6″ wide plate: so prior to stamping I made sure that it would fit in the machine.
- Using a co-ordinating die will give the image a neater edge, but it is possible to fussy cut the image on the card front to achieve similar results.
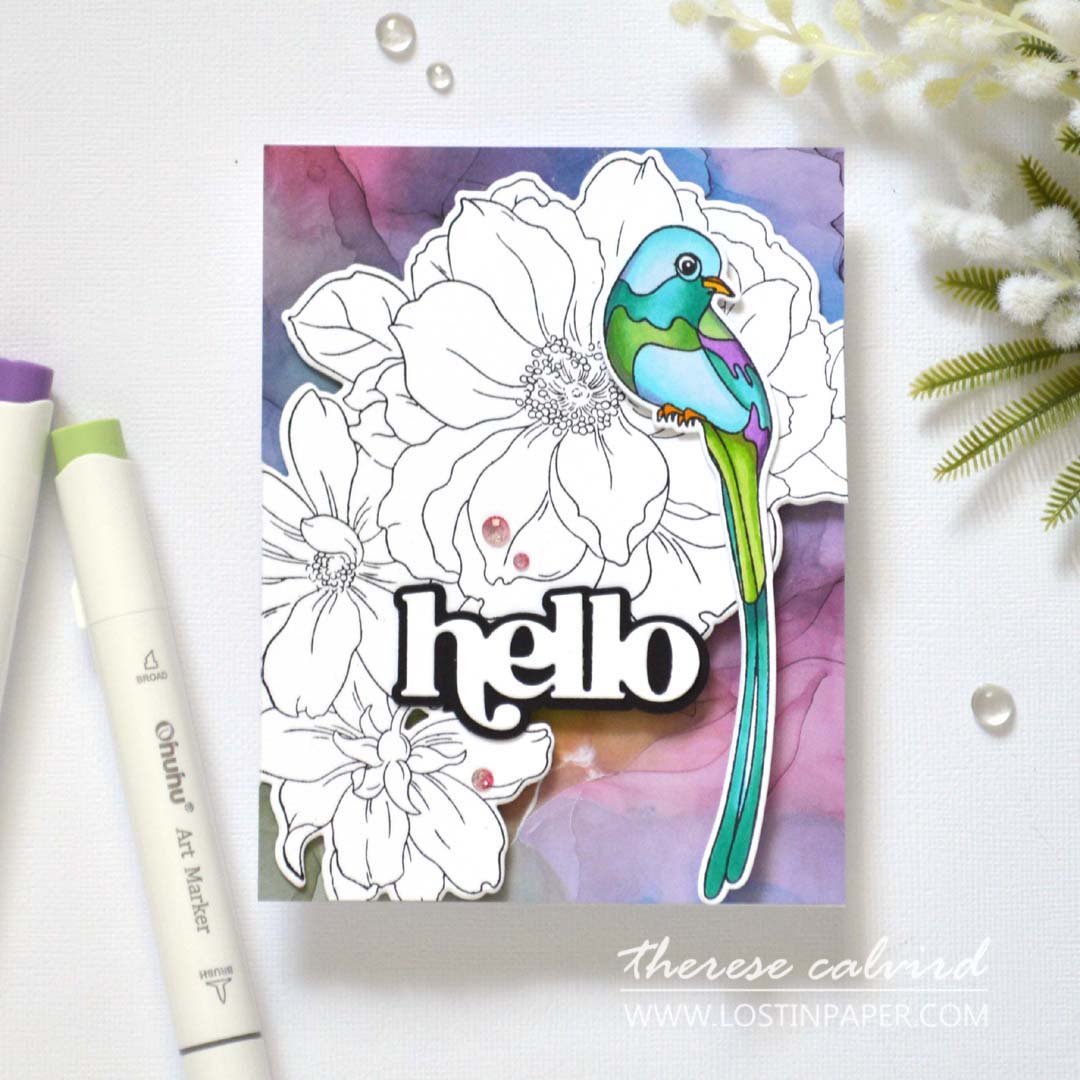
- Ensure that there is enough of the image at the base of the card so that it will ‘stand up’. This is not always possible, so consider other options such as I did, where I used the bird’s tail as a support. You could also add an extra flower or even a portion of a sentiment with the same result.
- Decorate the inside of the card how you like. Plain cardstock, design paper or even a stamped image can be added.
- Your personalised message can still be written inside, but you could always add a false panel/back or write directly on the back of the card.
BONUS IDEA
Another option is to create a false front for your card. Simply stamp and die cut the image on a separate piece of paper. Then cut away a portion of the right hand side of a sidefold A2 card. Next adhere the image to the remaining portion of the front of the card so that it overhangs. Any excess portions that overhang the card base, can be cut away with a pair of scissors.

I have been playing with the Ohuhu alcohol markers and enjoying these gorgeous bright colours.

These blooms would look lovely coloured brightly, but for some reason the ‘line-art’ look was calling myname today. I did use the new Stampwheel 2.0 from Altenew, which is going to be available soon. It is quite a bit larger, but being able to fit a whole A2 card base on the sticky grid mat was a game changer for this design.
Do you enjoy shaping your cards for a new fun look? Let me know in the comments below if you are going to try this technique or if you have any questions, don’t hesitate to reach out.
Sending crafty hugs your way,

I’ve added the links below (some of them are affiliate links which means that I will get a small commission at no extra cost to you). I truly appreciate your support of me and the stores that I adore 🥰!
Other Supplies:
Ohuhu Alcohol Markers Used: BG2,4,68 | P3,4 | BR1 | GY3,4,7,43 | PB10 | R11 | YR4 | 0.
Shop OHUHU
Australia (affiliate – Save 10% with Code: lostinpaper10): CLICK HERE
USA (affiliate – Save 10% with Code: lostinpaper10) CLICK HERE
Amazon AU (affiliate): CLICK HERE
 BAG Blooming Delight ALT | SSS |  Avian Allure SSS | OTH |  Avian Allure Die SSS | OTH |  Timeless Sentiments Die Set ALT | SSS |
 Neenah Solar 110 AMZ | SSS | Neenah Solar 80 AMZ | SSS |  Ink Drops Vivid SSS | Ohuhu Honolulu USA OTH |
Ohuhu Honolulu AU OTH |  Tuxedo Black SSS |  Glitter Drops Pixie Dust SSS |  Scissors SSS |
 Bone Folder Altenew ALT |  Score Board ALT | SSS |  Stampwheel 2.0 PRE-ORDER ALT | 9″ Fiskars Paper Trimmer AMZ | SSS |
 Bigshot SSS | Bearly Art Glue AMZ | SSS |  Glue Tape ALT | SSS |  Foam Tape ALT | SSS |
 Satin Masking Tape ALT | SSS |
You chose the prettiest colors for your bird, Therese! and didn’t his tail come in handy for a ‘kickstand?’ lol
=]
I know right lol.
So pretty! Love the fun twist on the shaped card front!
Thankyou so very much!
I agree with Michele, my eyes went right to that pretty little bird! Wonderful card, Therese!
Isn’t it a beauty, actually the whole set is lovely, it was nice to colour the flowers too (but they will have to go on another card)!
Incredibly stunning, such detail and the finish effect is amazing. That bird looks so real ! Brilliant xx
Thanks Angellica!